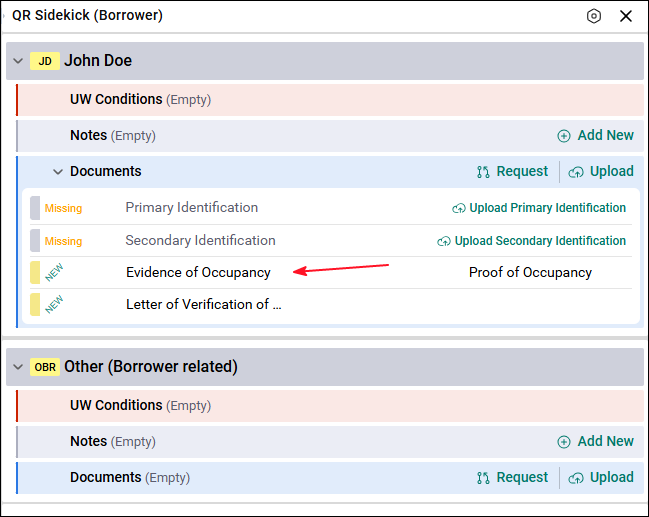
SideKick keeps all loan documents organized in the correct location. This helps Underwriters create conditions, review documents faster, and speed up the approval process. SideKick allows users to upload documents, request documents from external parties, and index documents once they are received.
Uploading Documents
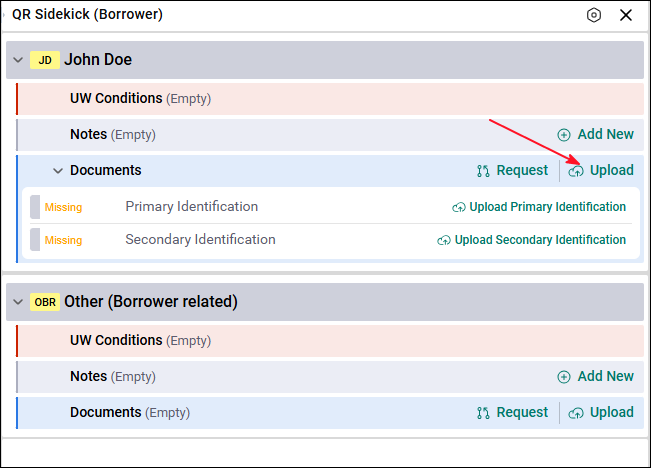
The Upload option in SideKick allows users to upload documents directly to the correct location. This ensures documents are placed where they belong from the start.
How Upload Works
When the user selects Upload in SideKick:
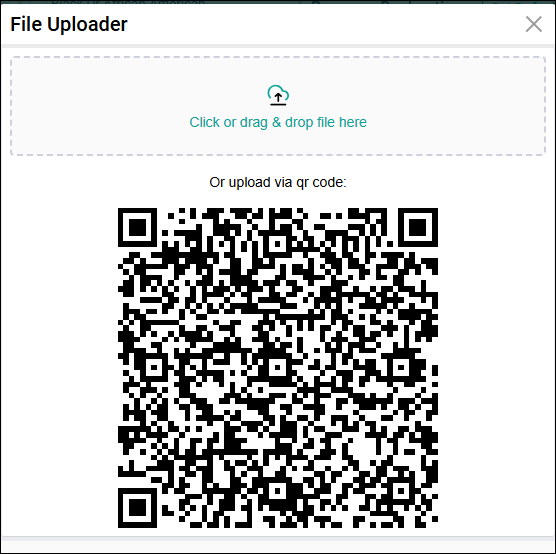
- They choose the file from their device.
- The document is uploaded directly to the location they are currently viewing.
- Example: A Social Security Verification Letter can be uploaded directly under the borrower who needs that verification.
After Uploading
When the upload is complete:
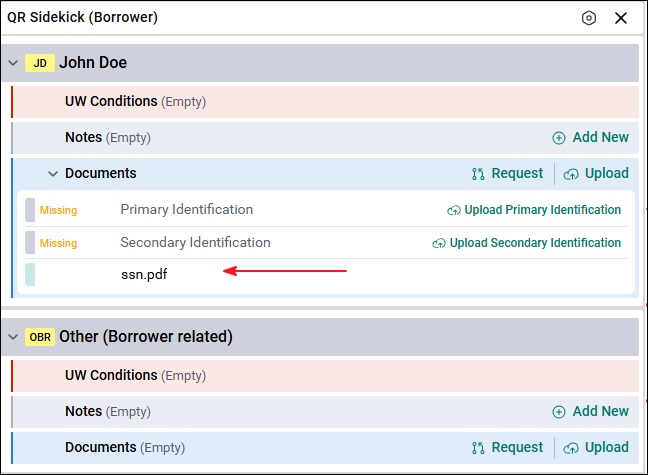
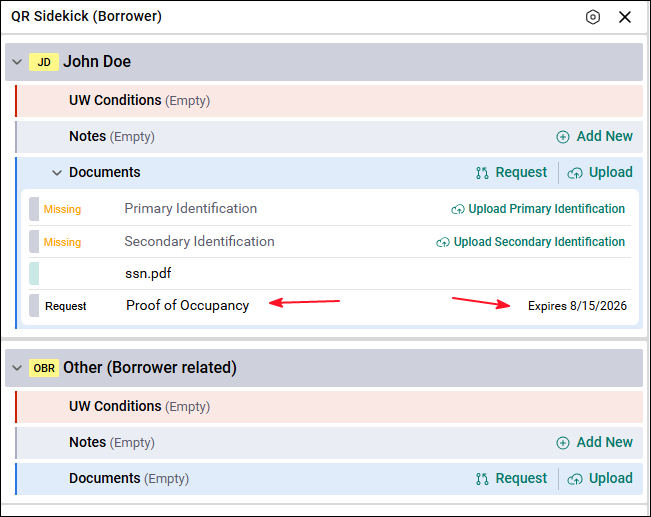
- The document appears under the Documents section in SideKick
- The document name will match the name of the uploaded file
- At this point, the document is only uploaded, not indexed
- A user with the correct rights will need to complete the indexing process
Requesting Documents
Users can request documents from borrowers, third parties, and other users. When a document request is created, the system generates a secure upload link that can be sent to the person who needs to upload the document.
User Rights Required
To create a document request, the user must have right 5021.
How to Create a Document Request
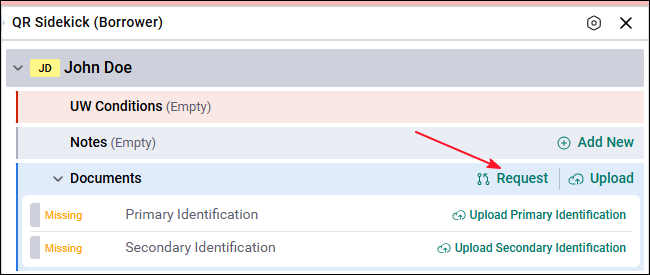
- Click Request in SideKick.
- Enter a description with at least 10 characters.
- Example: Proof of Occupancy
- Click Next.
Note: If the user requesting the document has indexing rights, they will see an option to switch from the simple view to the detailed view and can select the document type for the document they are requesting.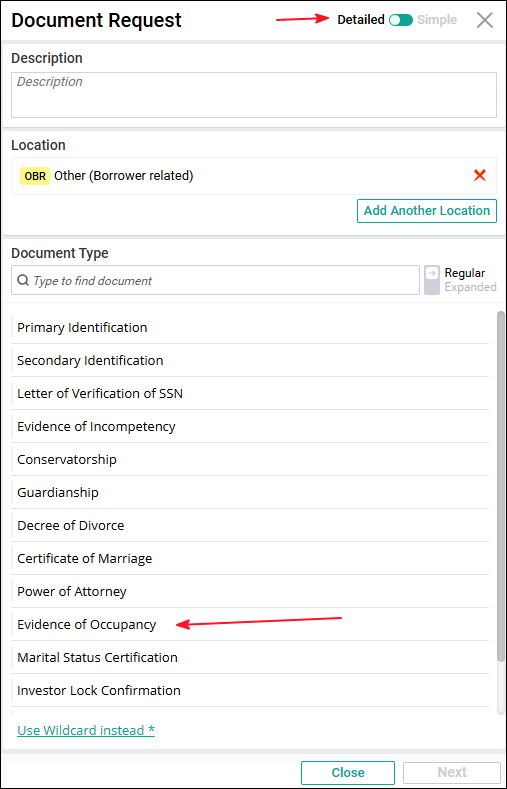
In this example, the user requesting the document does not have indexing rights, so we are performing only a simple document request.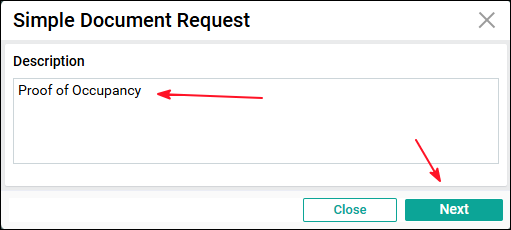
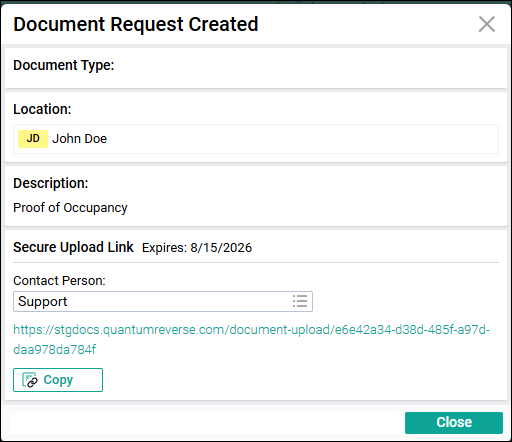
Secure Link Expiration
A pop‑up window will show:
- The expiration date of the secure link
- The expiration period depends on your company’s configuration
- Example: The link may expire in 5 days
What the Borrower Sees
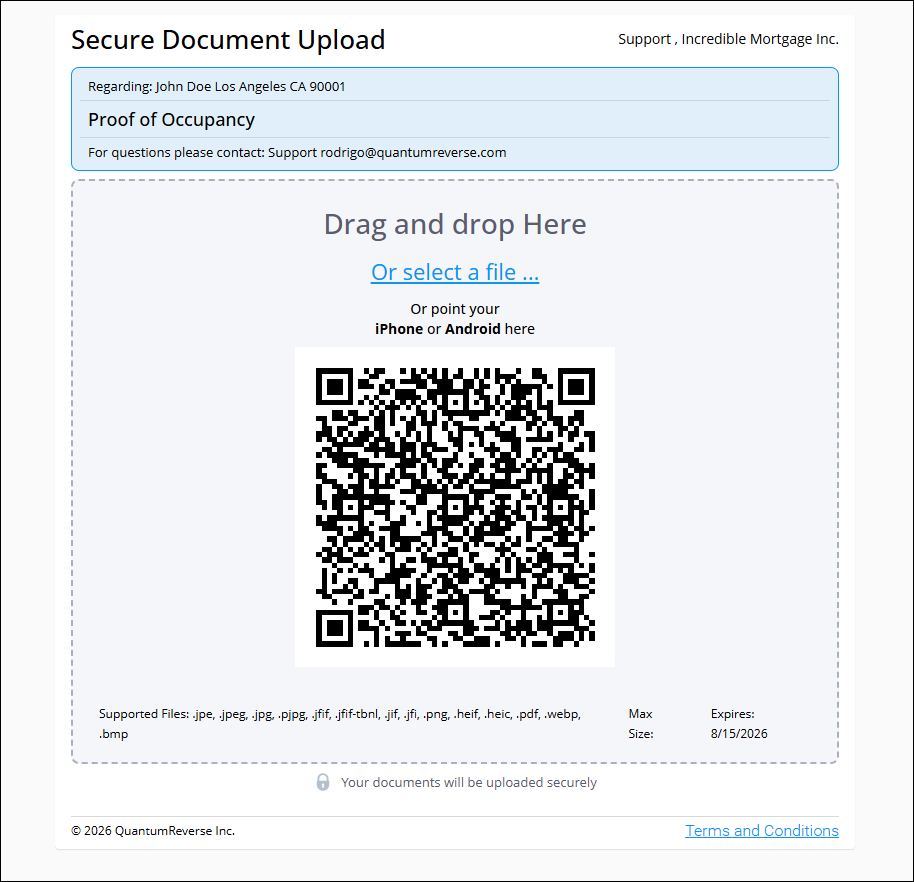
When the borrower or third party opens the secure link, they will see:
- A screen where they can drag and drop the document or select a file
- A preview of the document with options to:
- Add more pages
- Rotate the document
- A Complete button to finish the upload
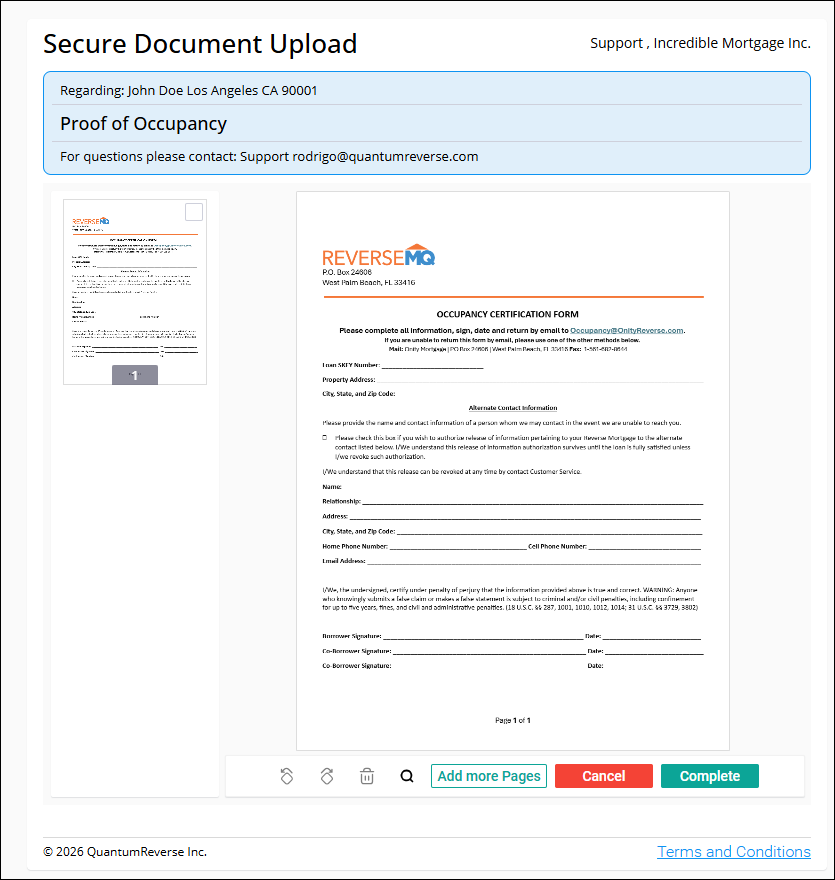
Once completed, the document appears in SideKick under Documents, ready for indexing.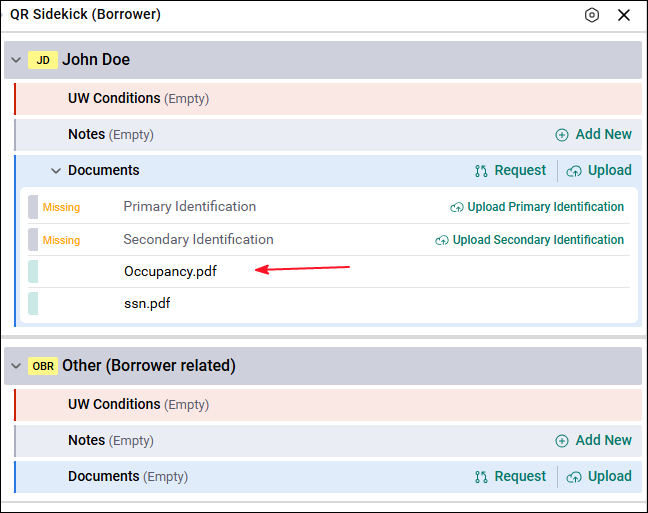
Indexing Documents
Indexing is one of the most important steps in Document Management because it determines how documents are organized, found, and used throughout the loan process.
In this step, the user verifies that the document was uploaded to the correct location, selects the correct document type, or, in cases like uploading a letter of explanation, confirms that it is linked to the correct document. For all documents, assigning the correct location is the most important part of the process.
User Rights Required
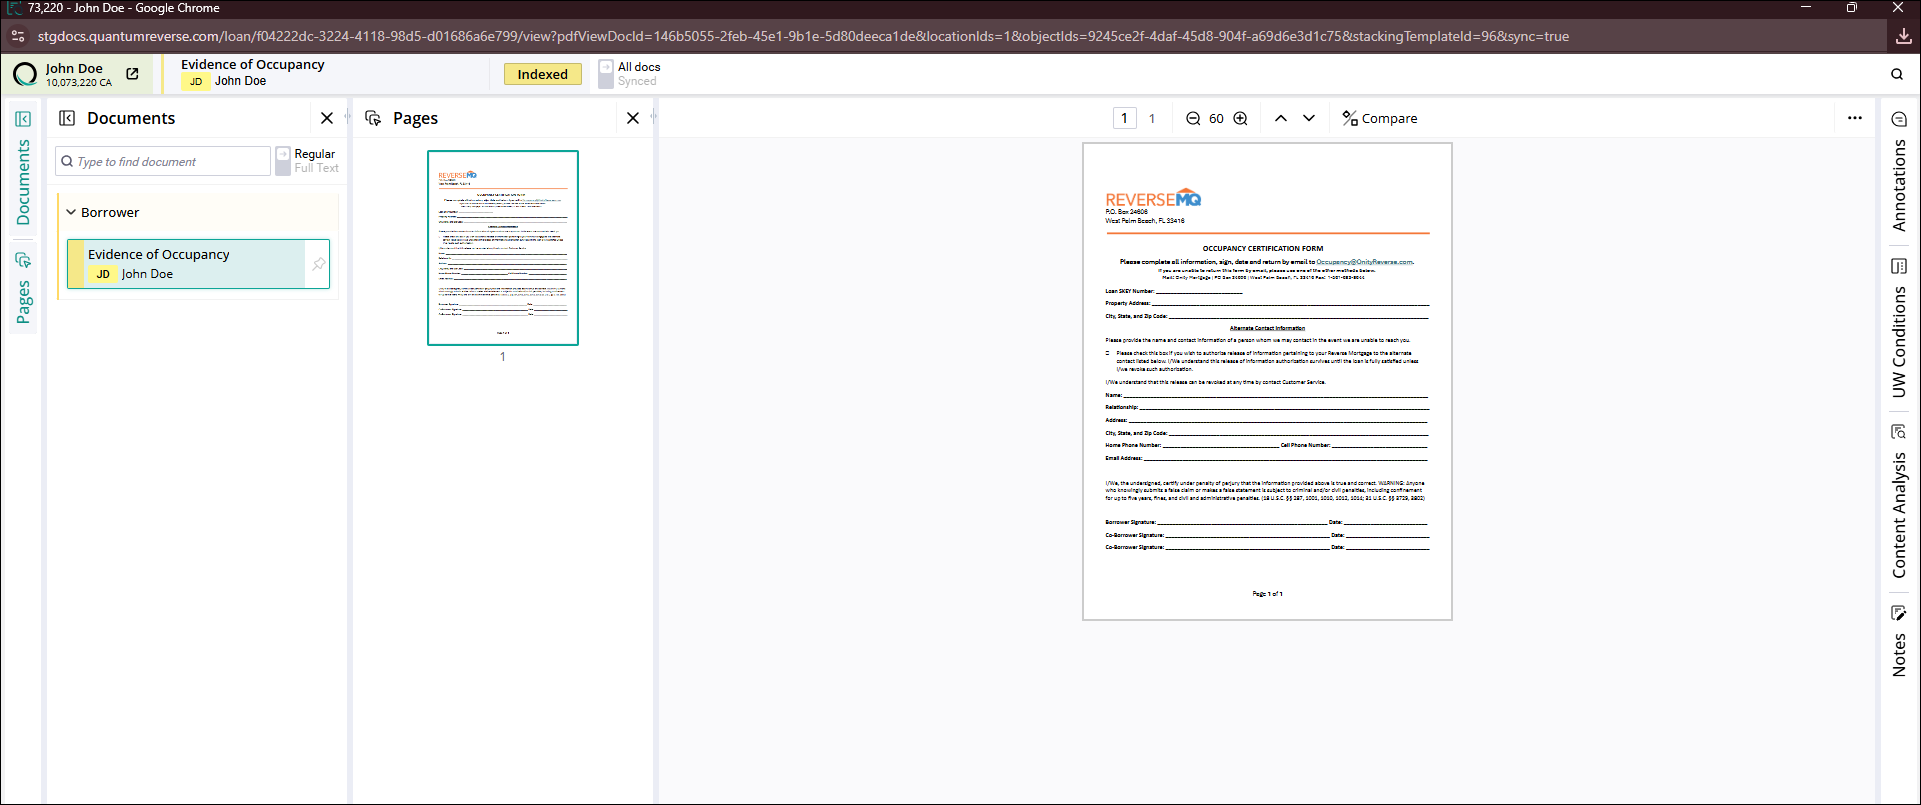
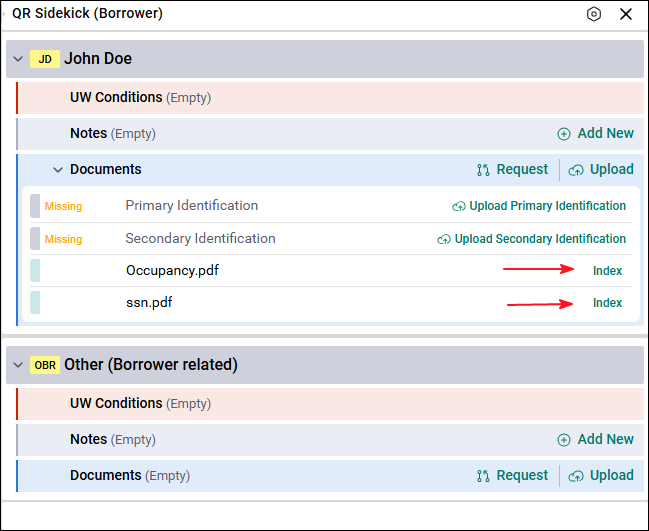
To index documents, the user must have right 5061. A user with this right will see the option to index the document on the right side of the Documents section. The user needs to click on it, and depending on how the viewer behavior is configured by your company, it will open in a pop‑up, a new tab, or a new window where the document can be indexed.
How Indexing Works
When indexing a document, the user will see several options:
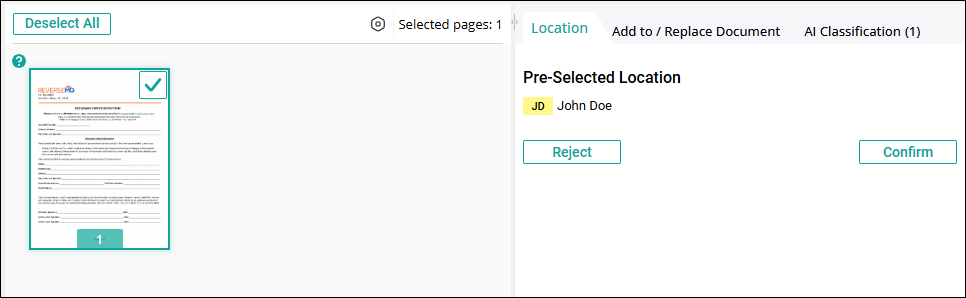
Location
This step confirms whether the document was uploaded to the correct location.
- Reject
- The document was uploaded to the wrong location
- The user will select the correct location
- Confirm
- The document was uploaded to the correct location
- The user will proceed to select the Document Type
Add to / Replace Document
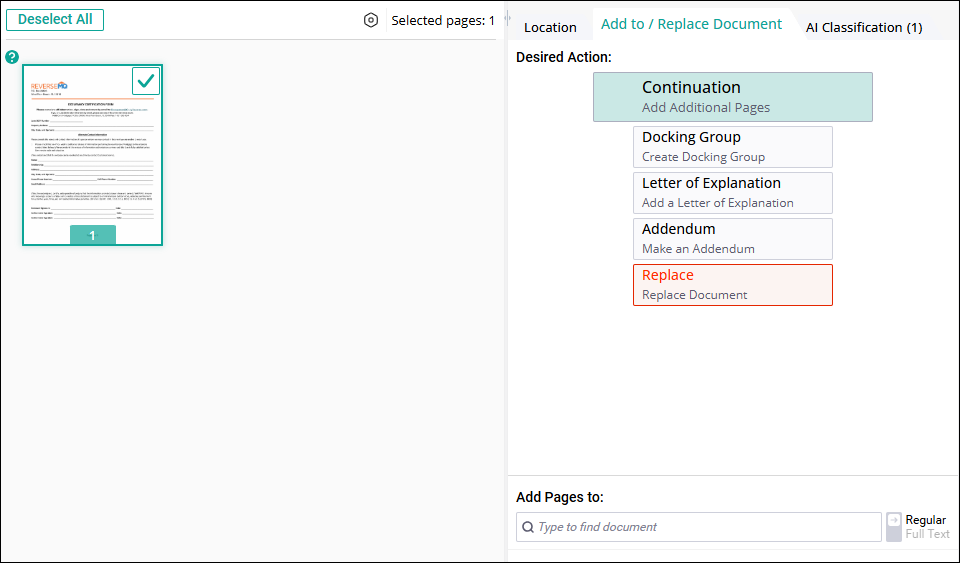
This section allows the user to:
- Add the document you are uploading to a document as additional pages
- Create a docking group, which links the document to another document
- Add the document as a letter of explanation
- Replace a document with the document you are uploading
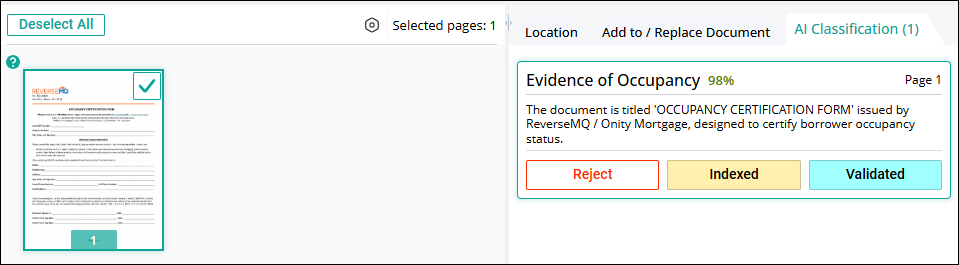
AI Classification
AI helps identify the document type.
Example: AI analyzes the document and determines it is 98% likely to be Evidence of Occupancy.
The user can then choose to:
- Index the document
- Reject
- Validate
After Indexing
Once the document has been indexed:
- The user can double‑click the document
It will open in Document Management
The user can continue working on it as needed