
Mastering the Document Viewer
Explore the advanced document management features, from side-by-side comparison and annotations to AI-powered content analysis and data extraction.
Opening and Browsing Documents
To begin working with documents, once they are indexed, you can double-click on any document in the list to open it in the integrated viewer.
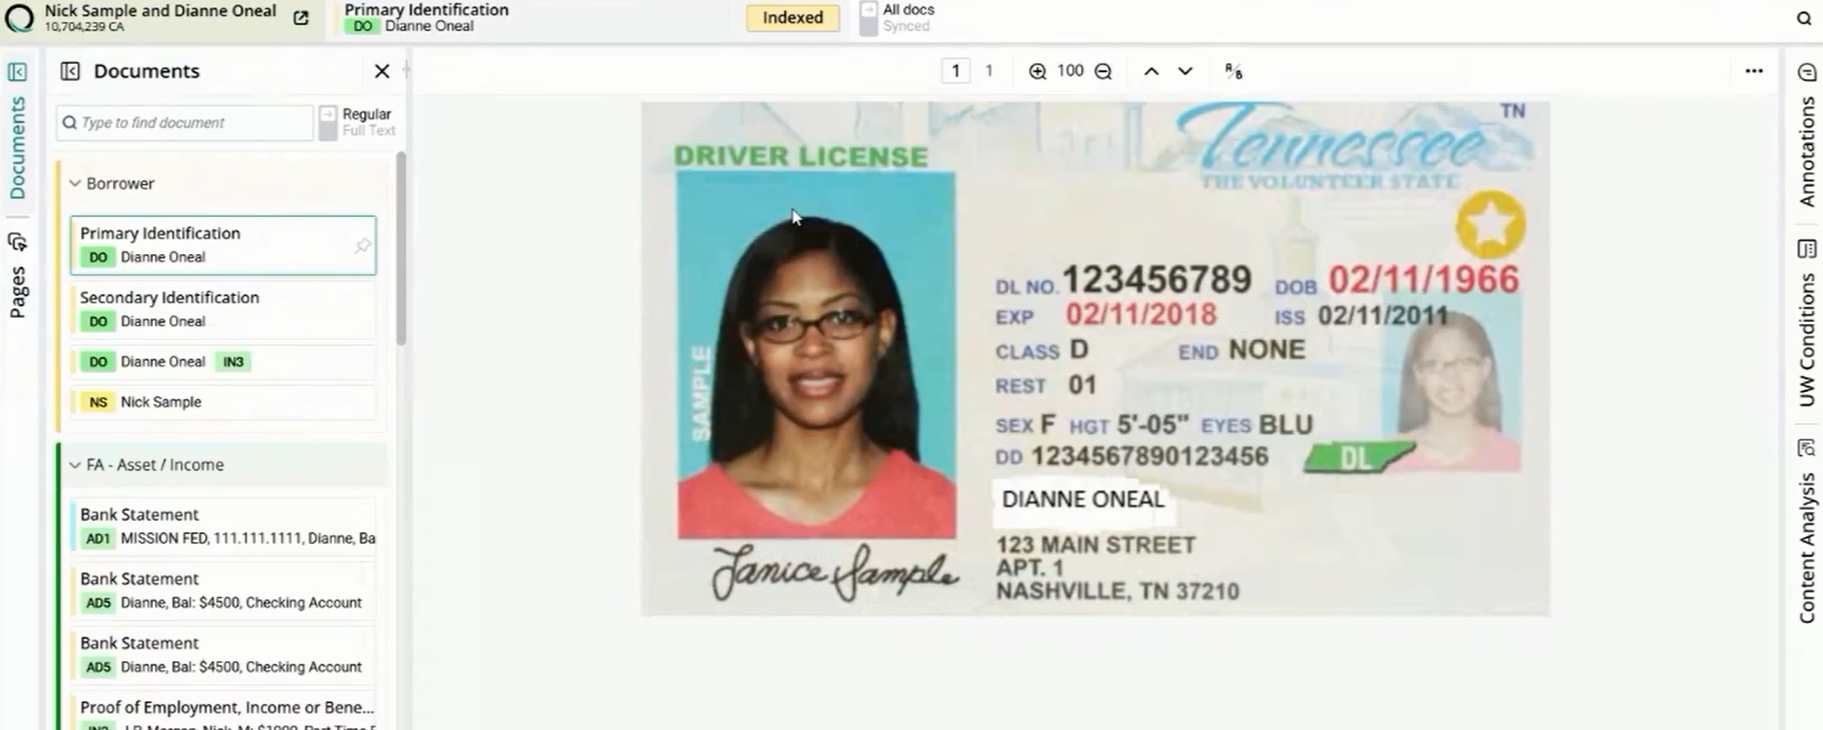
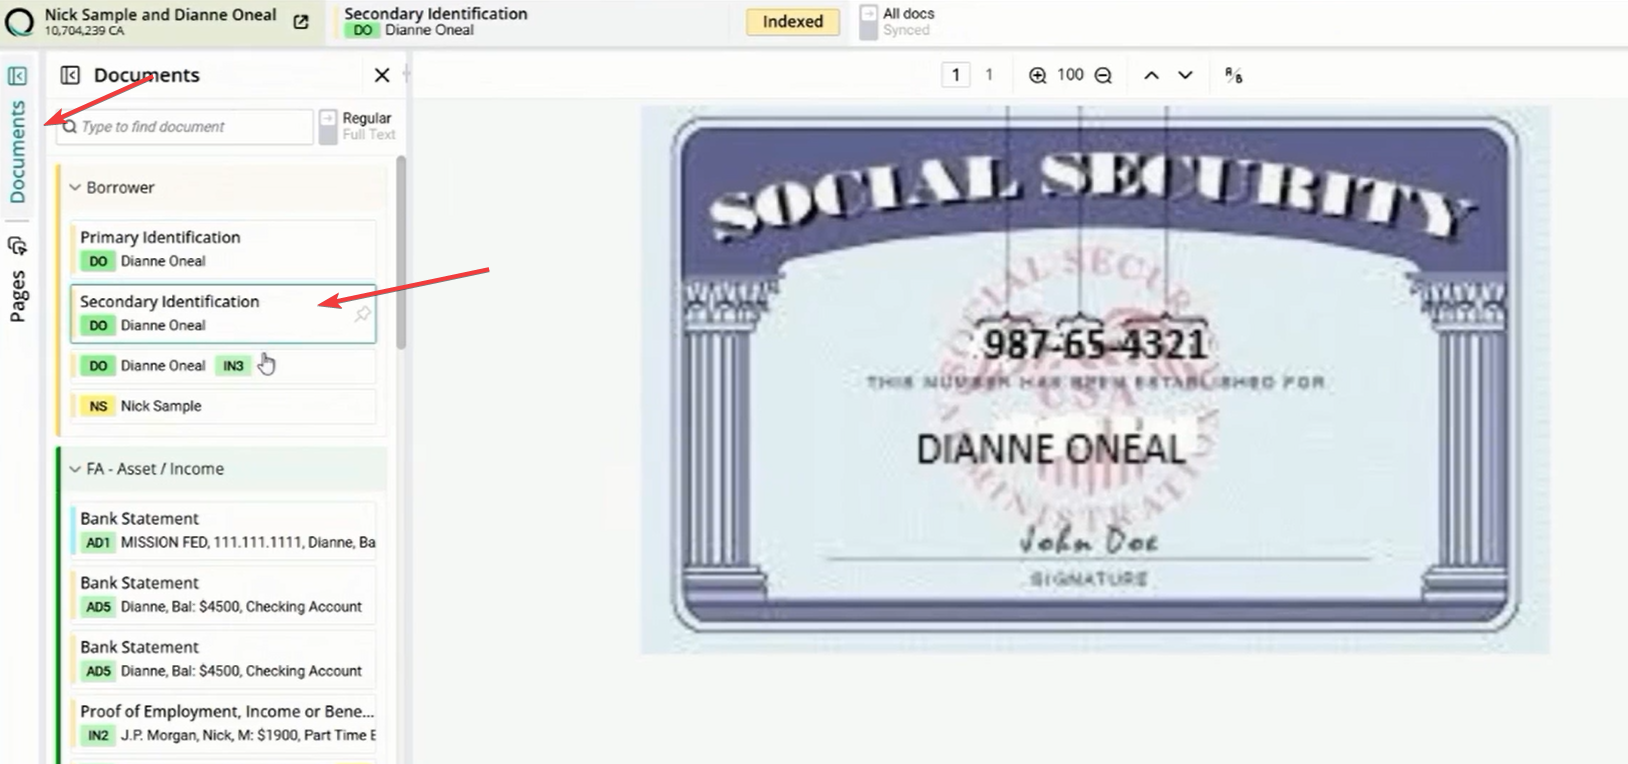
The left-hand panel displays all indexed documents added to the main view. You can click on documents one at a time and scroll through the list to review the files associated with the loan.
Double-click on any document in the list to open it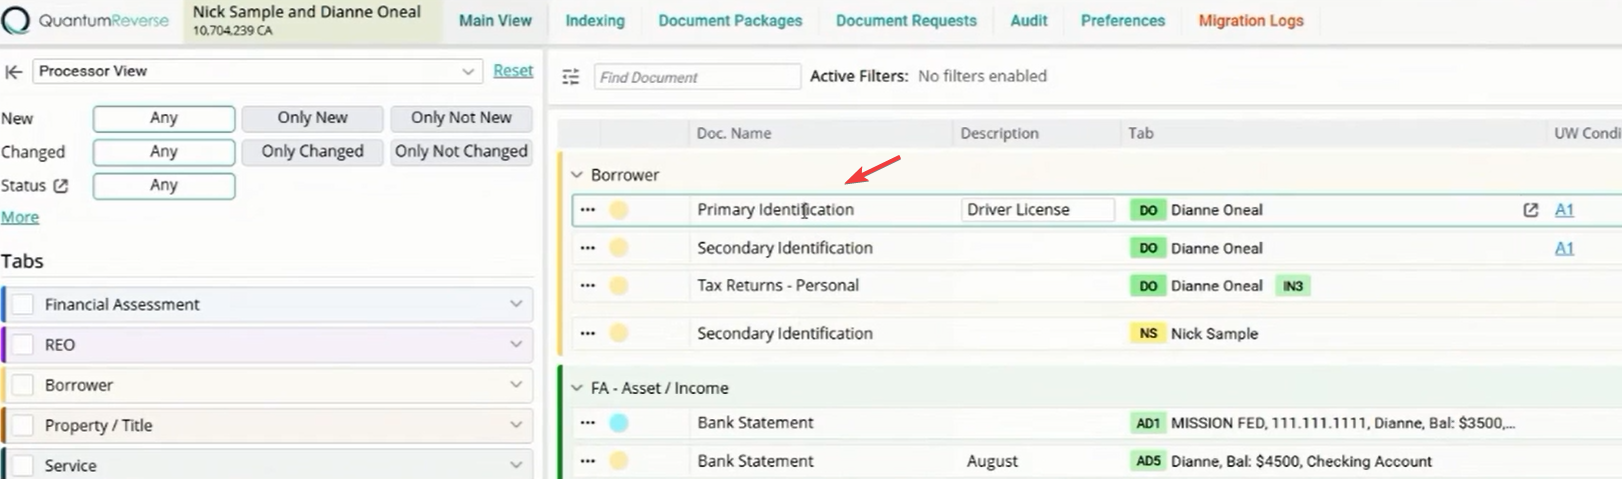
Page Thumbnails and Navigation
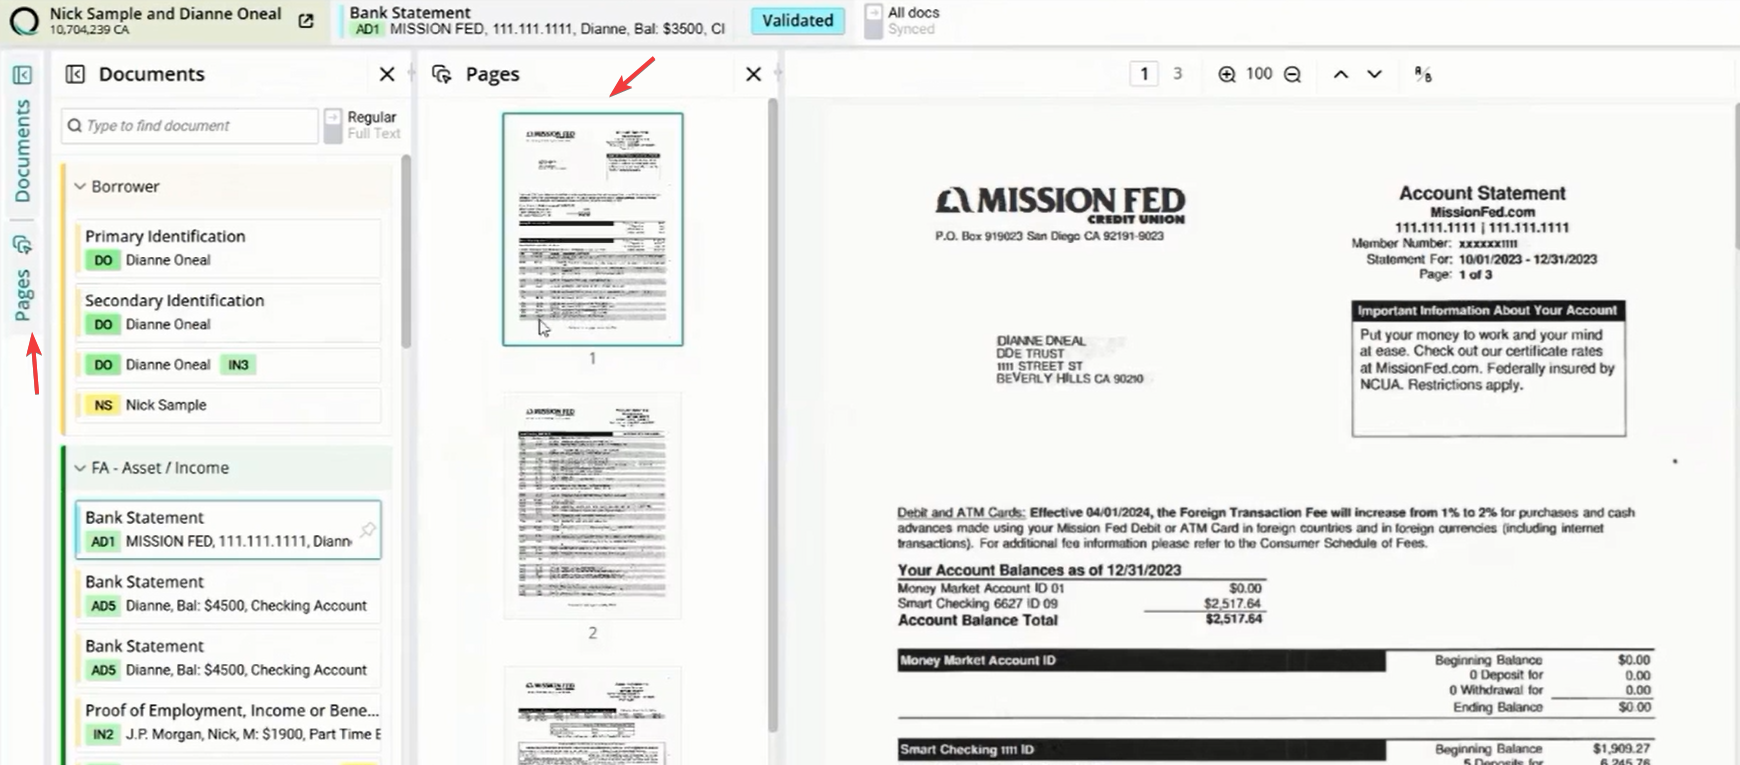
For documents with multiple pages, you can click the Pages button of the viewer. This opens a thumbnail sidebar showing every page tied to that specific document.
This allows for quick visual navigation through long files like bank statements or mortgage applications.
Keyword and Full Text Search
The viewer includes two powerful search modes to help you find information quickly:
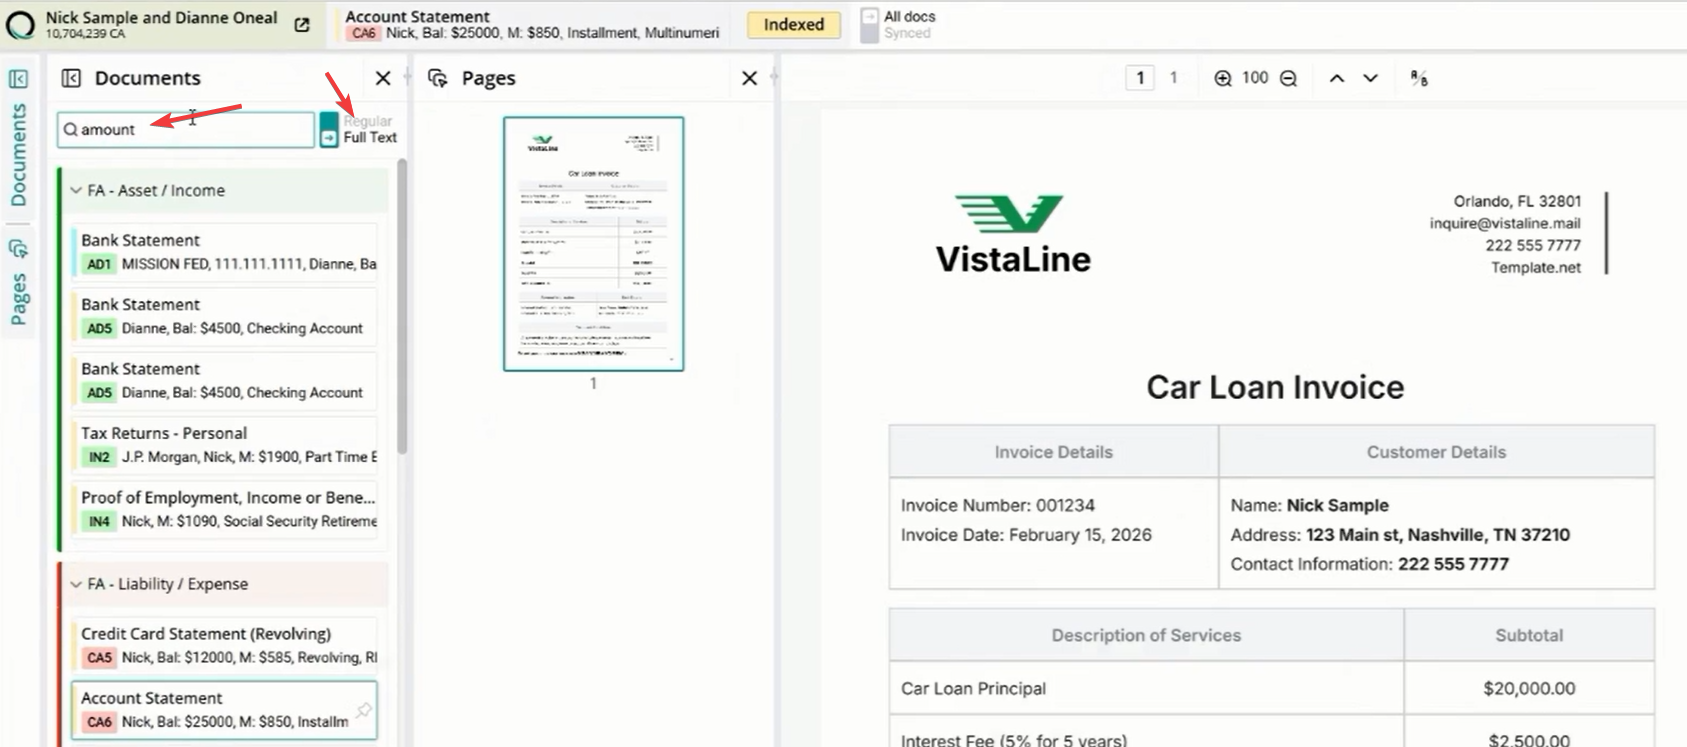
Regular Search: Search for specific document types like "Bank Statement" to filter the document list.Full Text Search: Toggle the Full Text option to search for keywords within the actual content of the documents. For example, searching for "bank" or "amount" will pull up every document where those terms appear in the text.
Regular Search 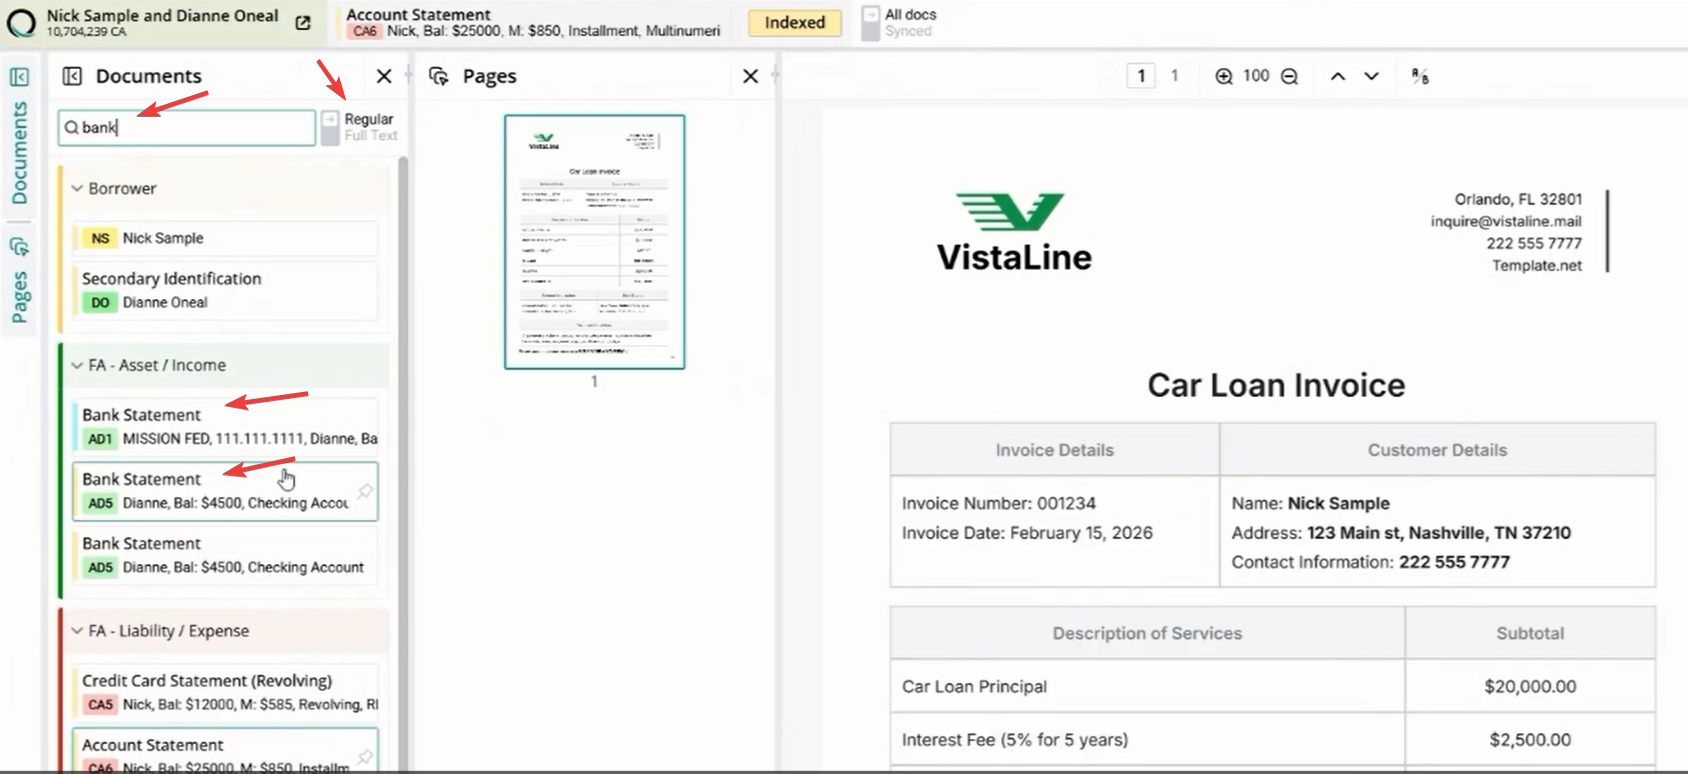
Full Text Search
Updating Document Status
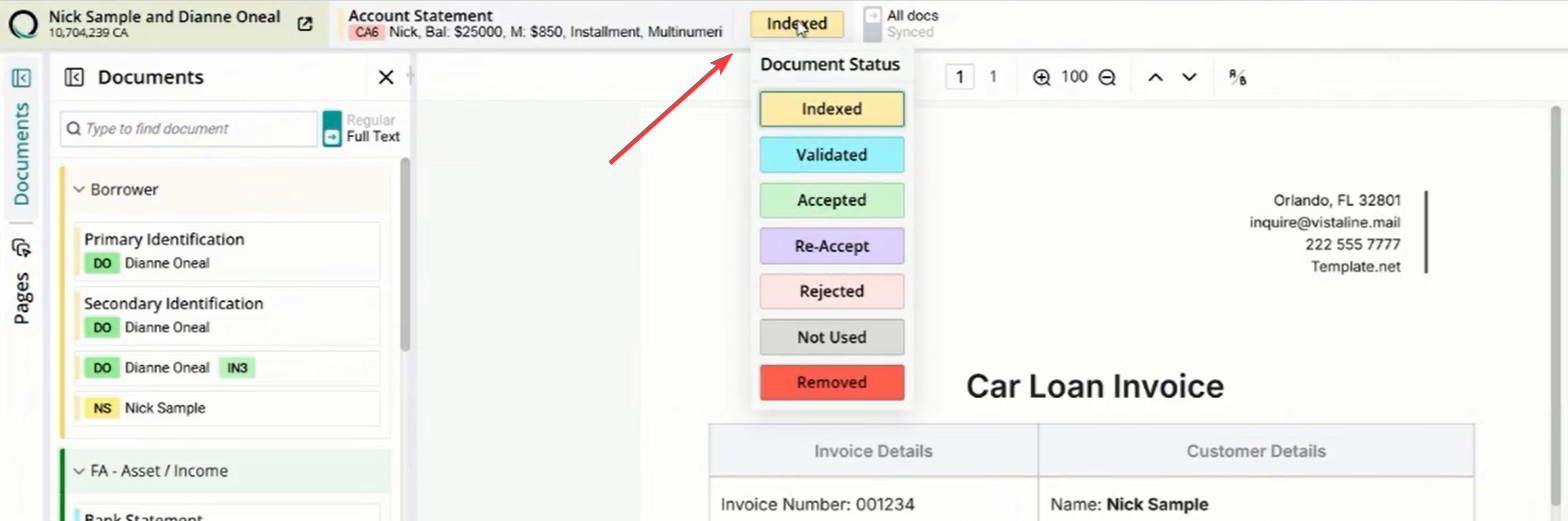
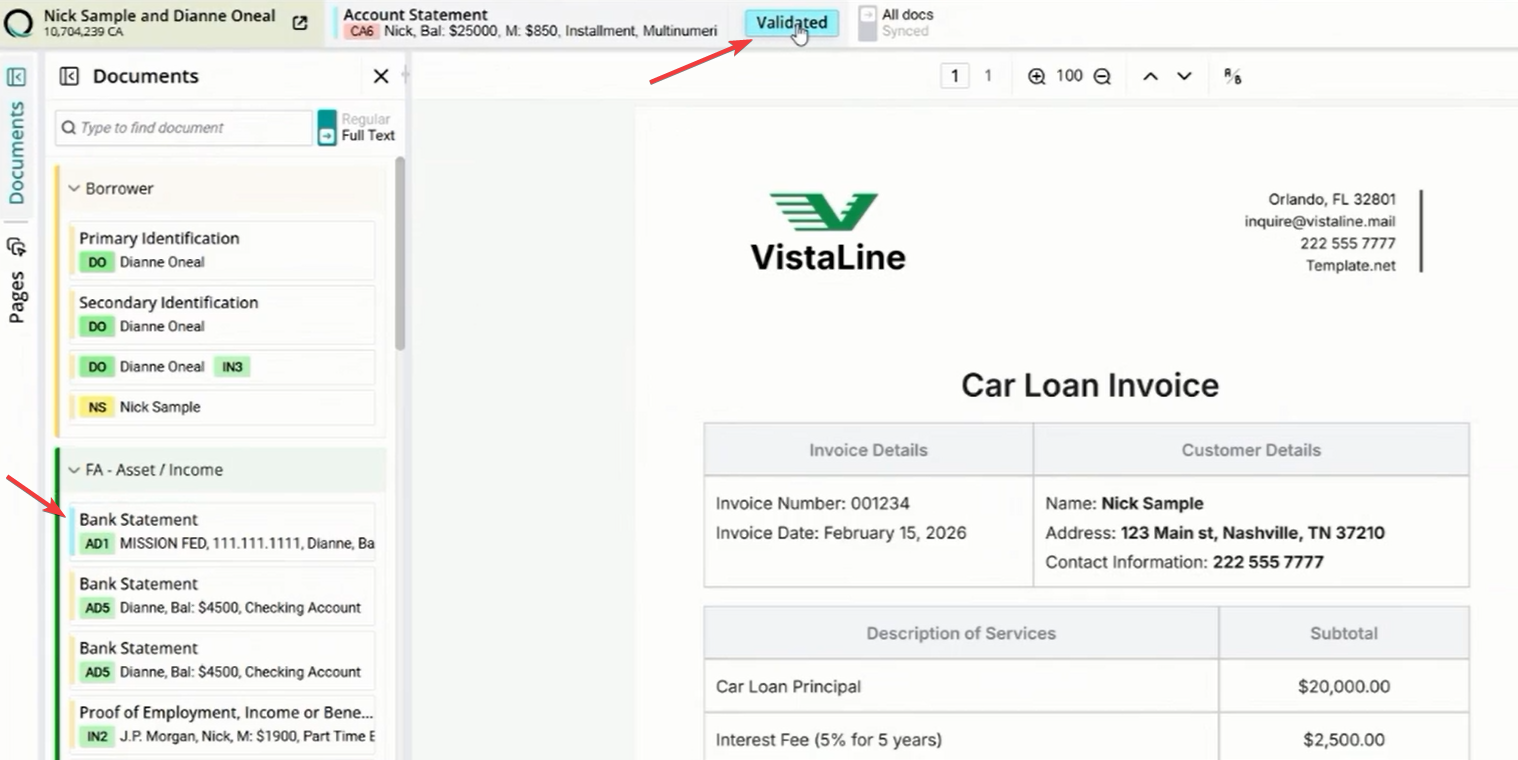
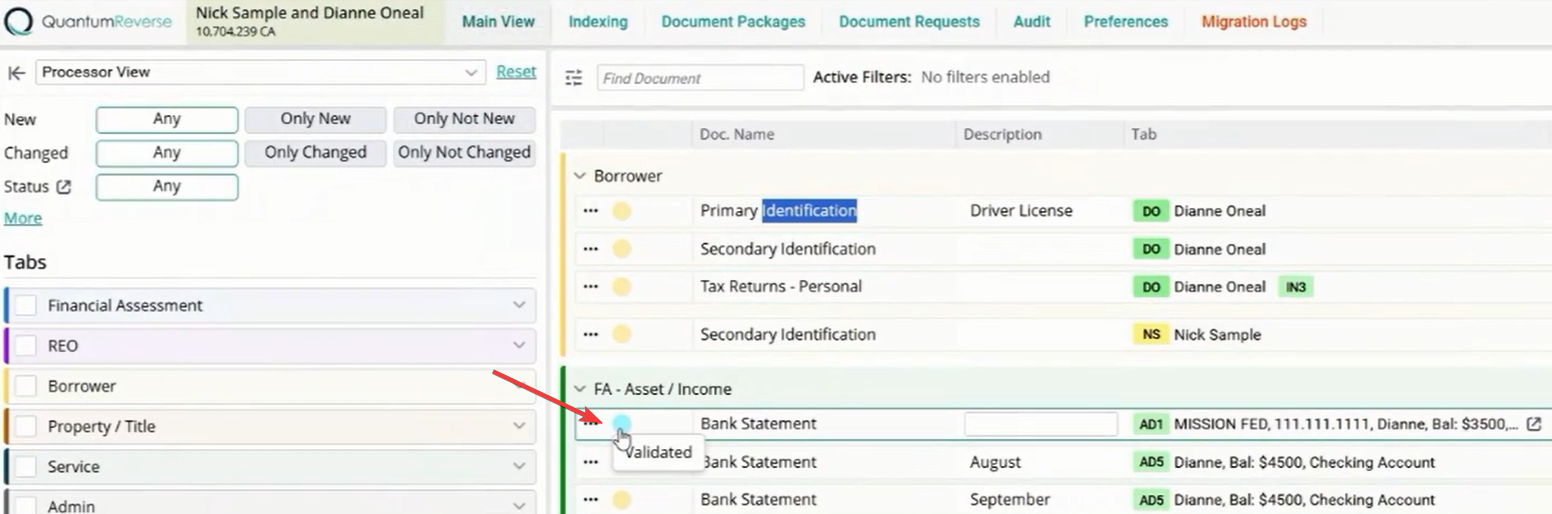
You can manage the lifecycle of a document by updating its status (e.g., from Indexed to Validated).
Role-Based Access: Status options are determined by your specific write access and rights within the organization.Visual Indicators: The system uses color-coding to show status in multiple areas, including the top of the viewer and the primary document management screen.
Side-by-Side Comparison (AB Mode)
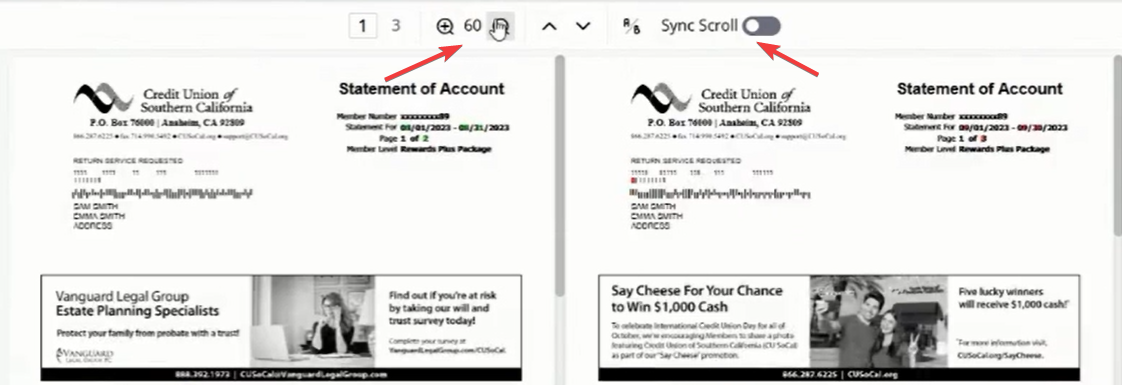
The AB button allows you to compare two documents side-by-side. This is ideal for reviewing different versions of the same document, such as an August bank statement versus a September bank statement.
Click on A/B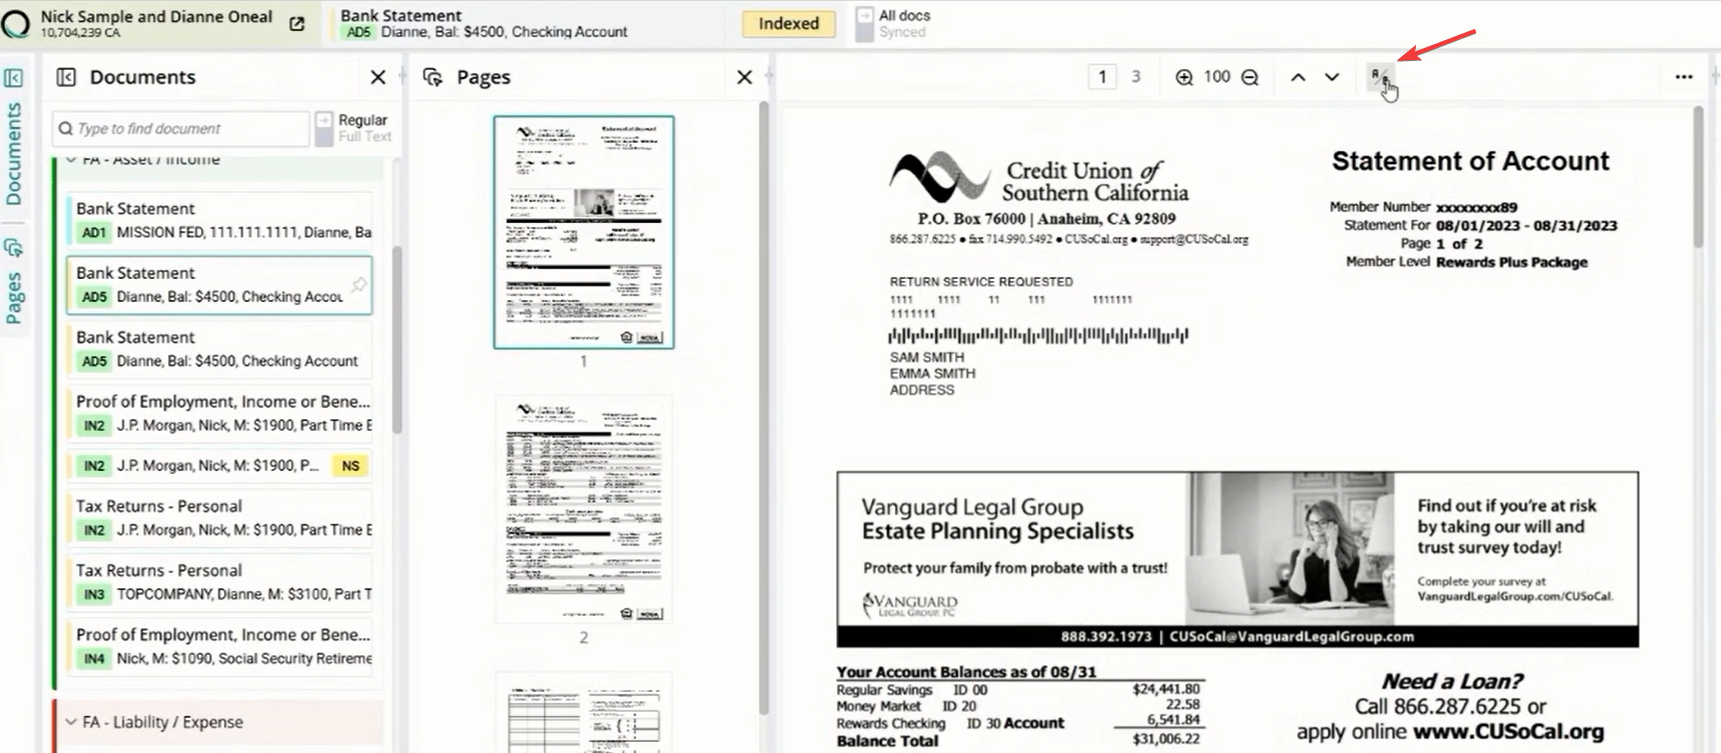
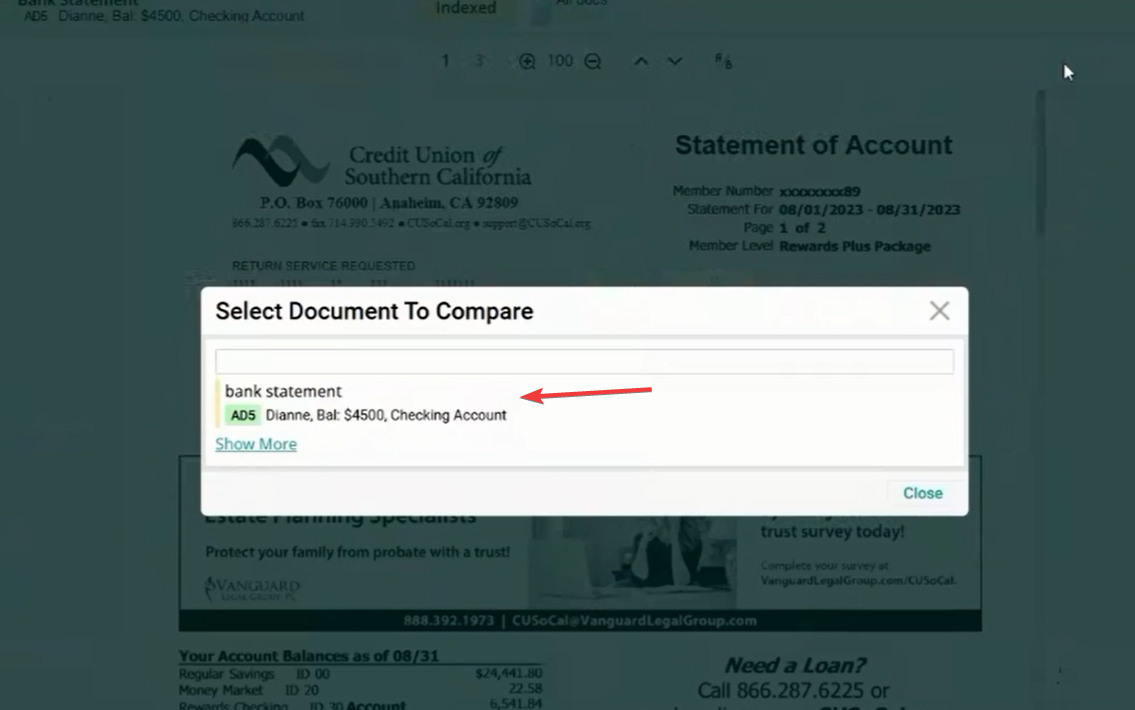
Select Document to Compare (August Bank Statement)
You can see how it highlights and identifies the differences between both documents.
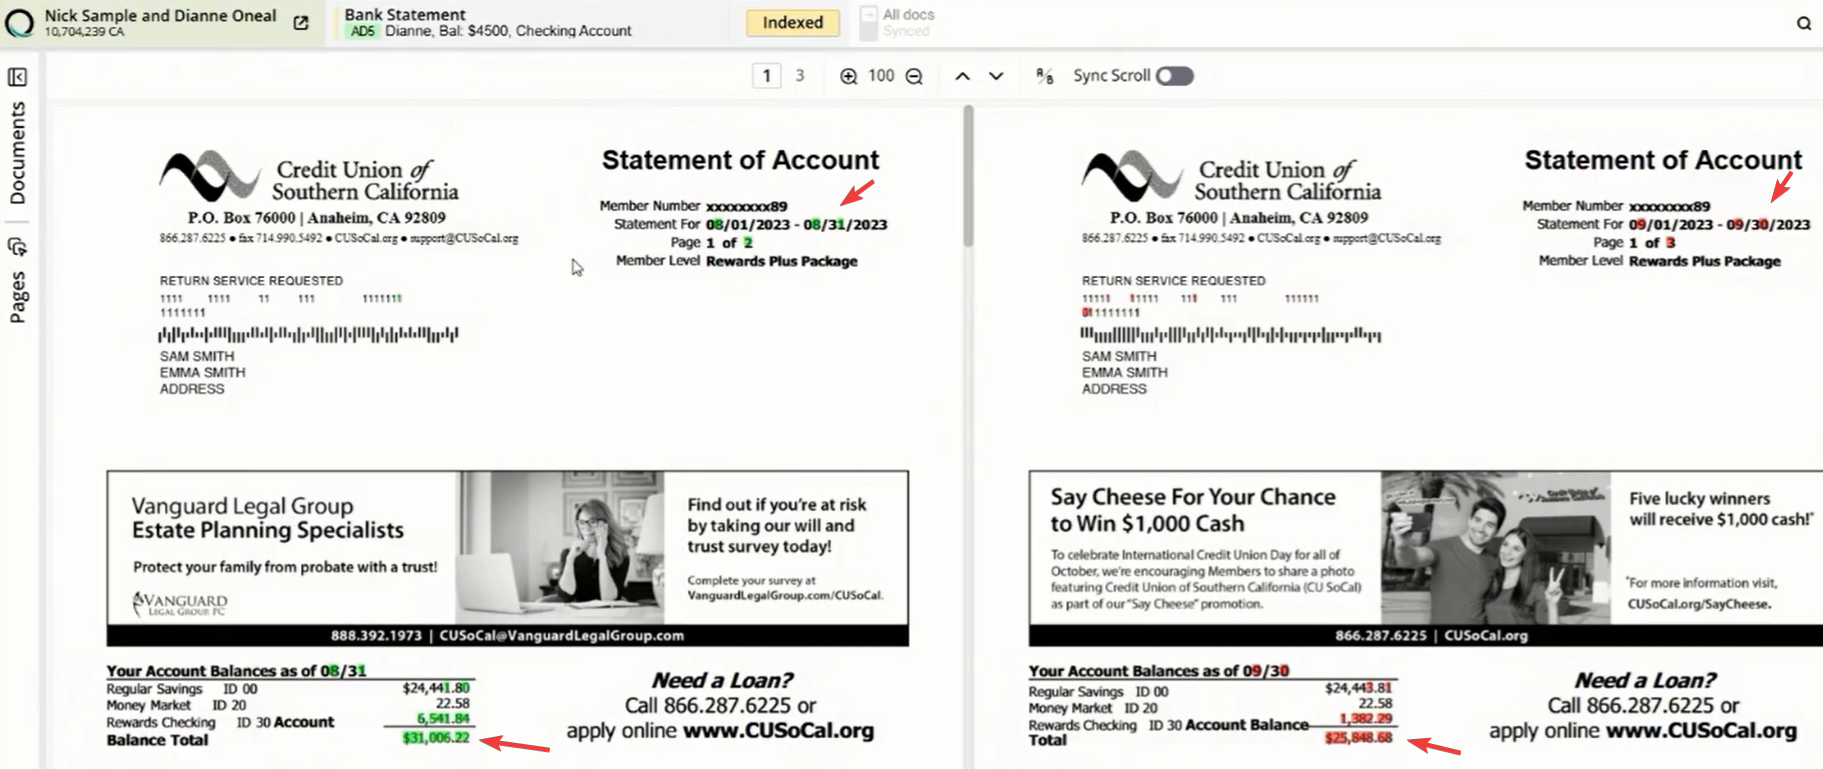
Sync Scroll: Toggle this feature to scroll through both documents simultaneously.
Zoom Tools: Use the zoom options to inspect fine details on both pages at once.
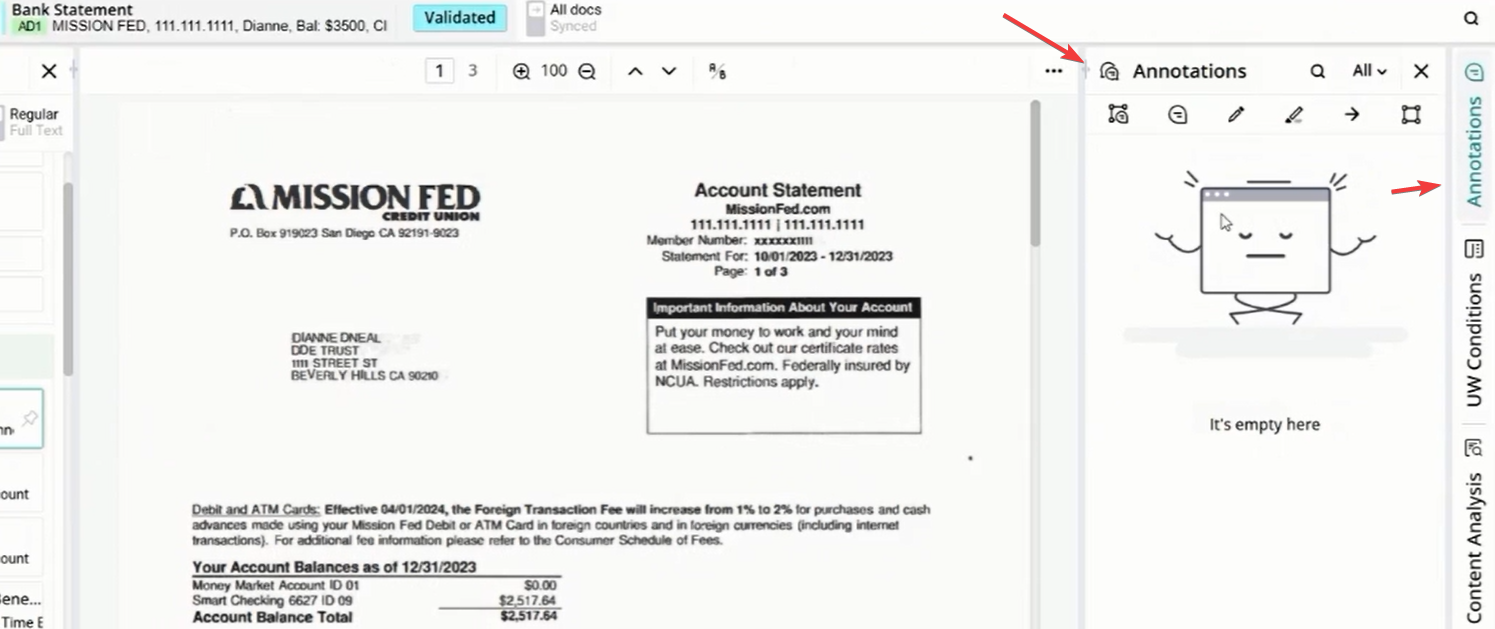
Document Annotations and Tools
The viewer provides a suite of professional annotation tools to mark up documents during the review process. These tools allow for clear communication and data highlighting within the file:
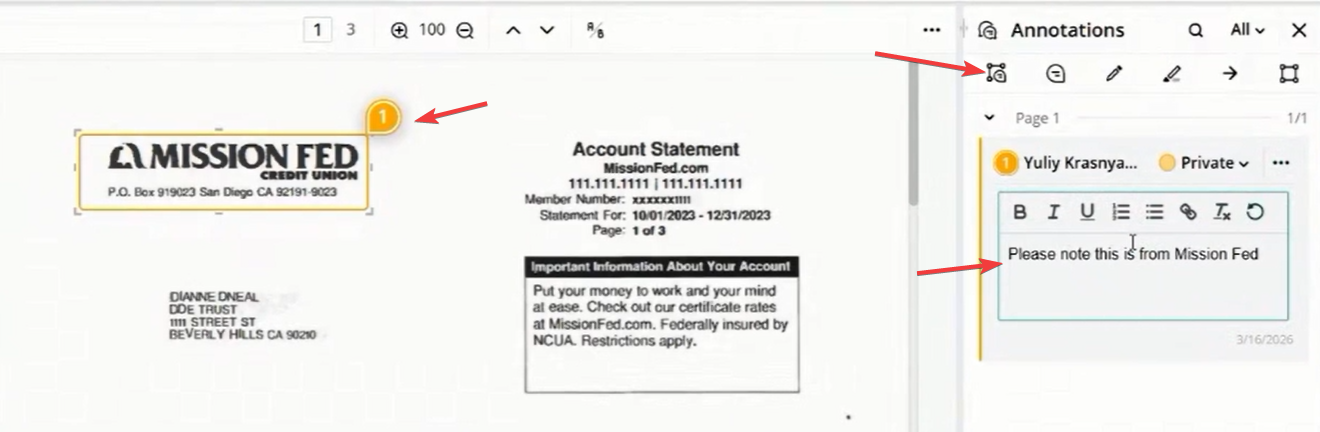
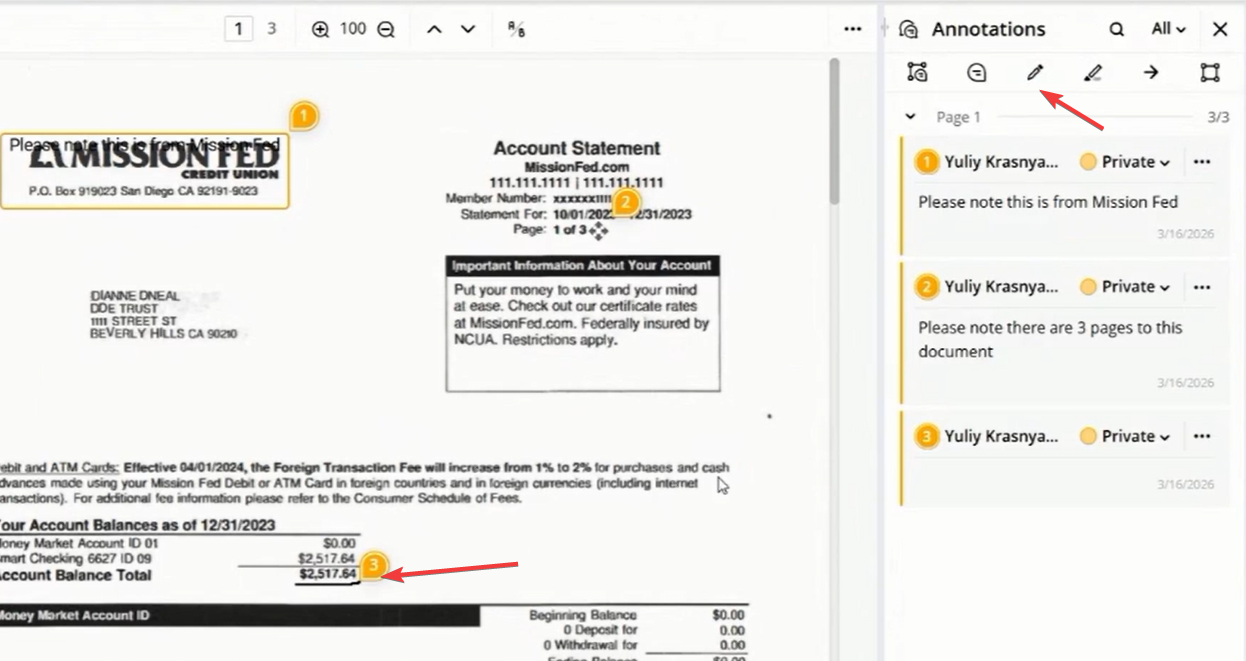
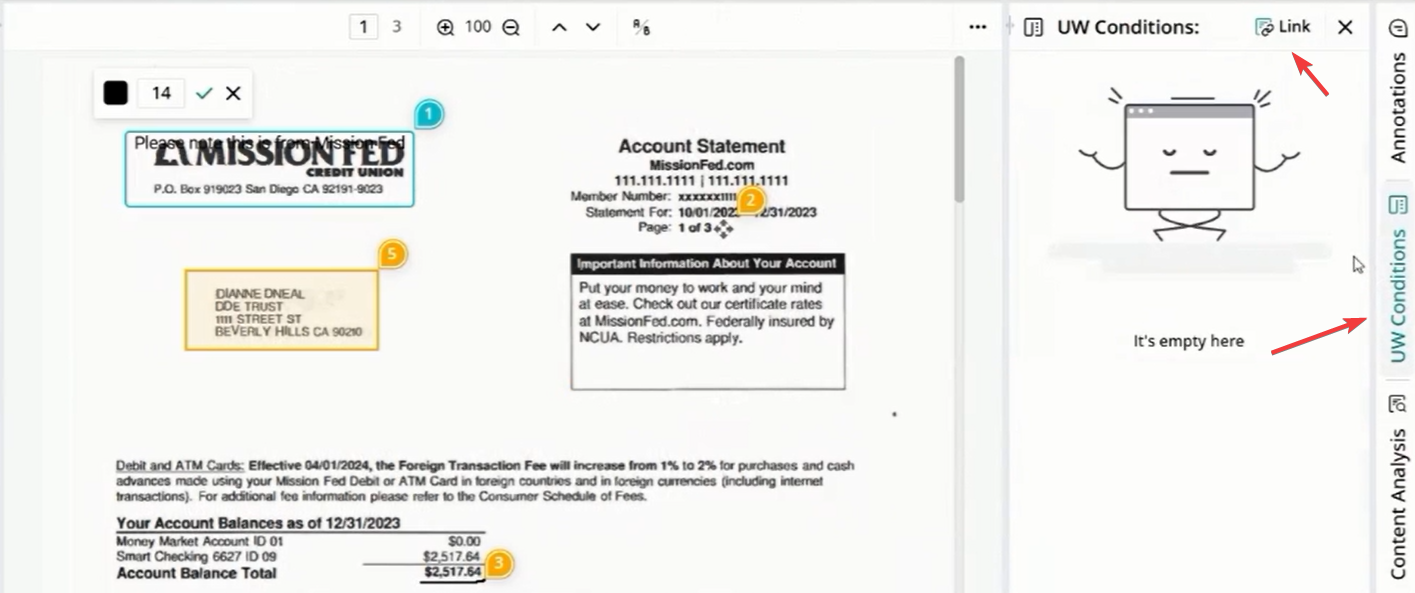
Commenting and Editing: By clicking the Edit icon on an existing annotation, you can add detailed comments. For example, you might add a note like "Please note this is from Mission Fed" to provide context for other reviewers.
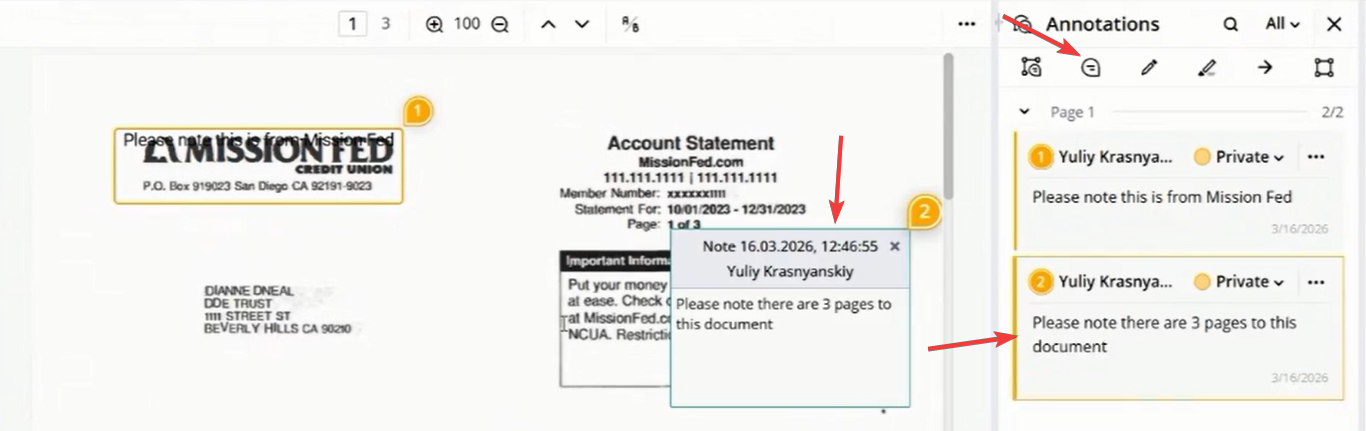
Text Notes: Double-click on any area of the document to place a text note. These notes are highly customizable; you can select the size and color of the note to ensure it stands out or fits within a specific categorization system.
Underlining: Use the Pen Tool to manually underline critical information. This is ideal for directing a team member's attention to a specific line of text or a signature block.
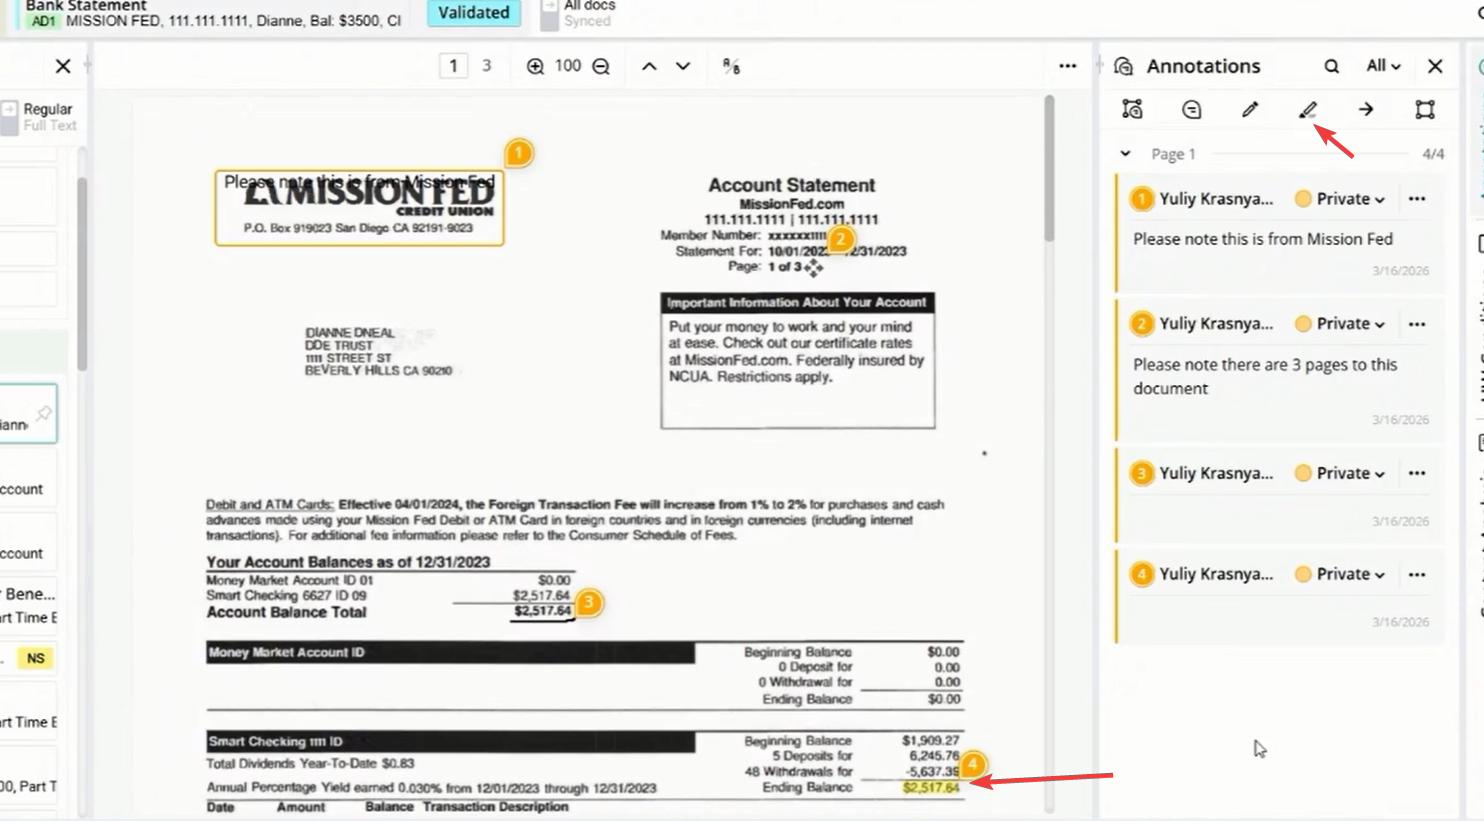
Highlighting: You can select specific sections of text or images to draw attention to them. The highlighter tool allows you to color-code important data points, such as dollar amounts or account numbers, for quick identification.
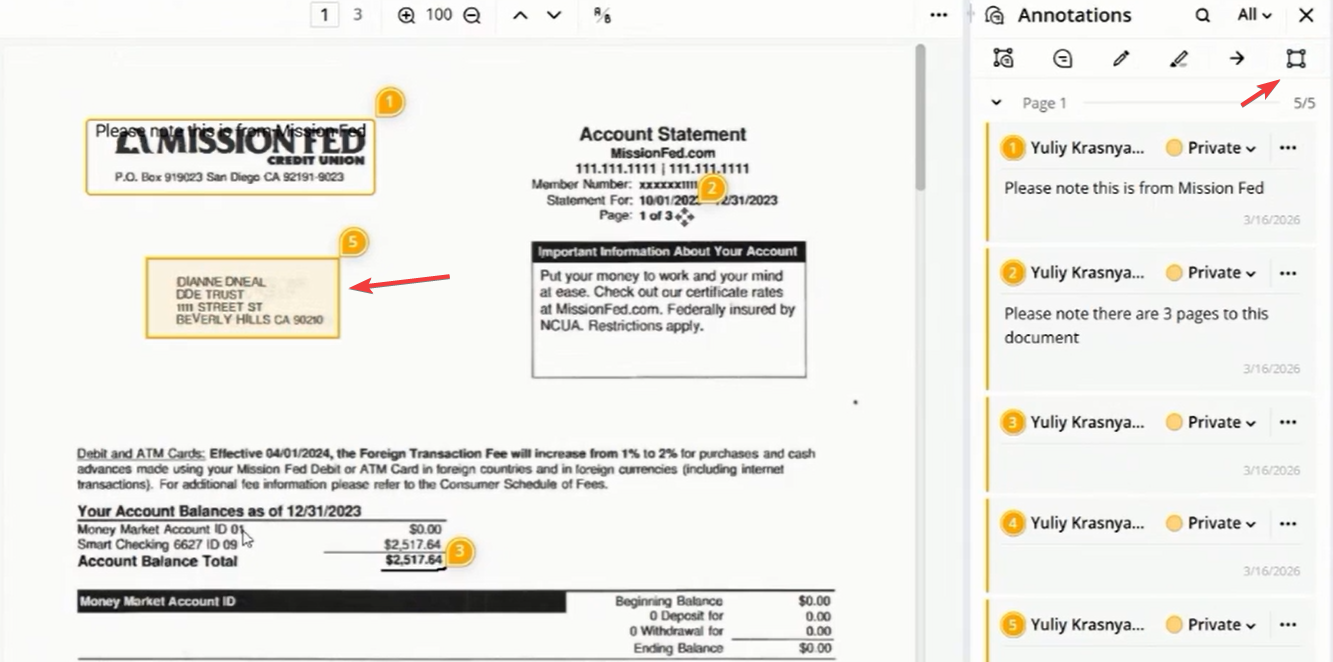
Area Annotation: Beyond individual text snippets, you can select and annotate an entire Area of the document. This is useful for marking up whole paragraphs or tables that require collective review.
Annotation Privacy and Sharing
When adding notes or annotations, you can specify the privacy level to control who sees the information:
Public: Visible to everyone and included in document exports.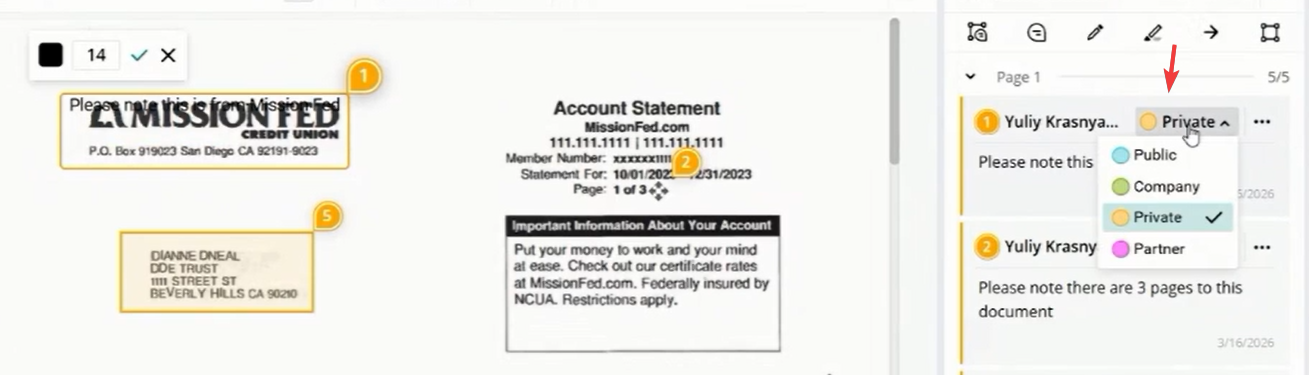
Managing Underwriting Conditions
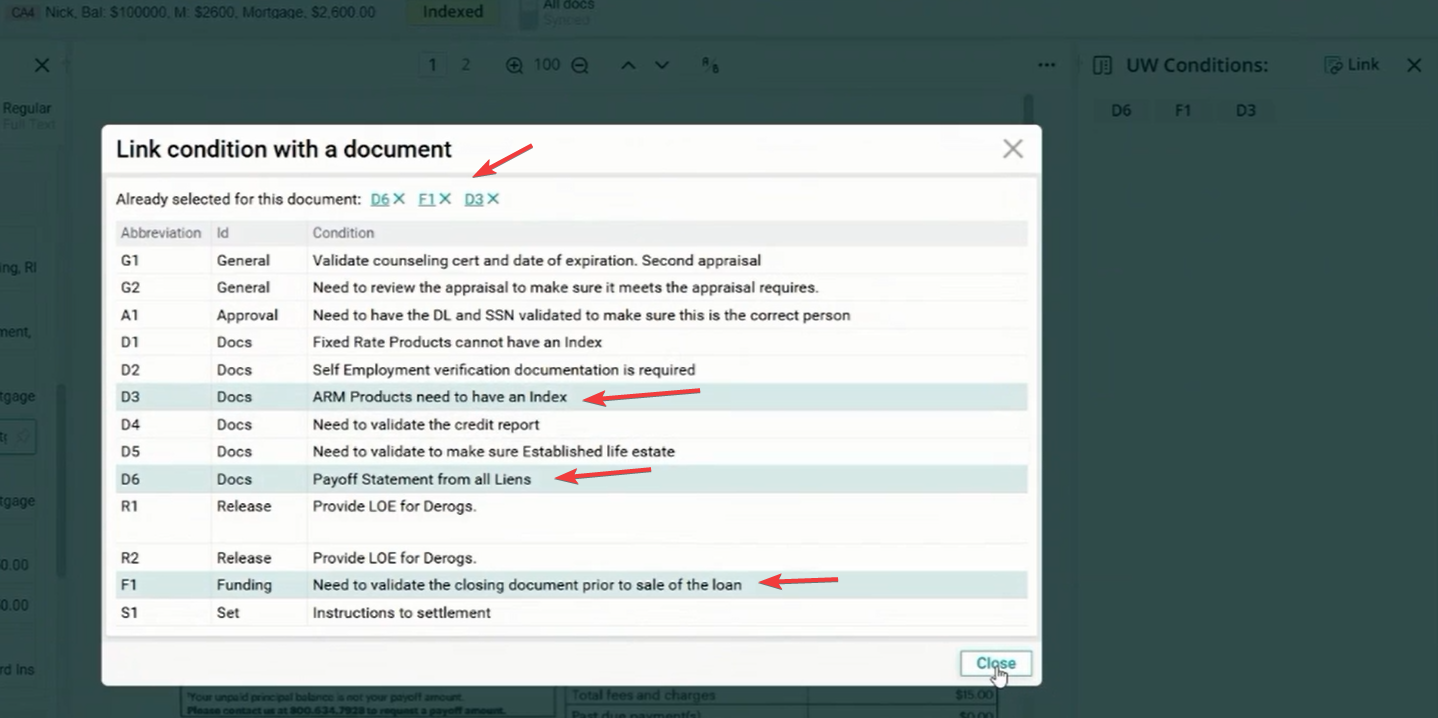
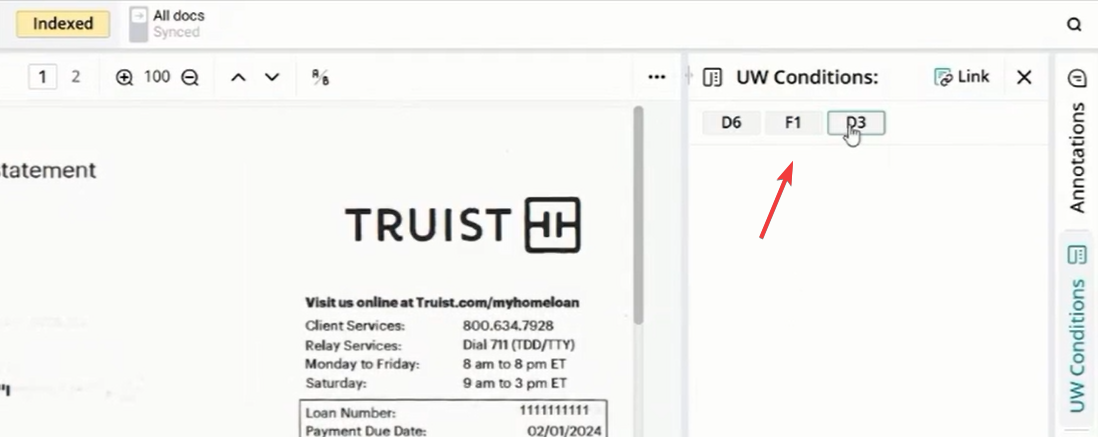
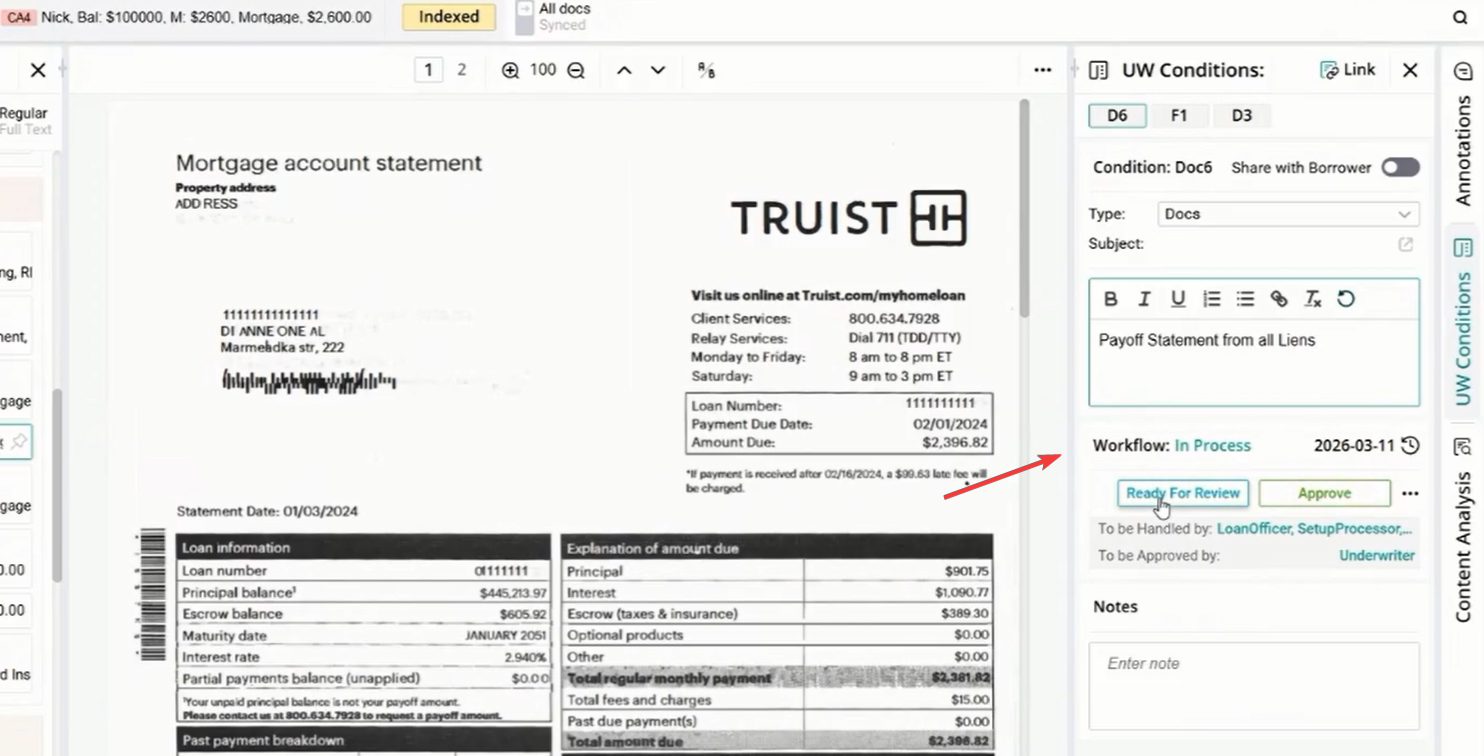
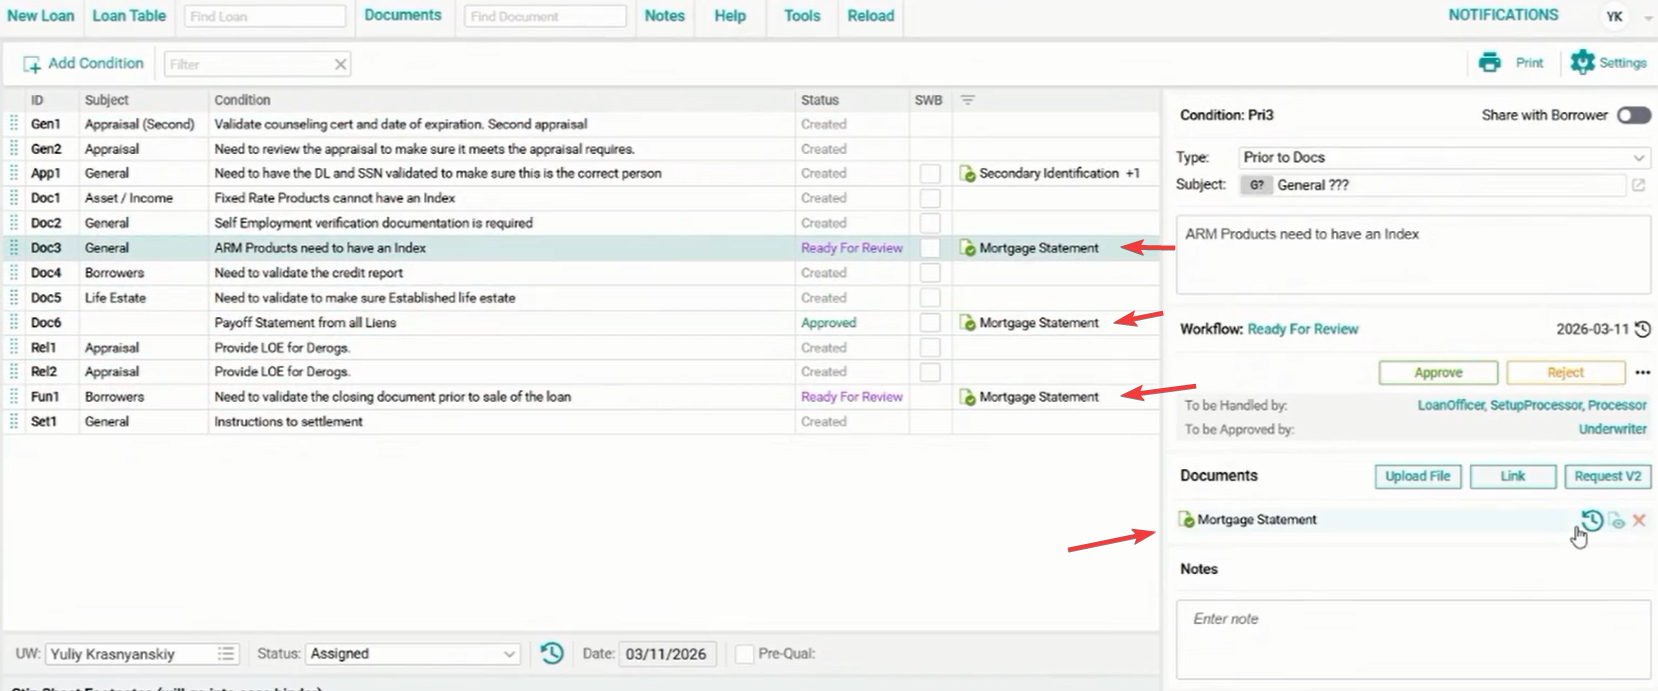
You can link documents directly to underwriting conditions from within the viewer.
Linking: Select a document (like a mortgage statement) and click "Link" to attach it to one or more conditions (e.g., "Payoff Statement from Aliana").Workflow Status: Update the condition status to In Process, Ready for Review, Approved, or Rejected.
Advanced Document Sync & Analysis
Learn how to use the powerful synchronization features to link your document review directly with loan data entry and leverage AI for deep content analysis.
Activating Document Sync
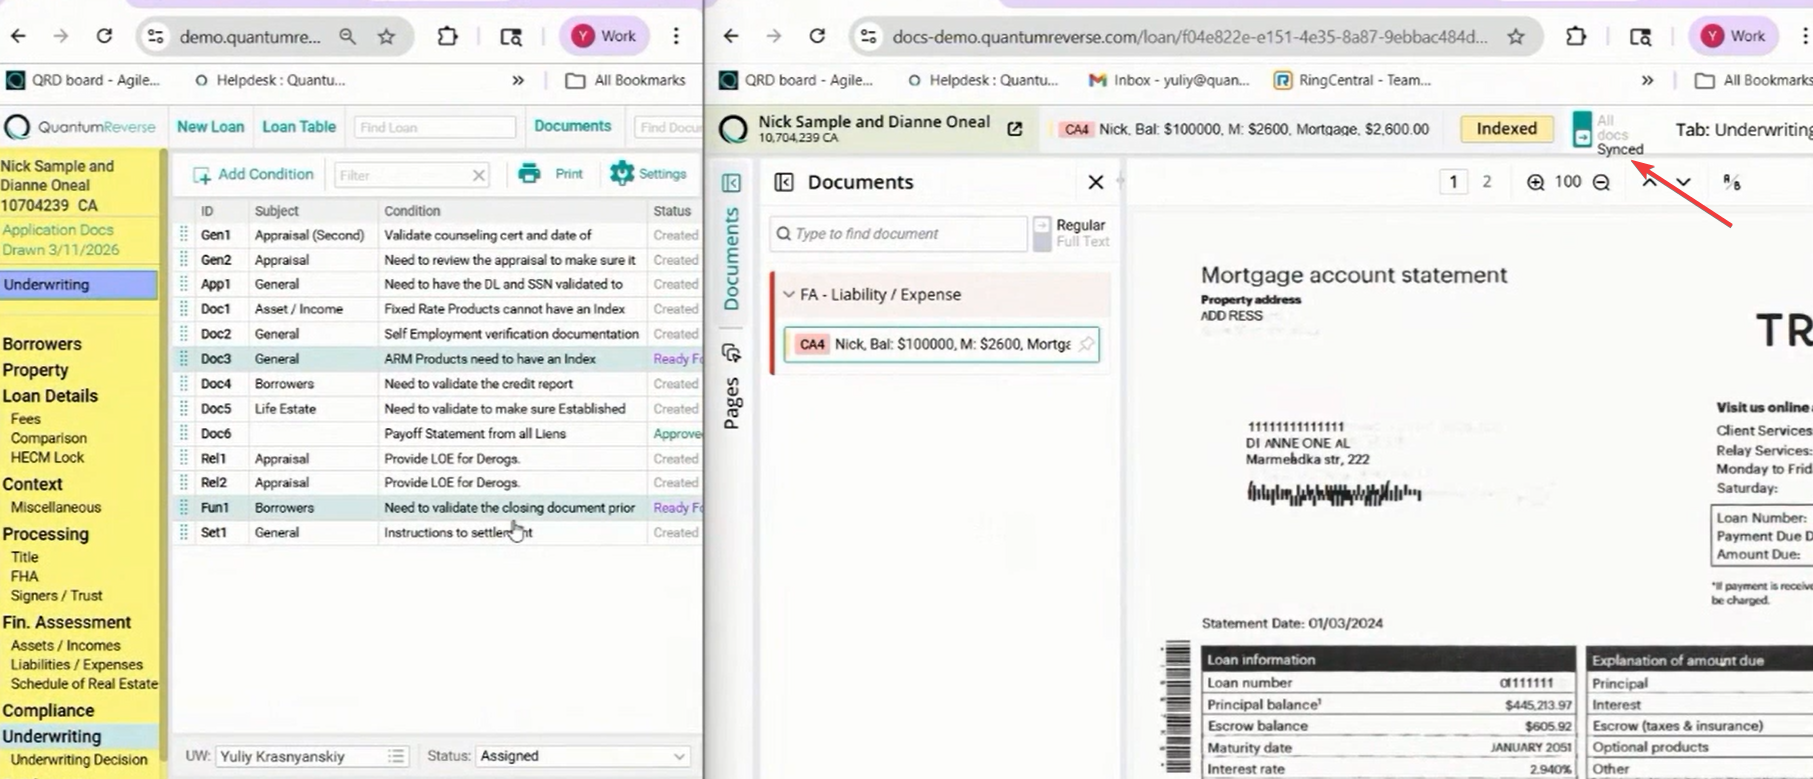
The synchronization feature allows the document viewer to automatically follow your navigation within the loan software. To enable this, split your screen and click the Synced button at the top of the document viewer.
Once activated, the viewer will dynamically load the relevant documents as you click through different screens and sections of the loan file.
Context-Aware Navigation
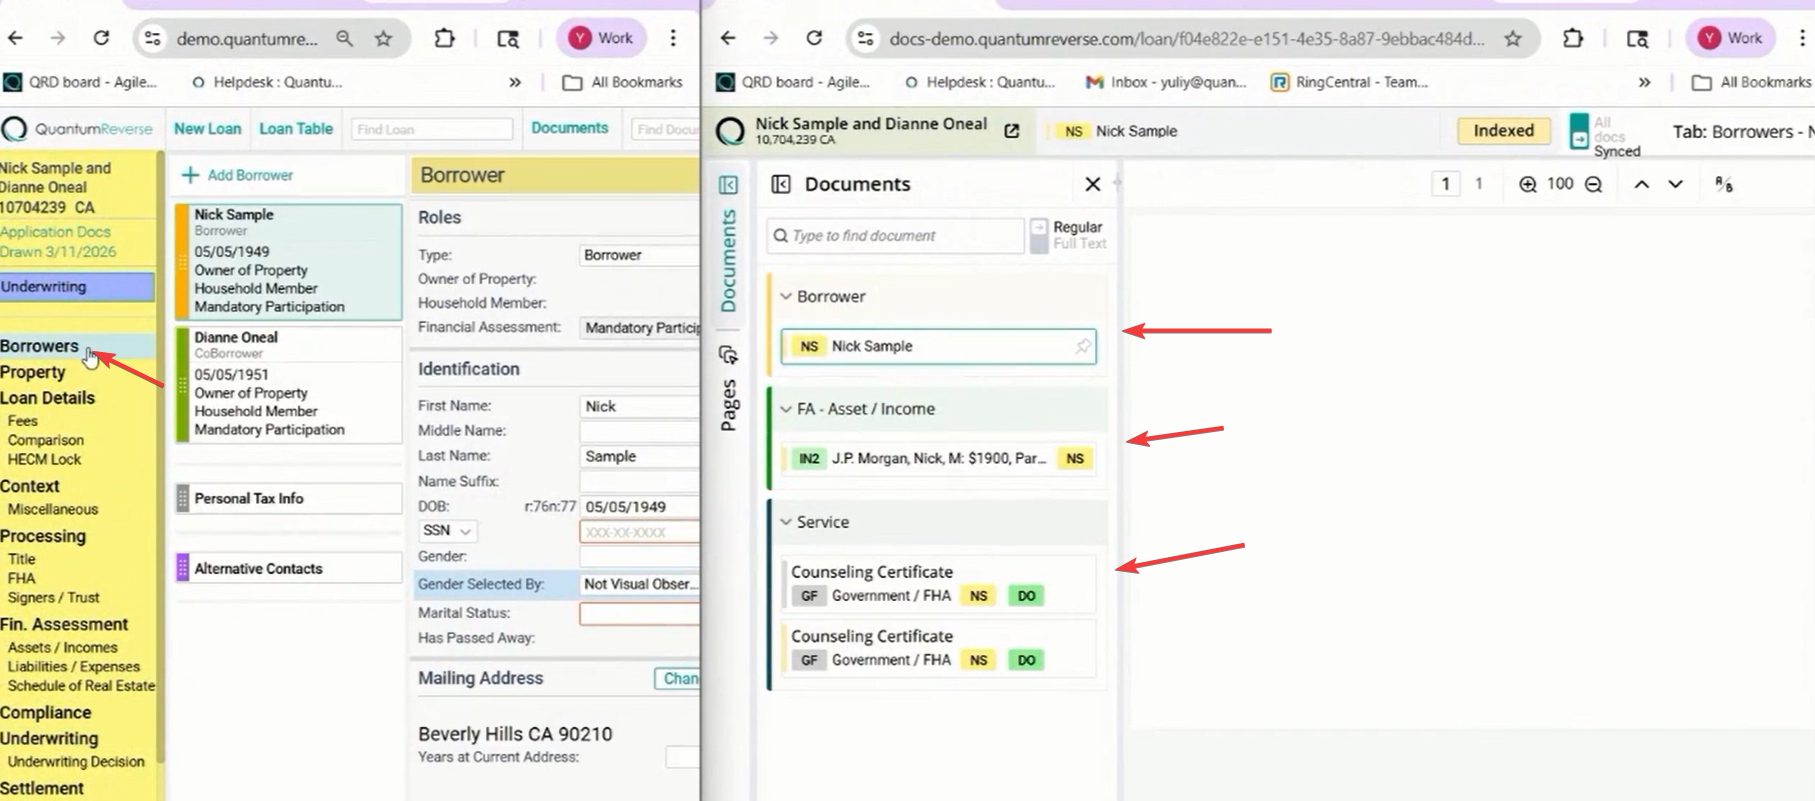
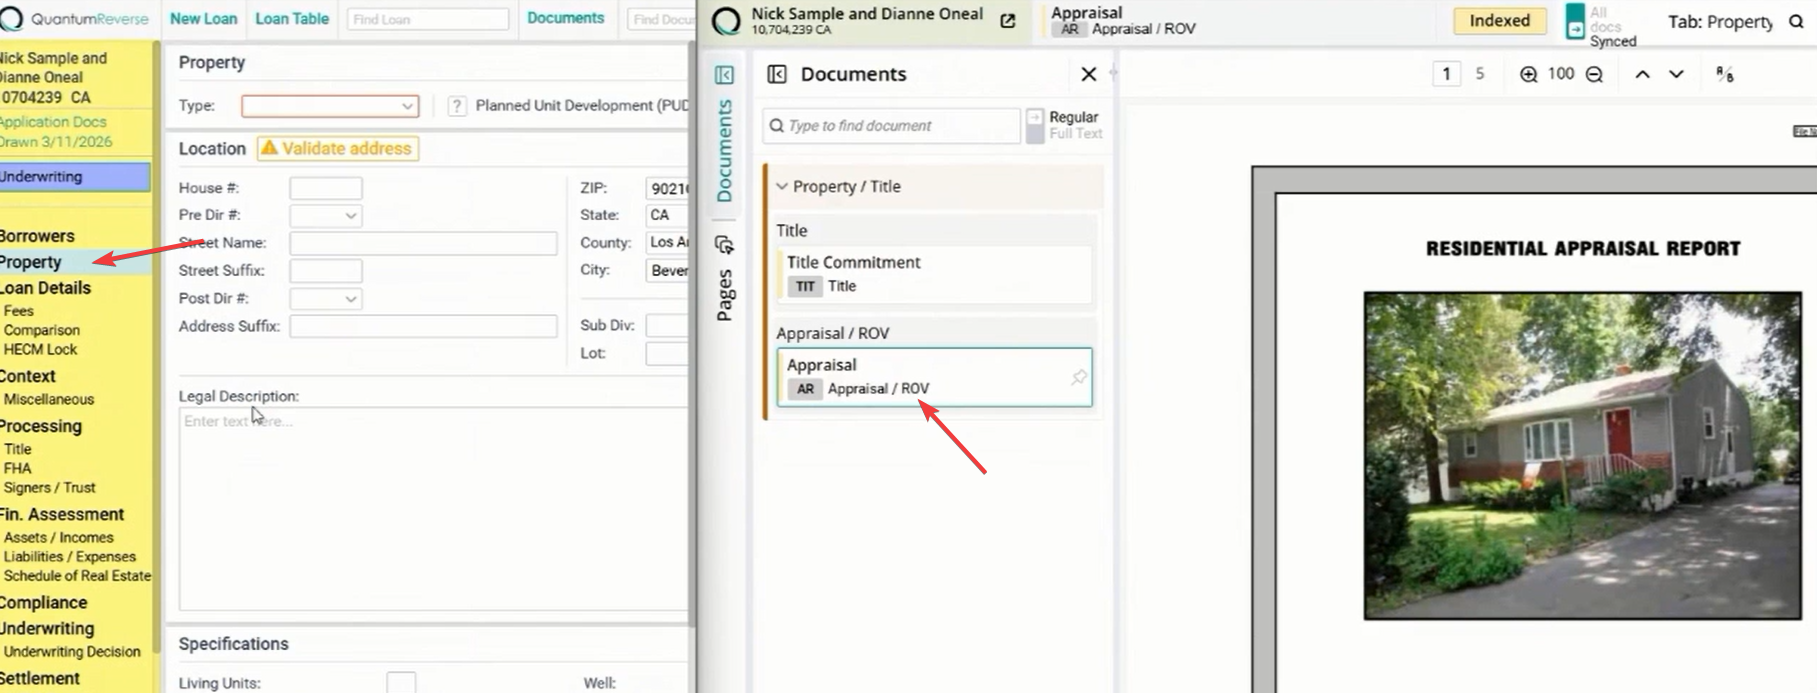
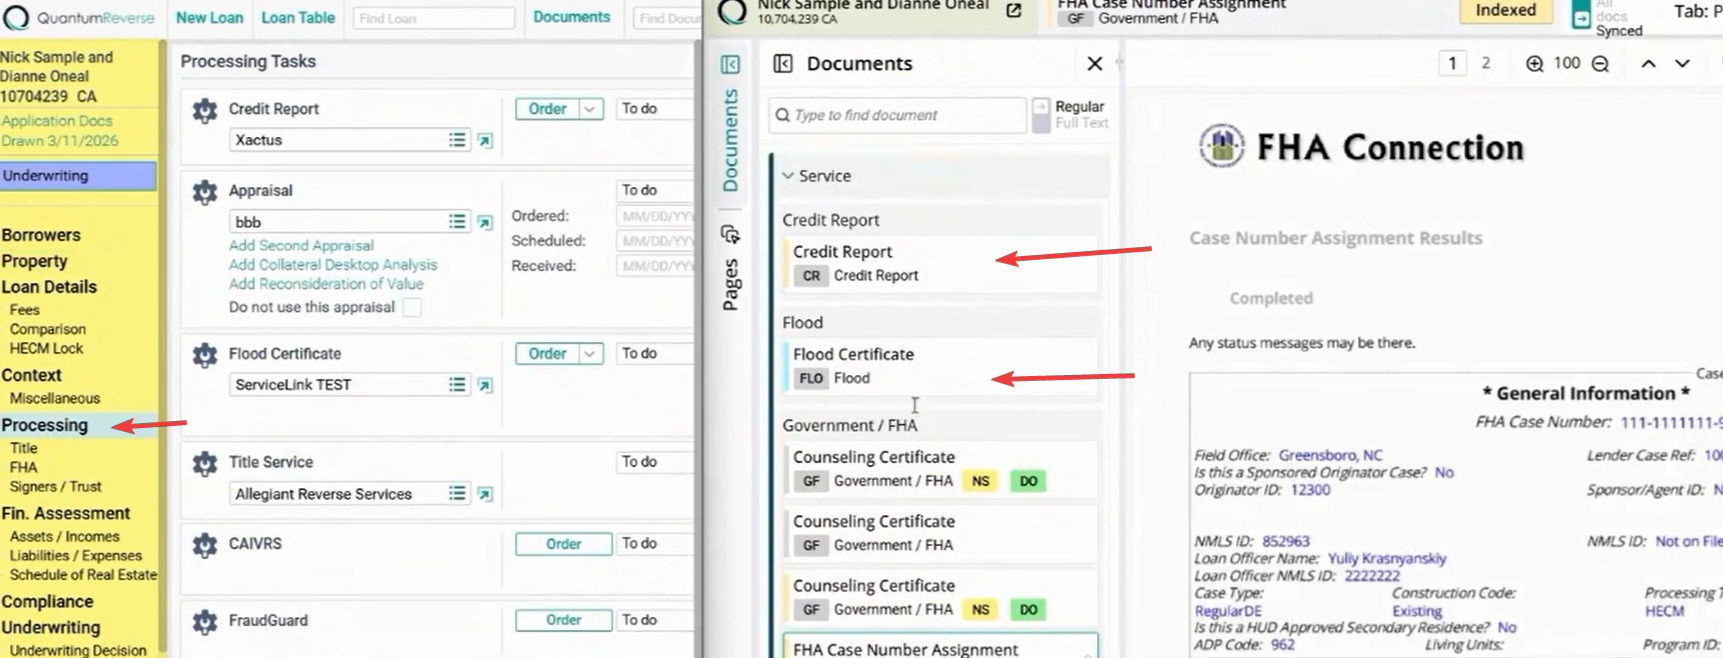
With Sync enabled, the system understands the context of your work. As you navigate through the loan tree, the viewer automatically updates.
Borrowers: Selecting the borrower screen loads identity documents like Social Security cards or driver licenses.Property: Clicking the property section automatically pulls up the title commitment or appraisal report.
Processing: Navigating to processing tasks loads relevant files like credit reports or flood certificates.
Syncing Assets & Income
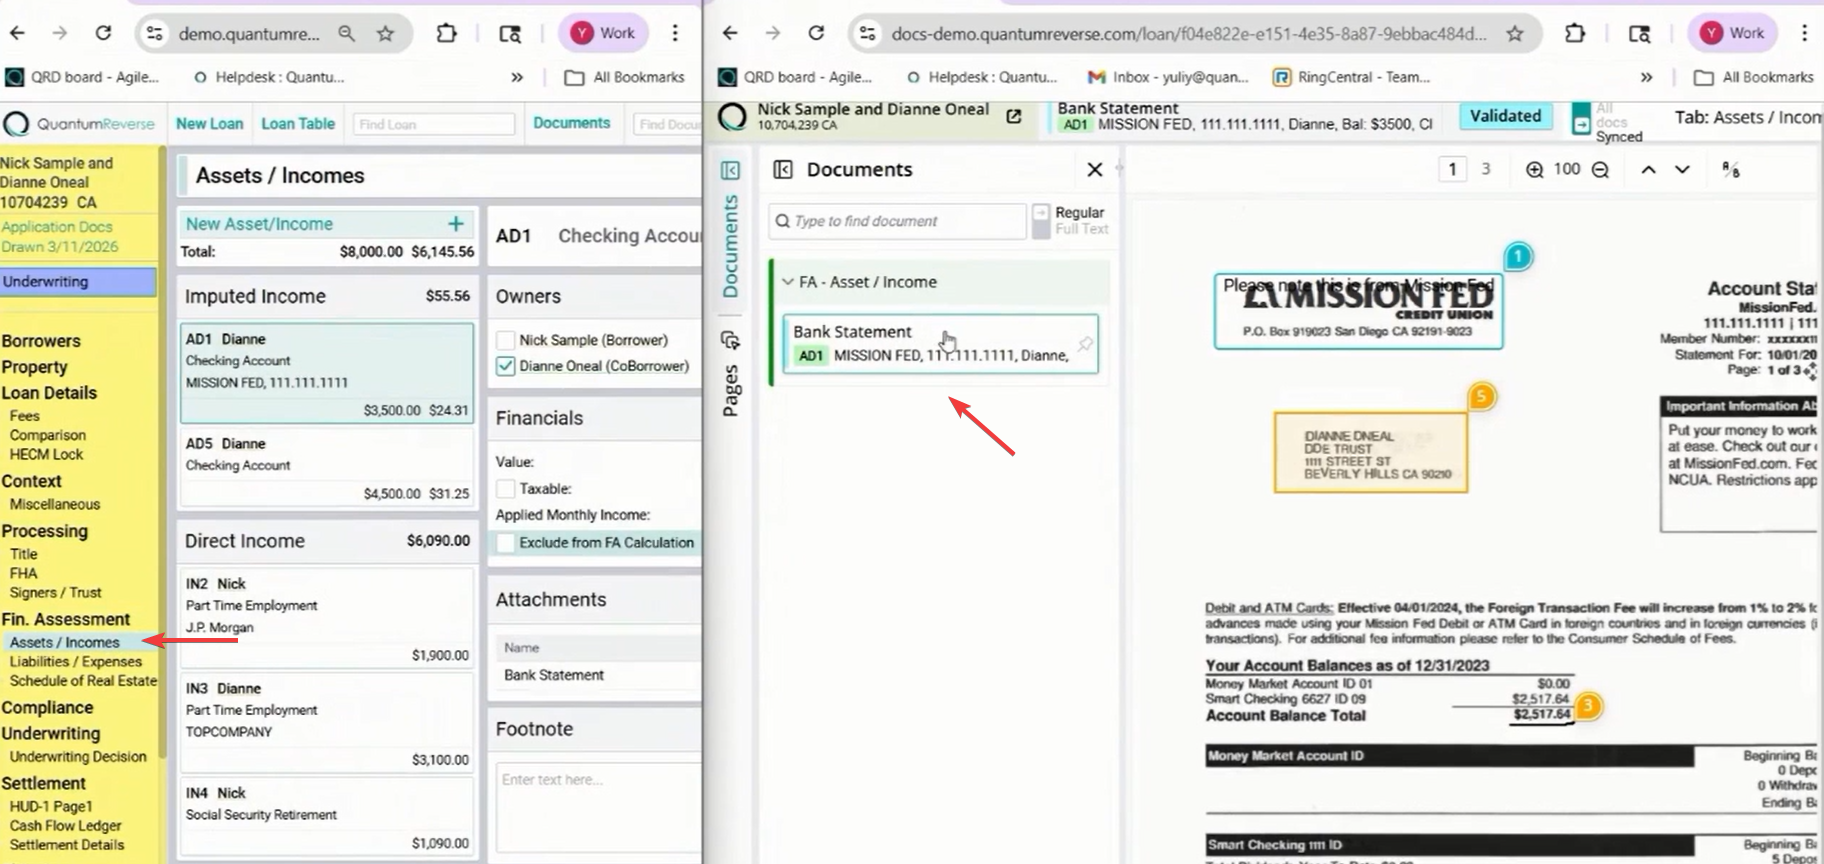
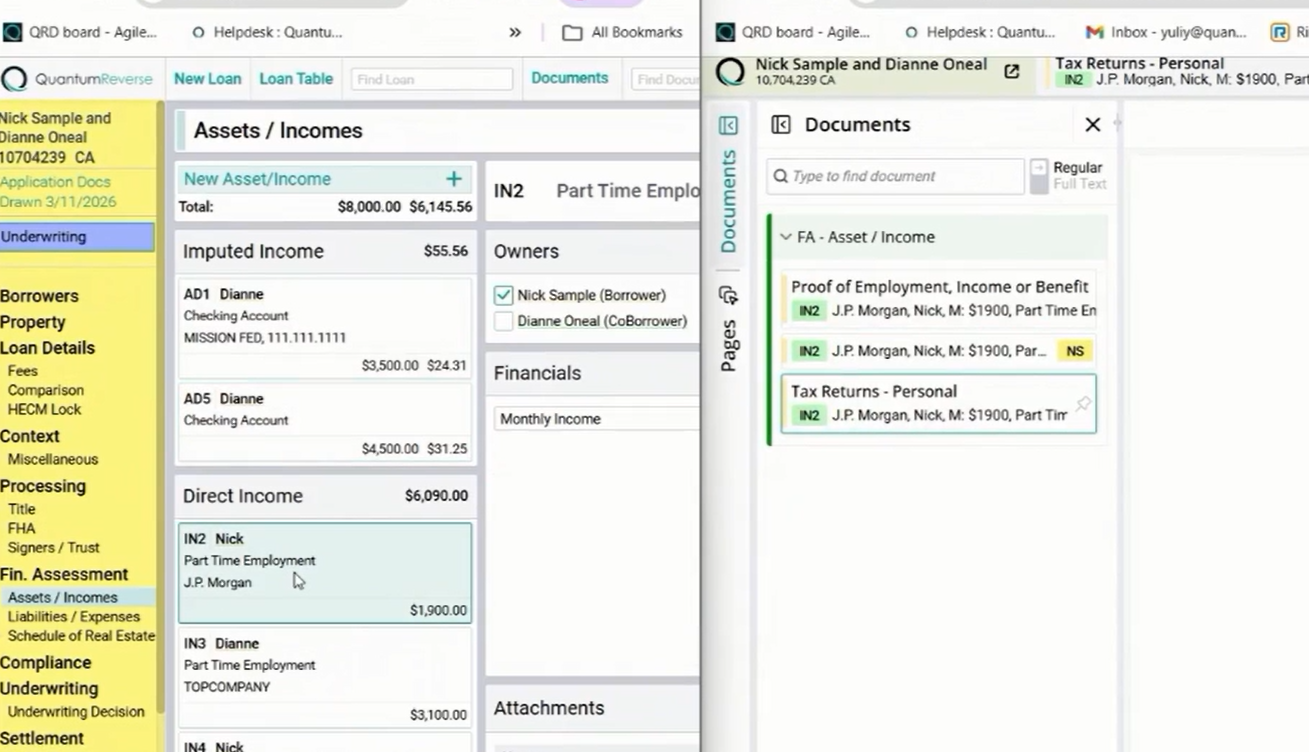
The Sync feature is particularly powerful when working with financial data. When you navigate to the Assets/Income section of a loan, the viewer will automatically display the corresponding bank statements or pay stubs.
This eliminates the need to manually search for the correct file while you are performing income calculations or asset verification.
AI Content Summary
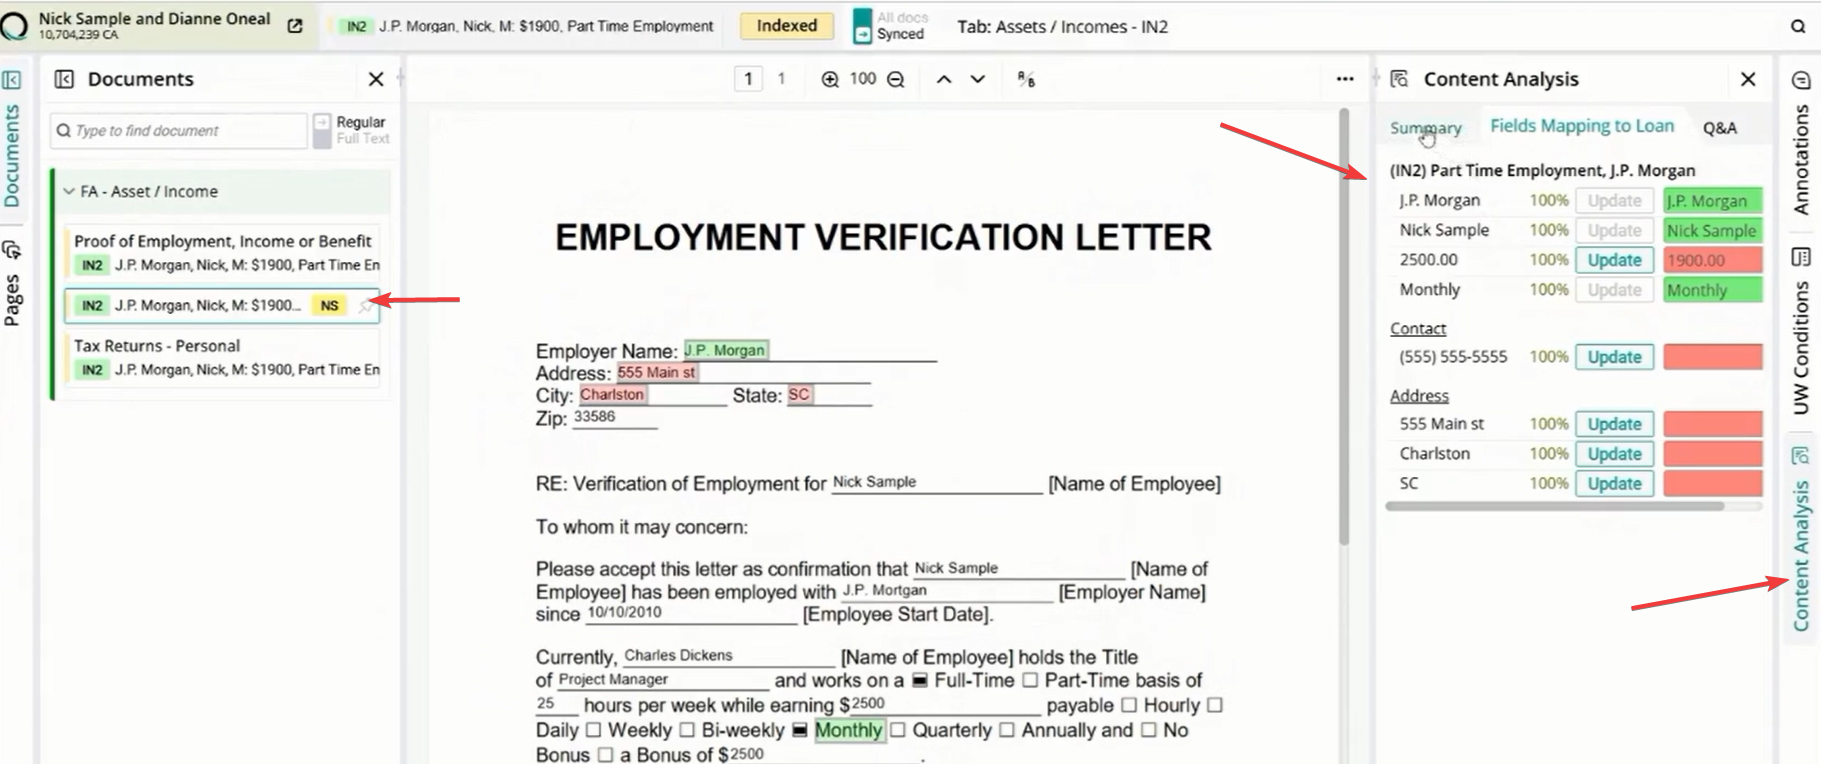
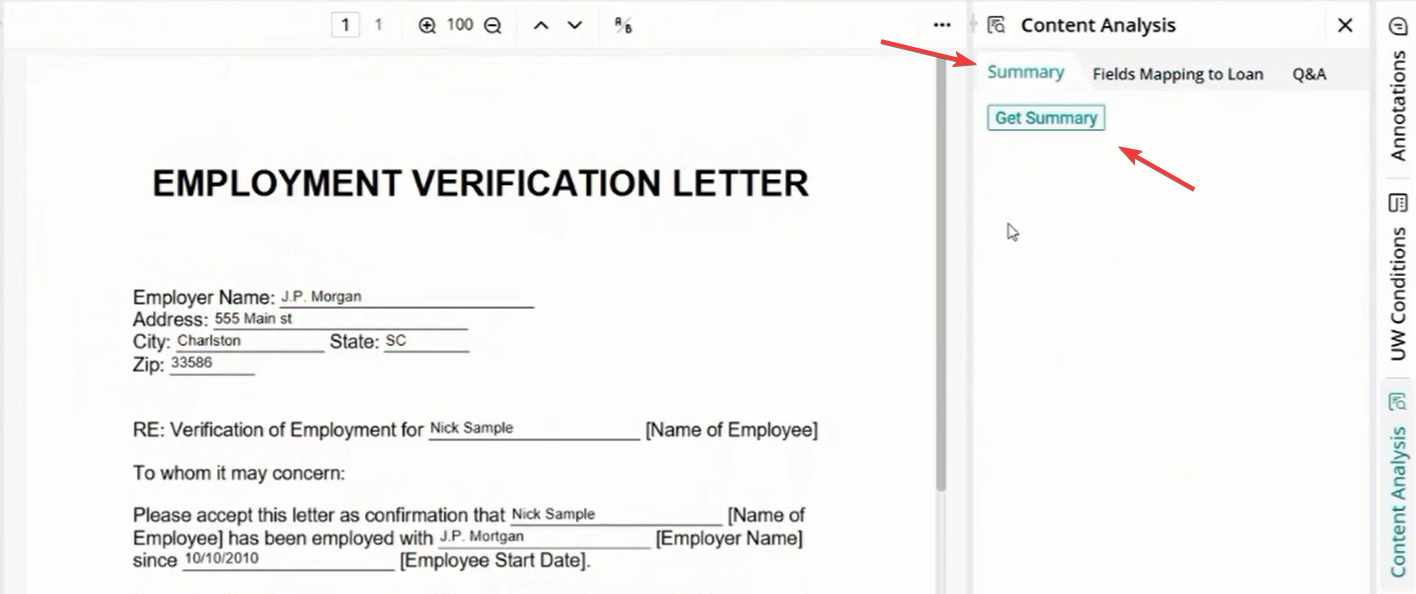
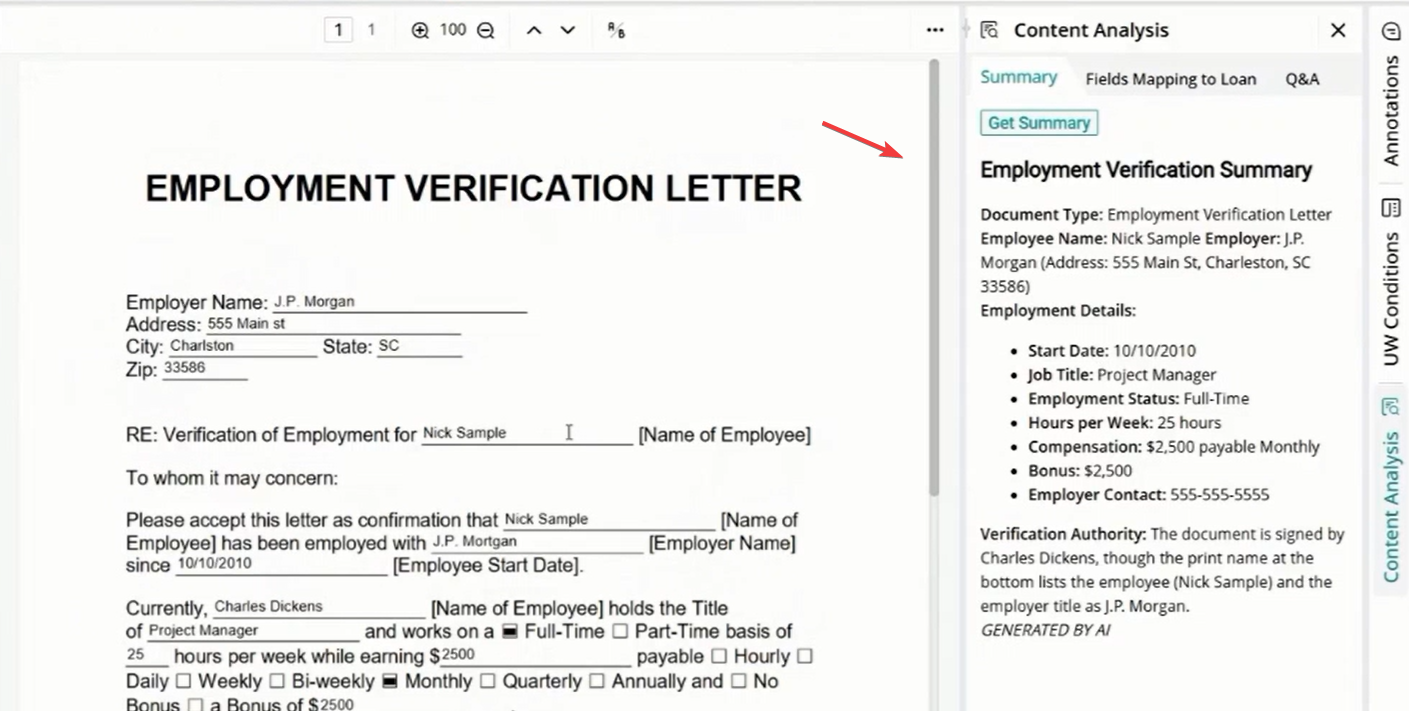
The Content Analysis tab leverages AI to provide an instant overview of any document. By clicking Get Summary, the system extracts critical data points from the file.
For example, on an Employment Verification Letter, the AI will identify and list the Start Date, job title (e.g., project manager), employment status (full-time), and compensation details (e.g., $2,500 monthly).
Resolving Data Discrepancies
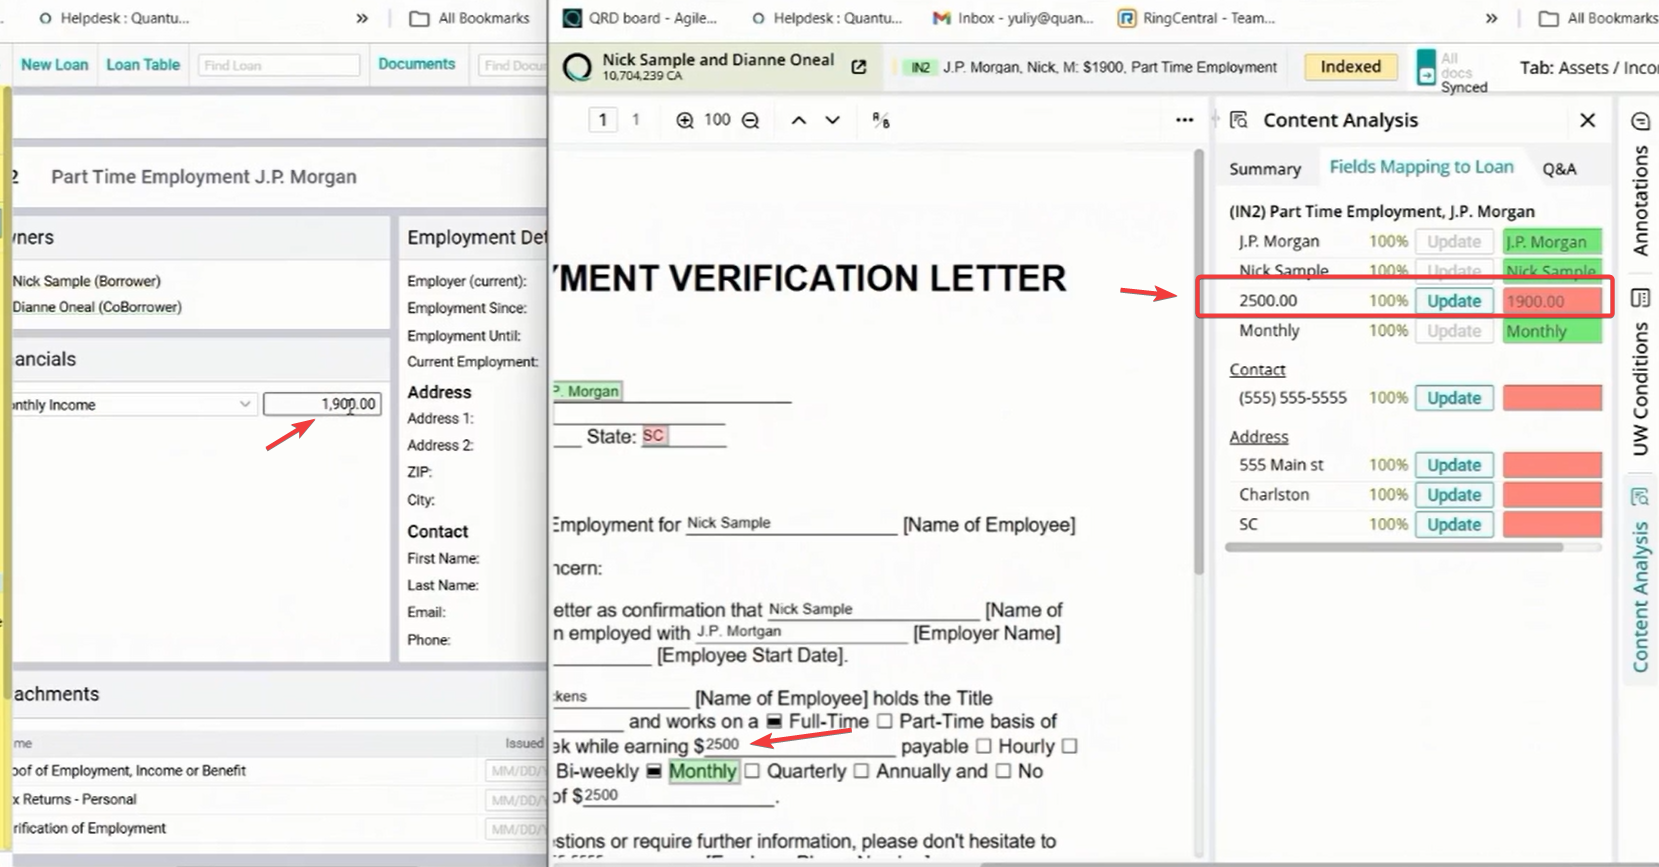
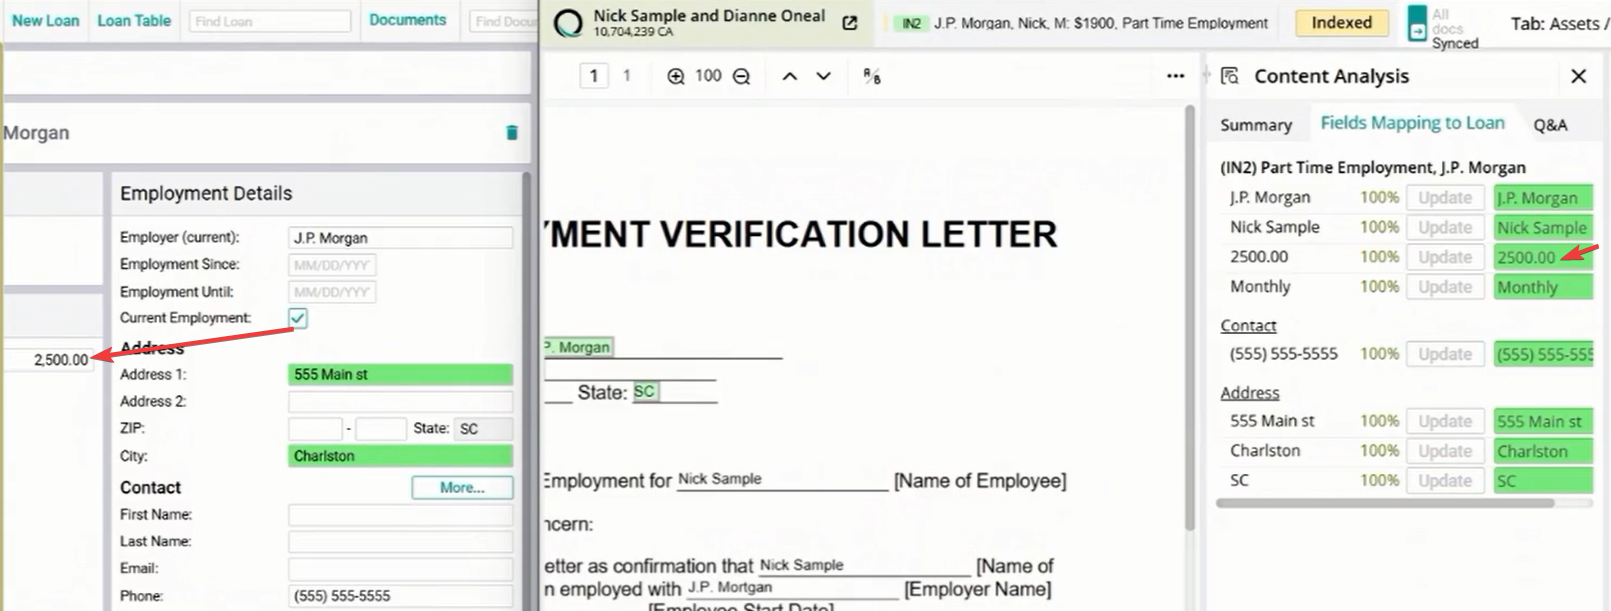
The system automatically compares the data extracted from the document against the information already entered in the loan file.
Any mismatches are highlighted in red. For instance, if the document shows a monthly income of $2,500 but the loan file lists $1,900, the system flags this discrepancy immediately for your review.
One-Click Data Sync
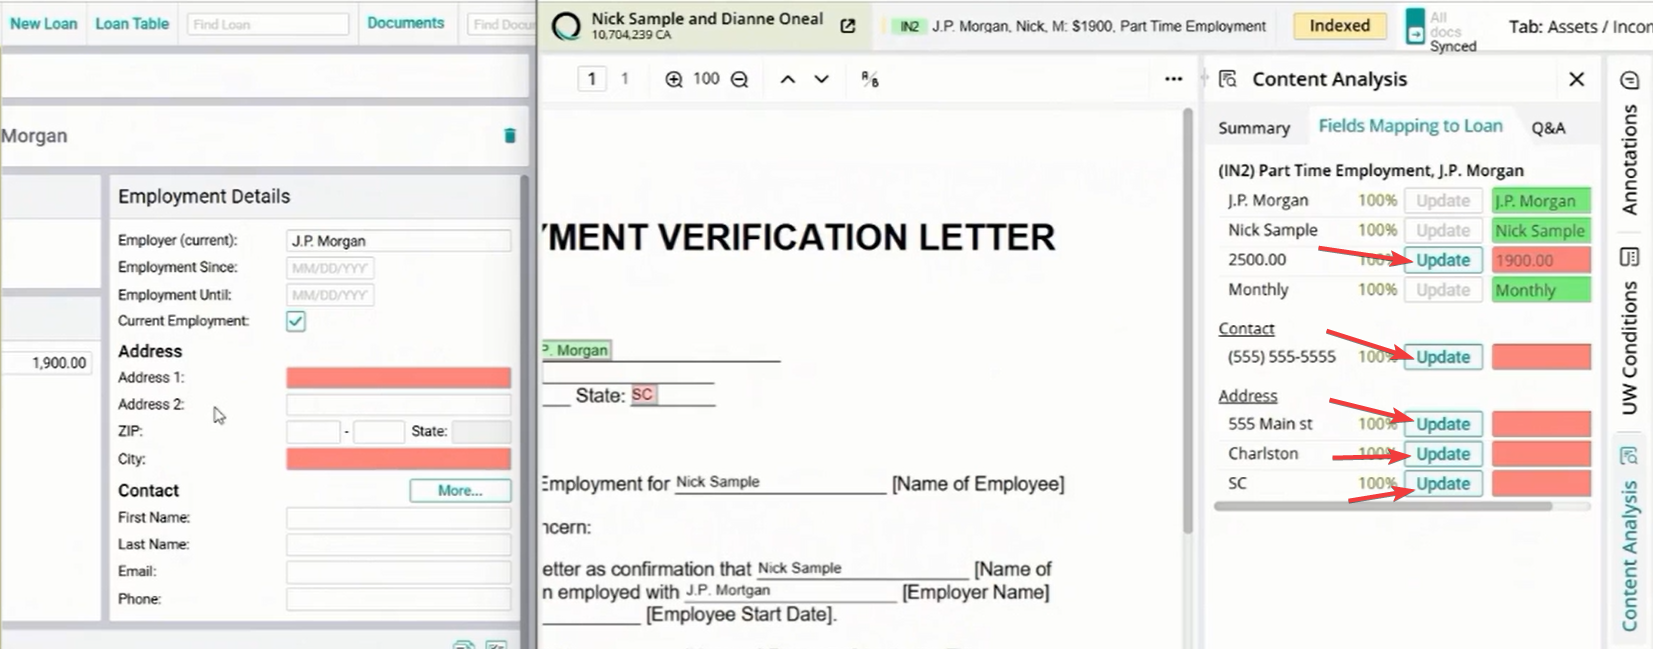
Once a discrepancy is identified, you can resolve it instantly. The Fields Mapping to Loan tab provides an Update button for each verified data point.
Clicking Update will automatically push the verified information (such as Address, City, State, or Phone Number) from the document directly into the loan software, ensuring 100% data accuracy without manual entry.
Interactive Document Q&A
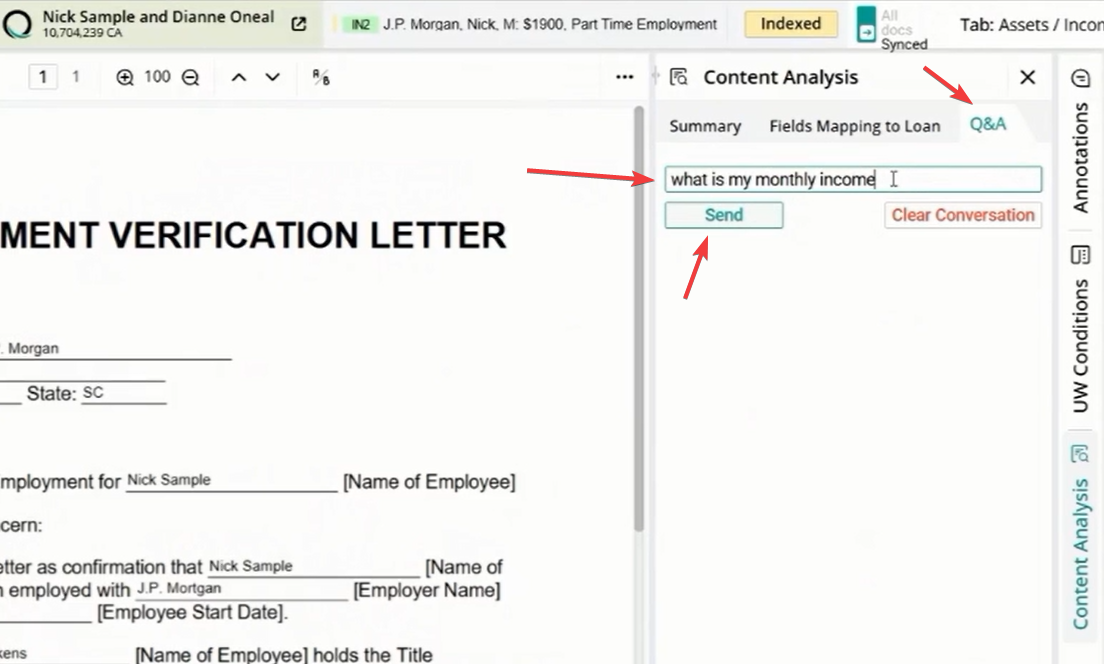
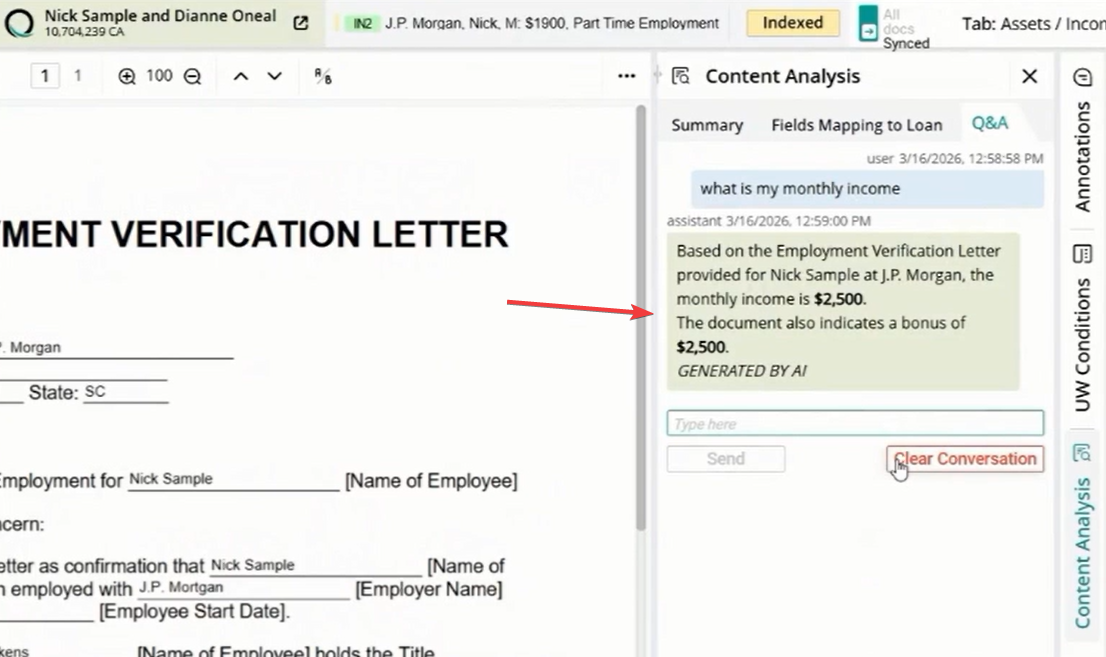
The Q&A tab allows you to have a natural language conversation with the document. You can ask specific questions to find information that might be buried in long files.
Example query: "what is my monthly income" The AI will scan the document and return the exact figure found, such as $2,500, providing a fast and efficient way to verify complex data.
Video