
A comprehensive guide to navigating and utilizing the primary document management interface for efficient file tracking and organization.
Introduction to Main View
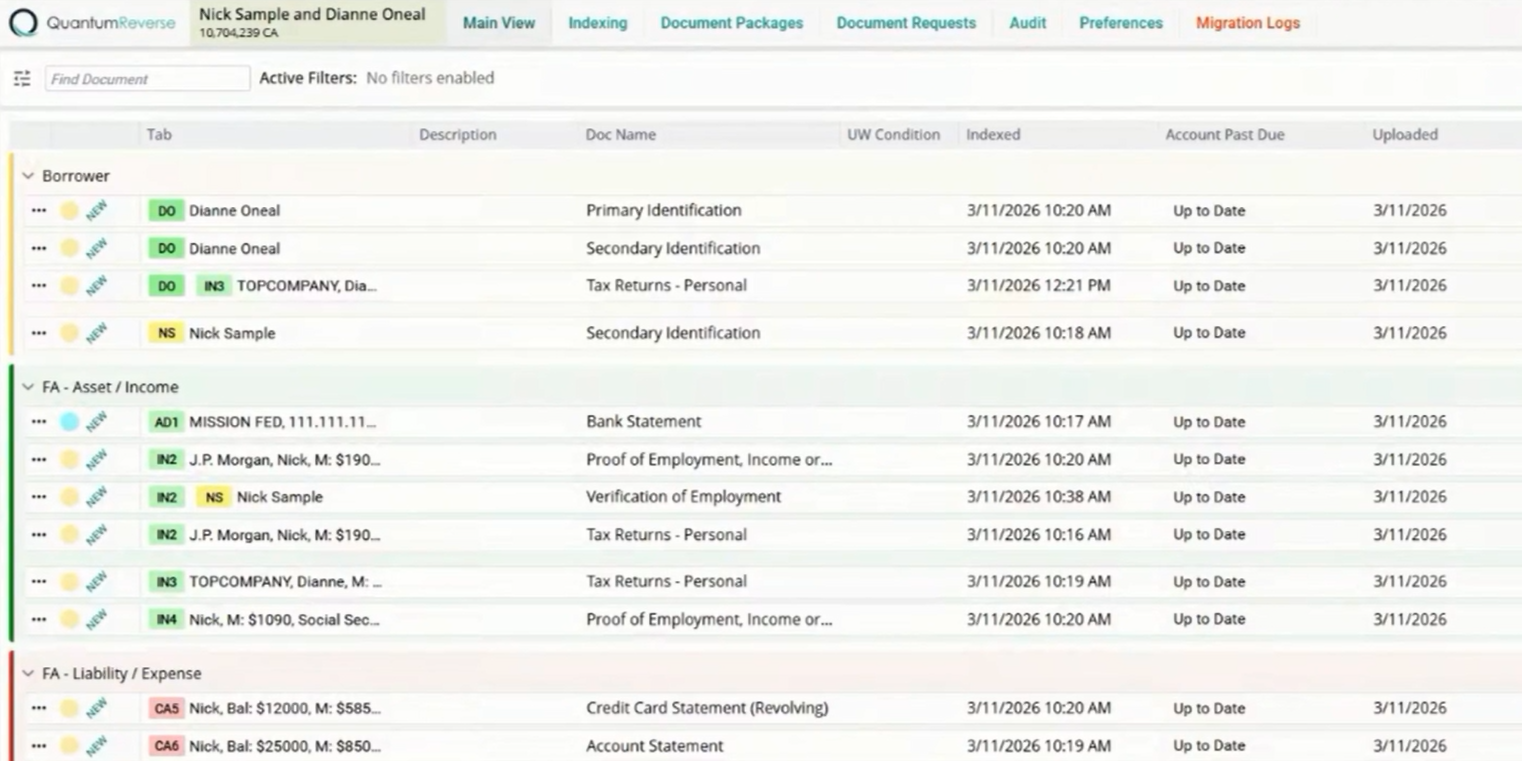
The main view is the central hub of the document management system. It provides a structured overview of all documents associated with a loan, organized by categories and subjects. This interface is designed for high-density information review and rapid document interaction.
Selecting and Switching Views
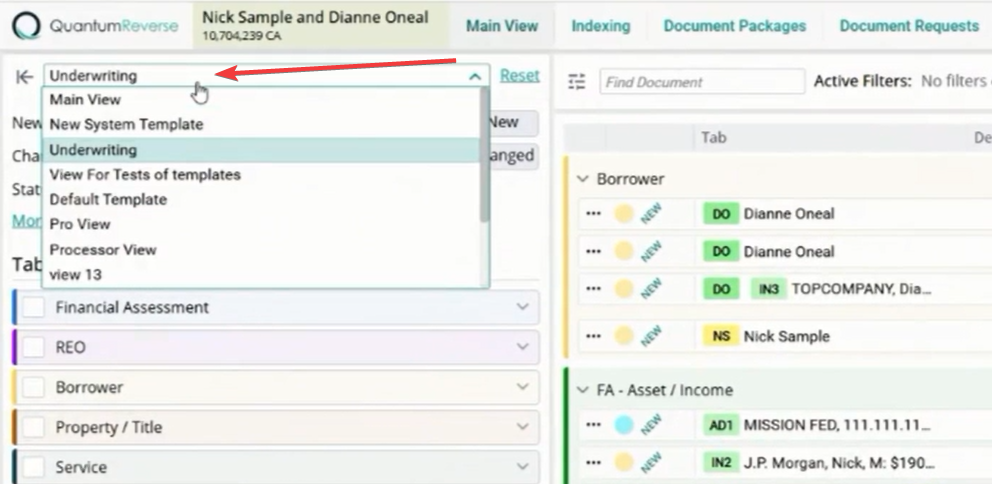
Administrators can define multiple view profiles tailored to specific roles (e.g., Processor, Underwriter).
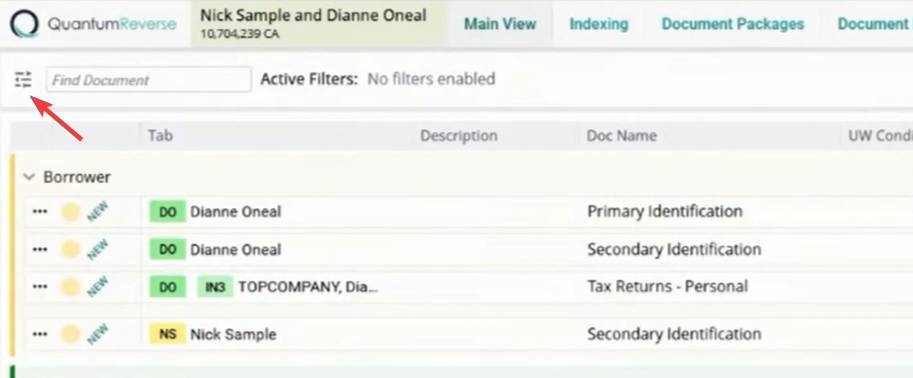
Switching Views: Use the dropdown at the top left to select your preferred view.
Impact: Changing the view updates the visible columns, stacking orders, and available actions to match your current task.
Adding Document Descriptions
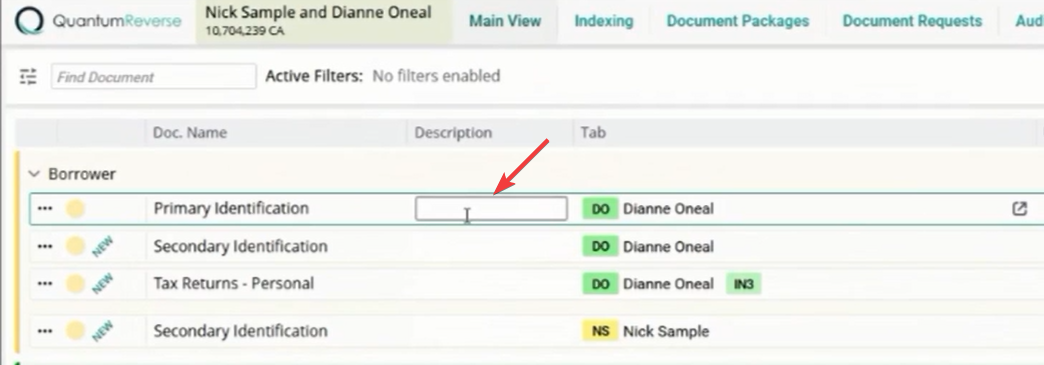
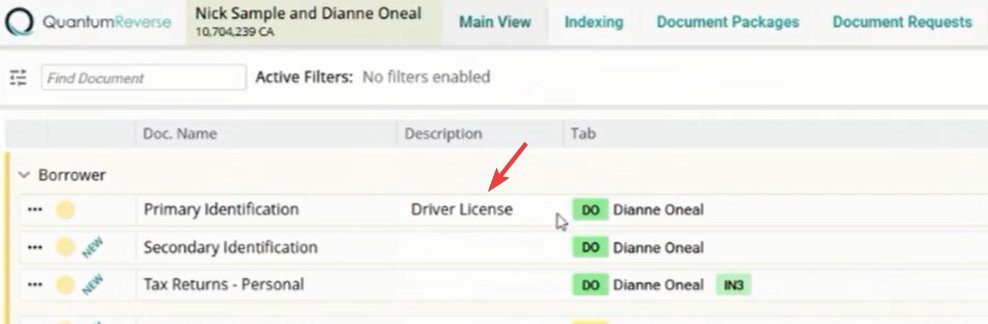
The Description column allows you to add specific metadata to any document. Usage: Click into the description field to type details like "Driver License" or "2023 Tax Return." Benefit: This helps subsequent reviewers quickly identify the exact nature of a document without opening it.
Managing Document Locations
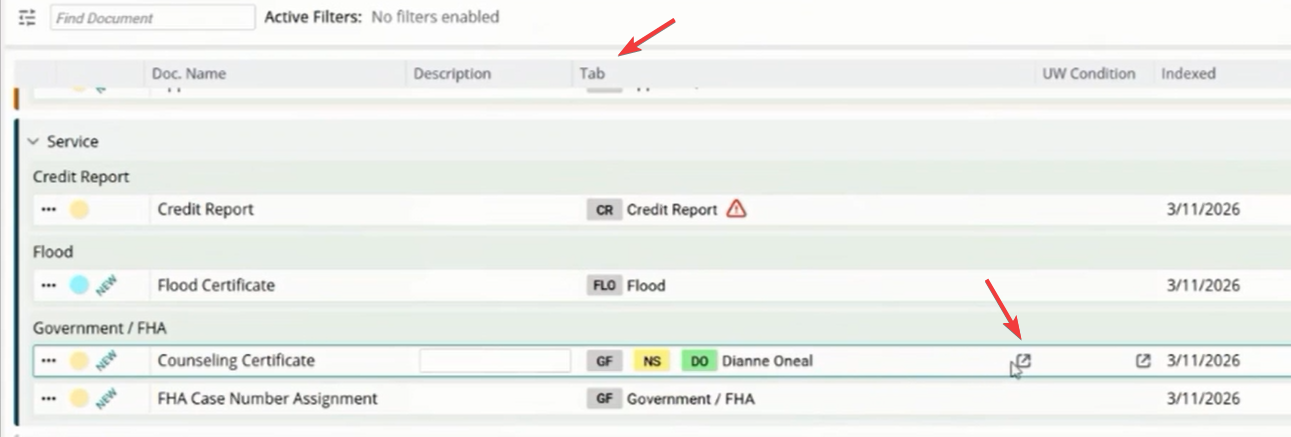
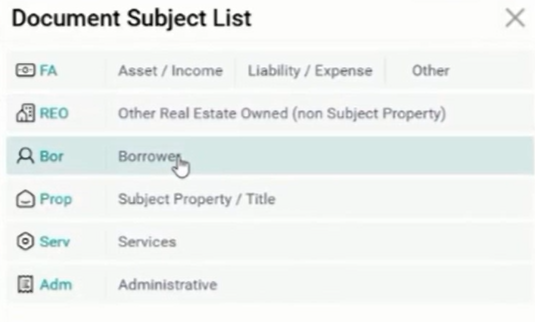
Documents can be linked to multiple subjects or locations within a file. Document Subject List: Click the icon in the Tab column to open the subject management modal. Adding Locations: Select "Add Another Location" to link the document to additional borrowers (e.g., Nick Sample and Dianne Oneal).
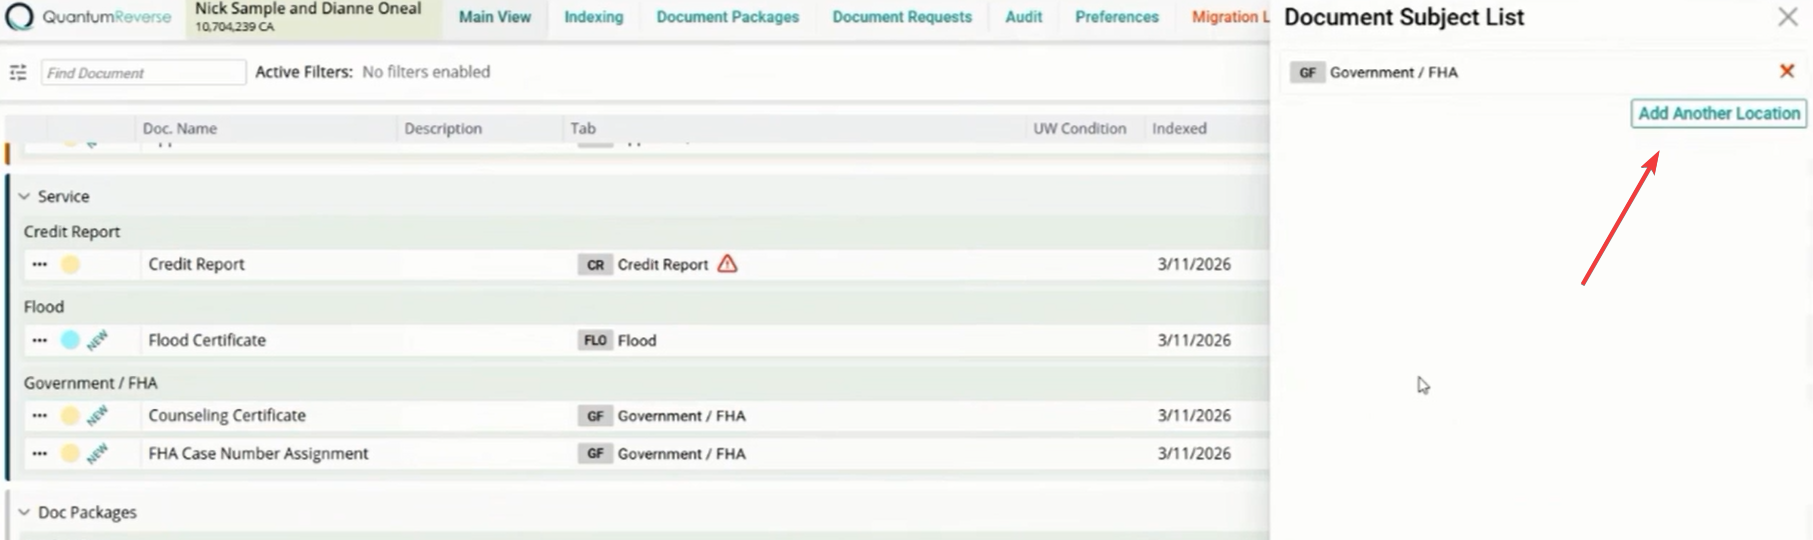
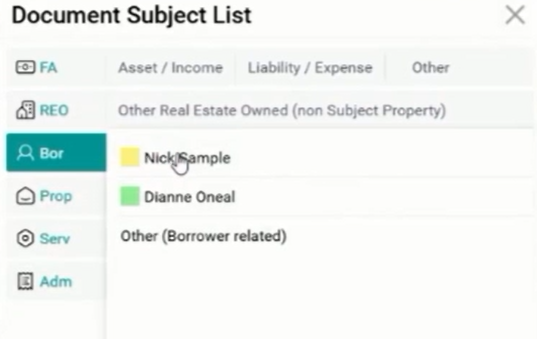
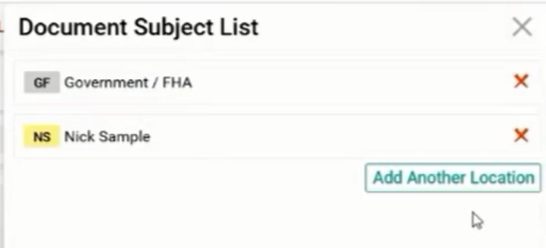
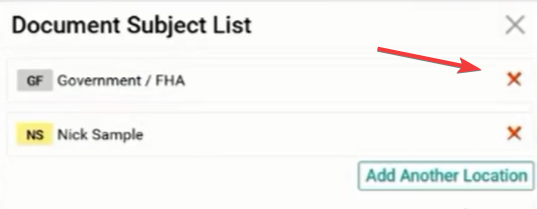
Removing Locations: Click the 'X' next to a subject to remove that specific mapping.
Tab Priority & Stacking Behavior
The system's stacking logic determines how documents appear when mapped to multiple categories.
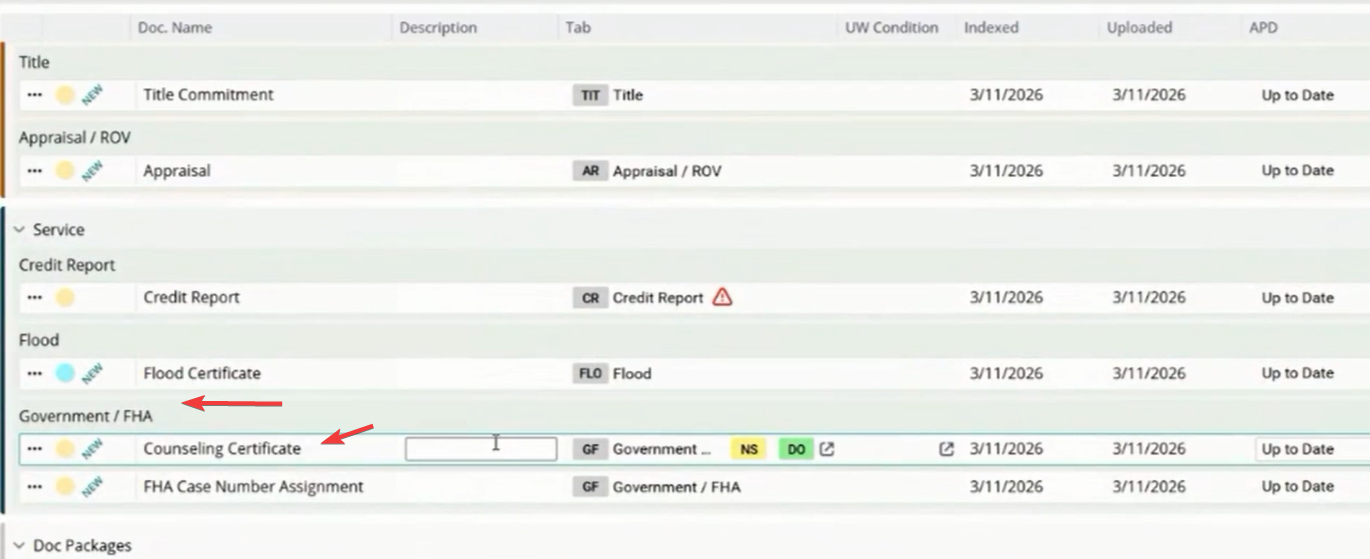
- Show Multiple: When enabled, a document like the Counseling Certificate will appear in every tab it is mapped to, such as Borrower, Co-Borrower, and Government/FHA.
- Single Instance: Alternatively, it can be set to only appear in the first tab according to the defined priority.
Show Multiple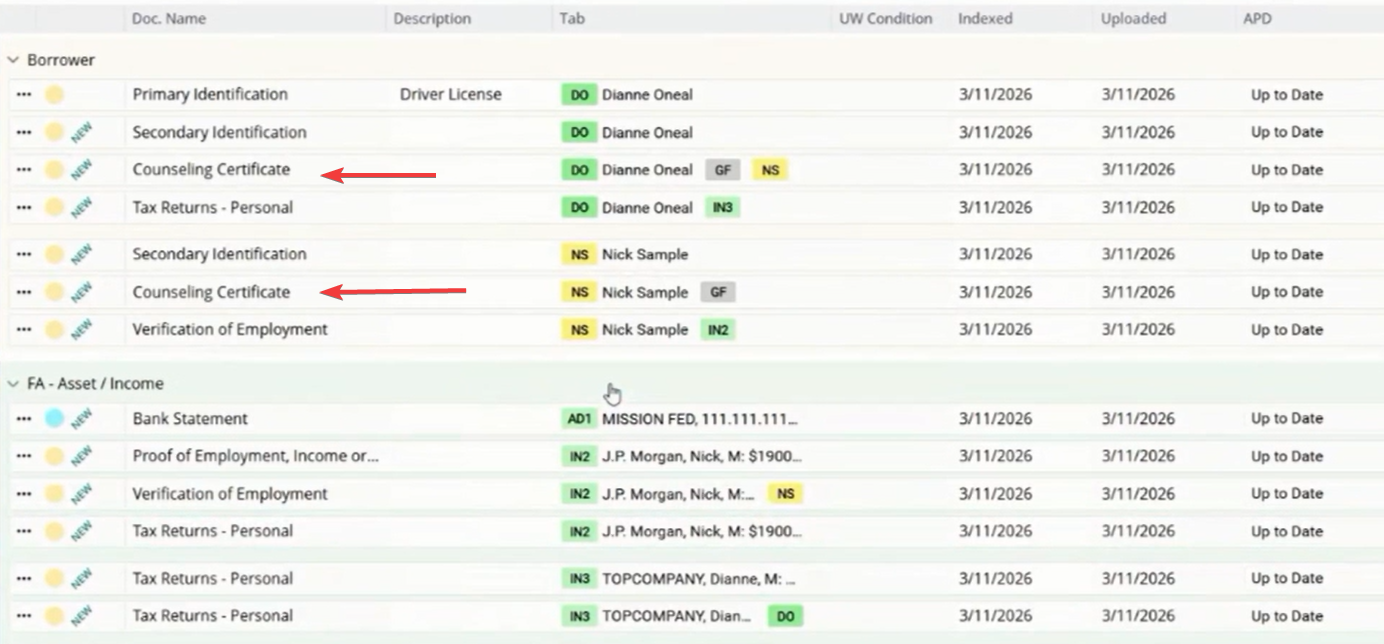
Real-time Annotation Sync
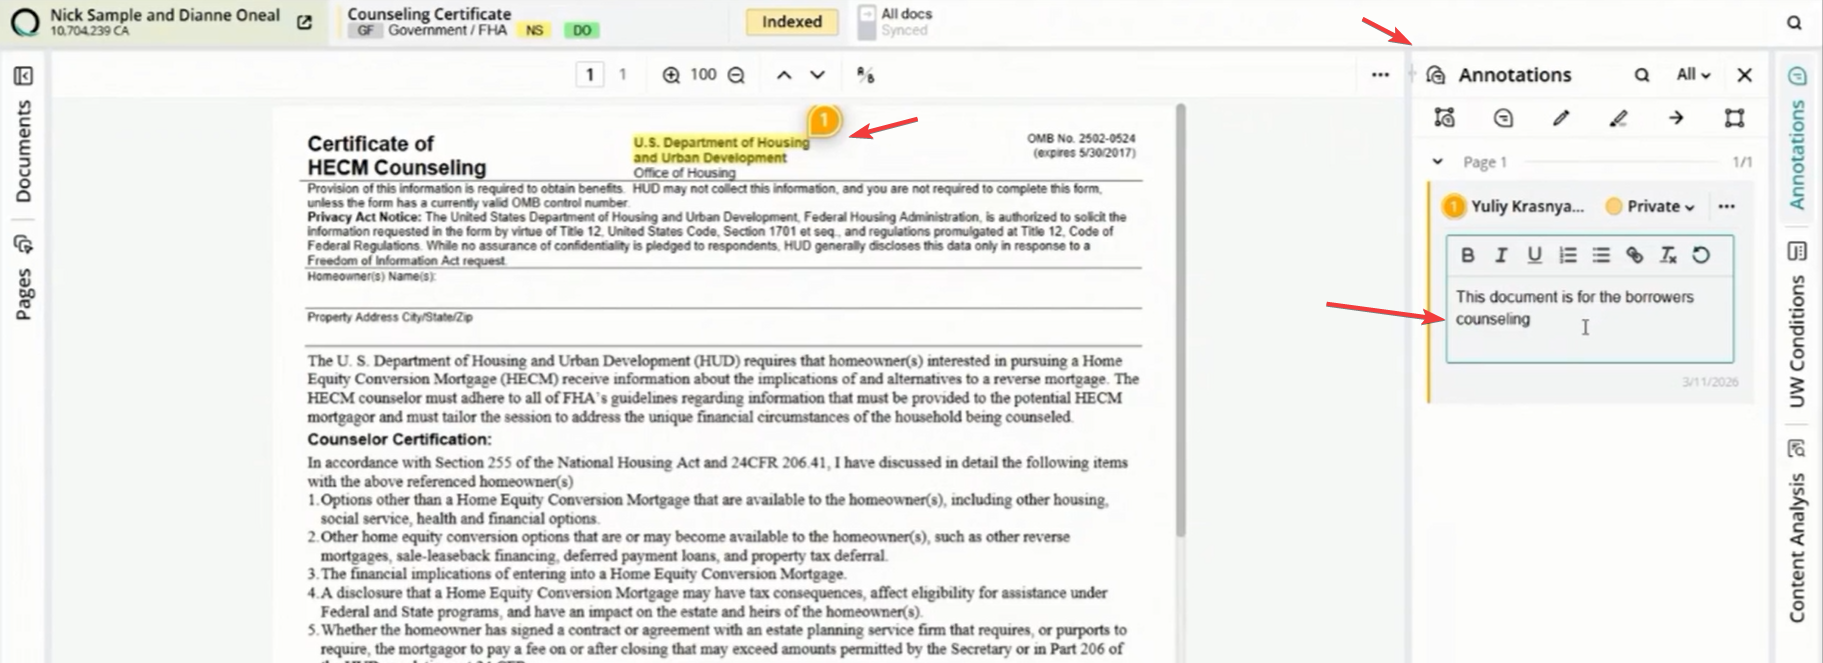
When a document is visible in multiple locations, it remains a single record. Synchronization: Any annotations, highlights, or comments added to one instance will automatically appear on all other instances in real-time. Data Integrity: This ensures that all team members are viewing the most up-to-date information regardless of which tab they are working in.
Underwriting Conditions
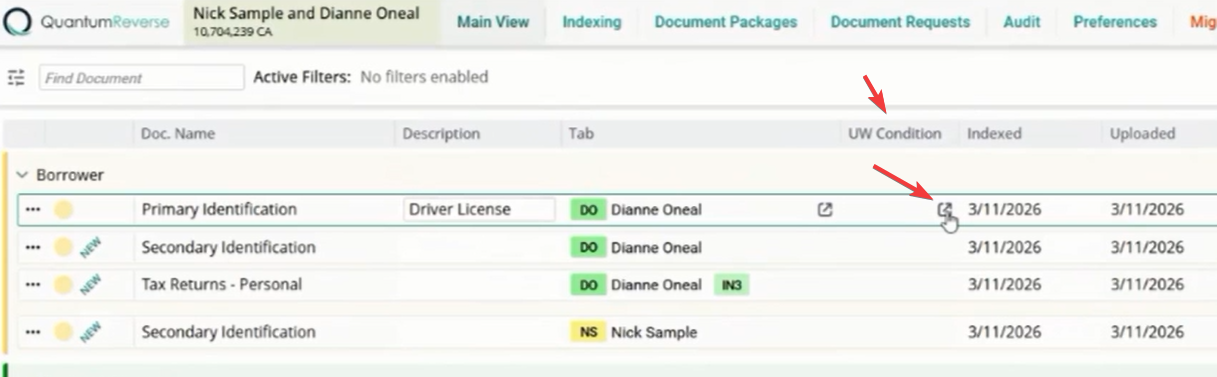
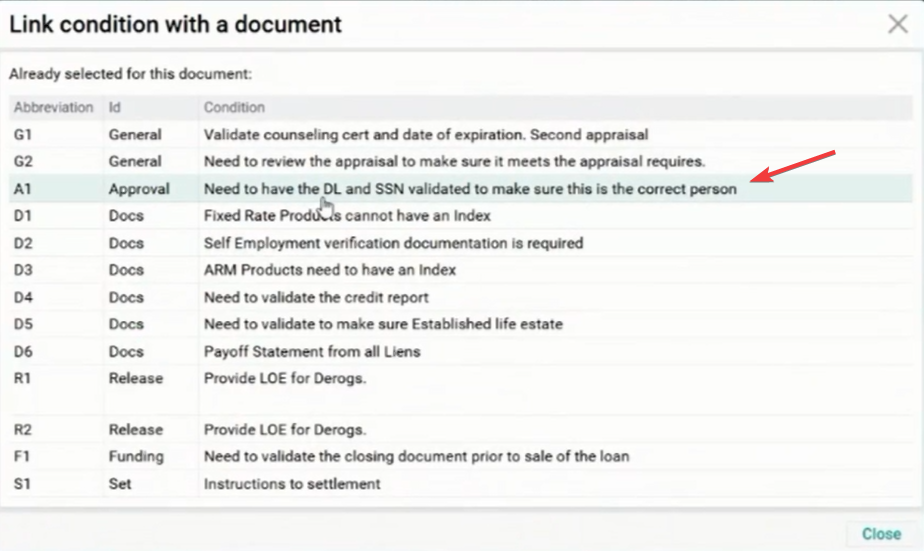
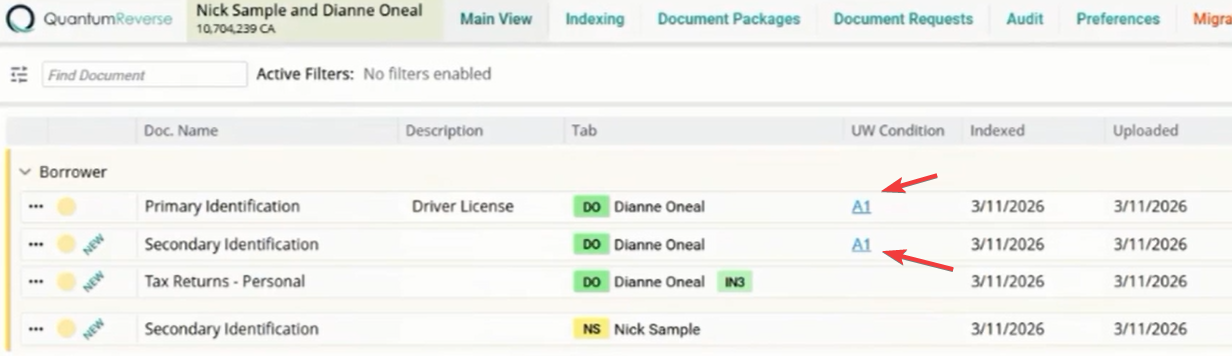
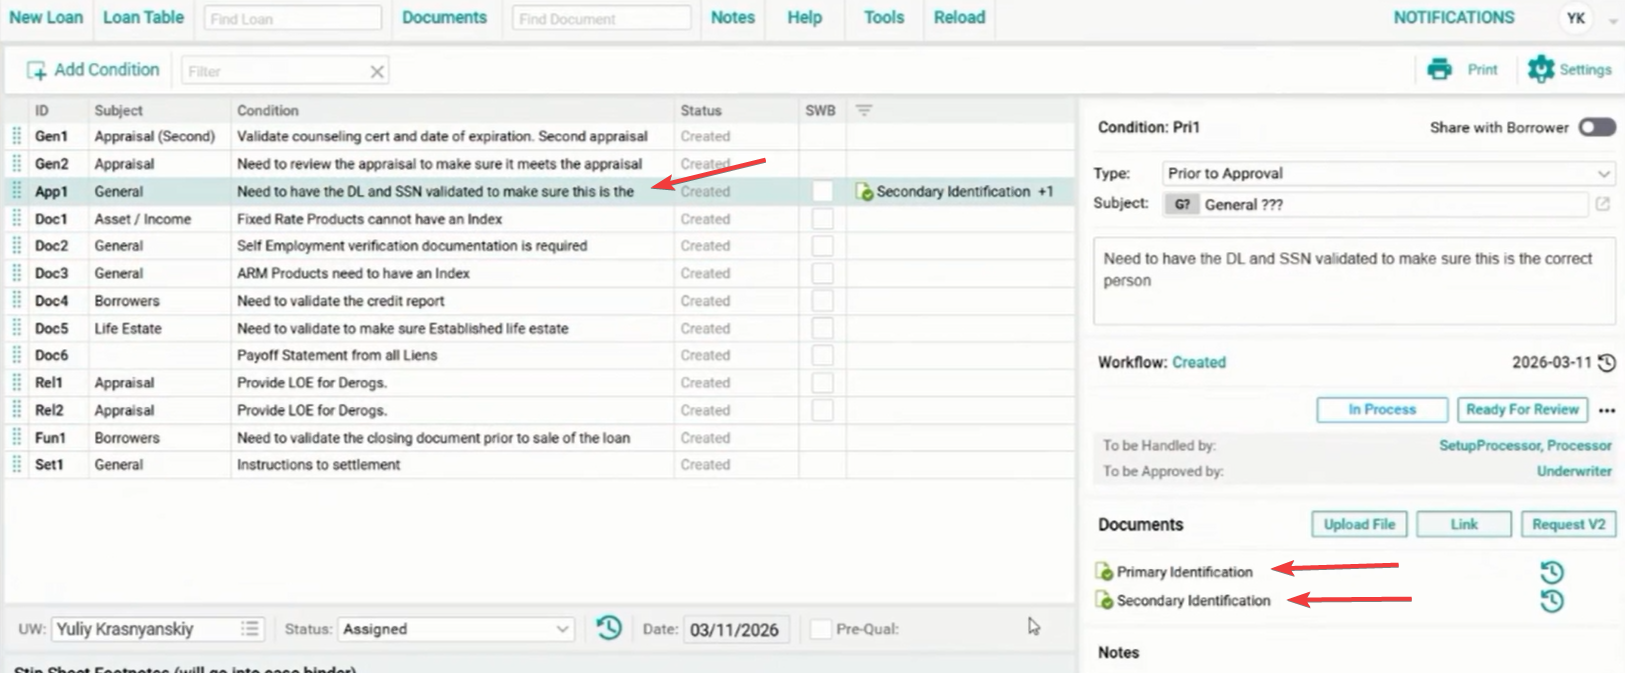
Documents can be directly linked to specific underwriting conditions. Linking: Click the box in the UW Condition column to select the relevant requirement (e.g., "Need to have the DL and SSN validated"). Workflow: This creates a direct link between the document and the condition, which is visible in the Underwriting screen for final approval.
Configuring Custom Fields
The Main View supports custom data fields that can be tailored to your company's needs.
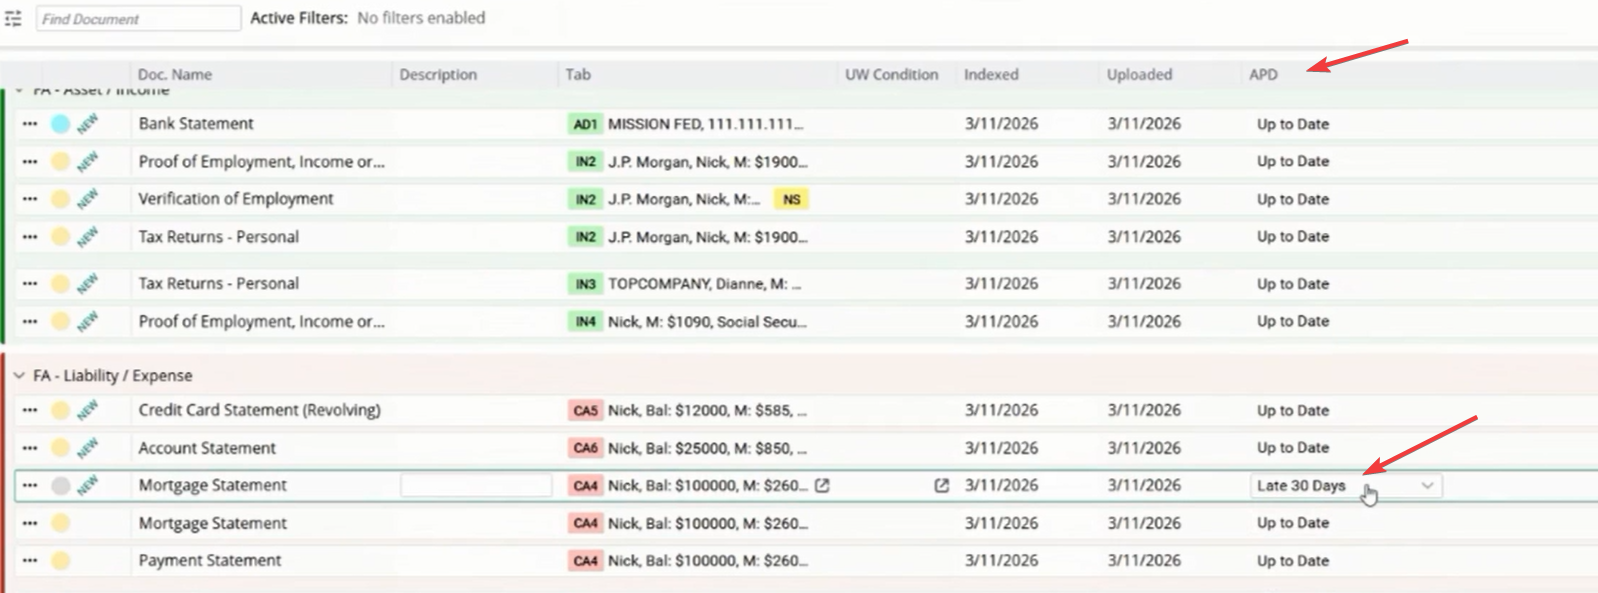
Field Types: These can include dropdowns (e.g., "Late 30 Days") or free-text areas.
Communication: Use these fields to relay specific data points to other team members working on the file.
Field Types: These can include dropdowns (e.g., "Late 30 Days") or free-text areas.
Communication: Use these fields to relay specific data points to other team members working on the file.
Closing Package Integration
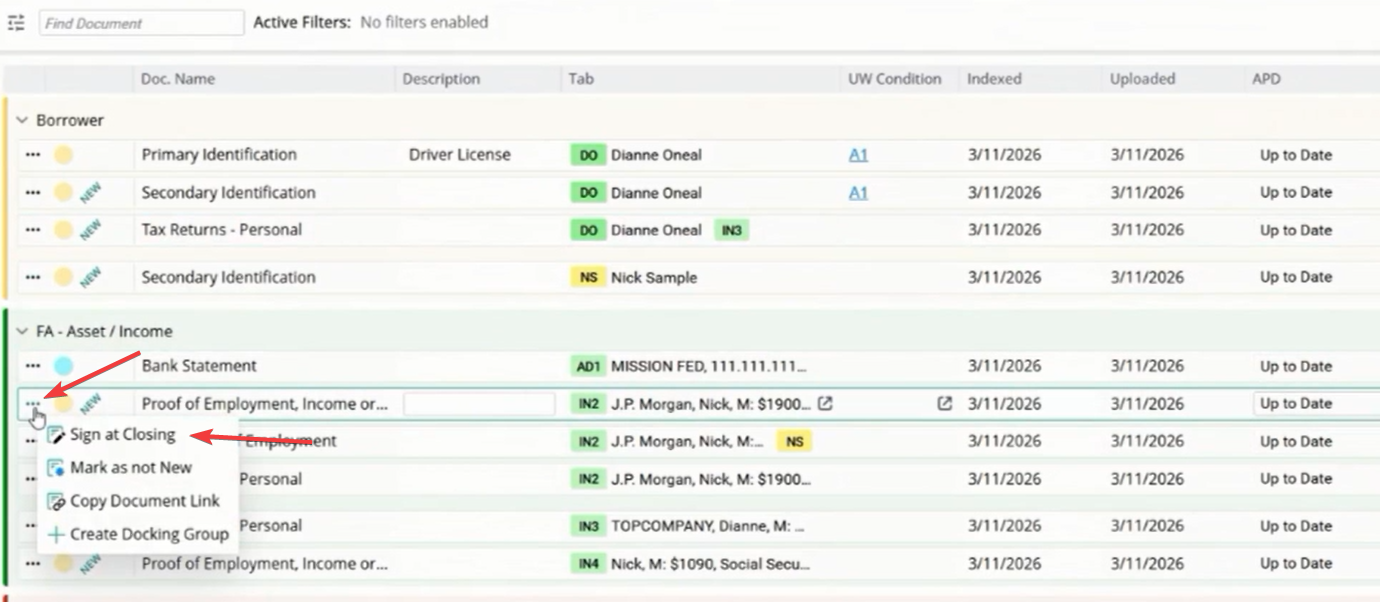
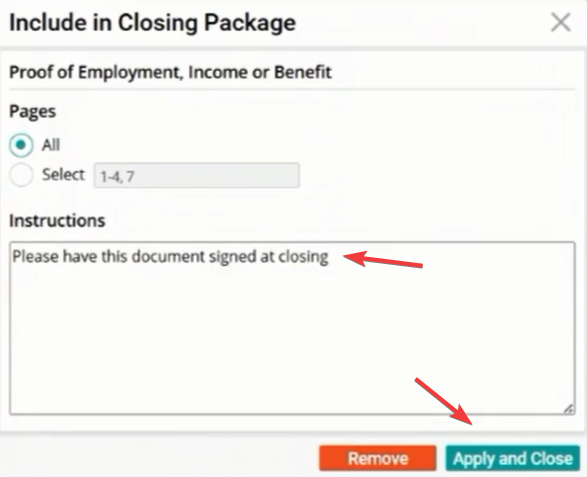
You can mark specific documents to be included in the final closing package. Sign at Closing: Select this option from the document action menu (three dots).
Instructions: Add specific notes for the closing agent (e.g., "Please have this document signed at closing").
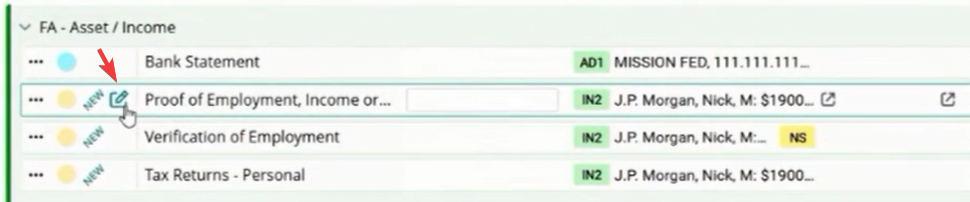
Indicator: A green checkbox icon indicates the document is successfully queued for the closing package.
Instructions: Add specific notes for the closing agent (e.g., "Please have this document signed at closing").
Indicator: A green checkbox icon indicates the document is successfully queued for the closing package.
Document Docking Groups
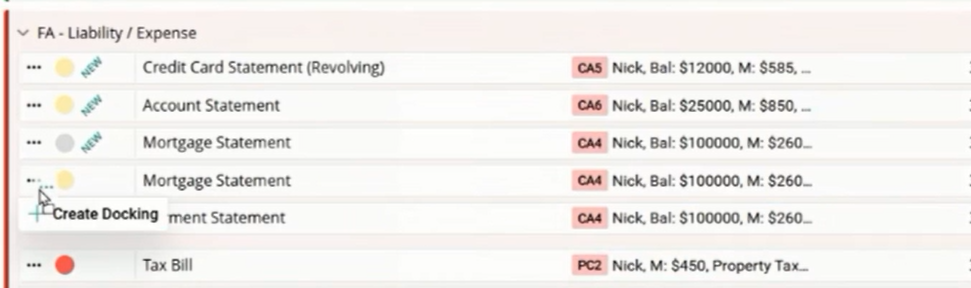
Create parent-child relationships between related files using Docking Groups.
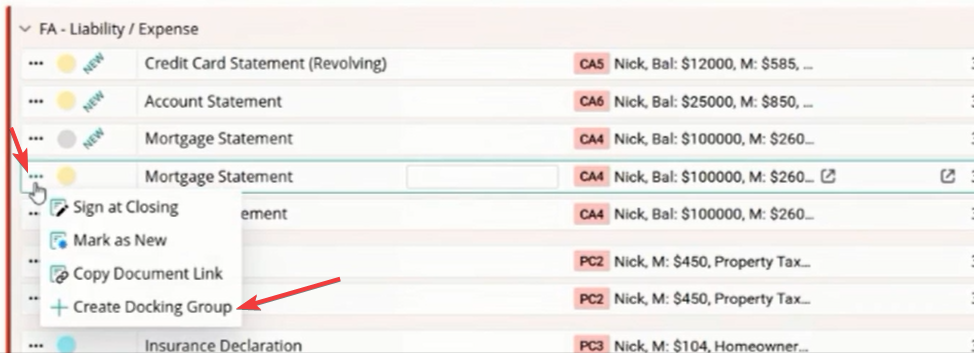
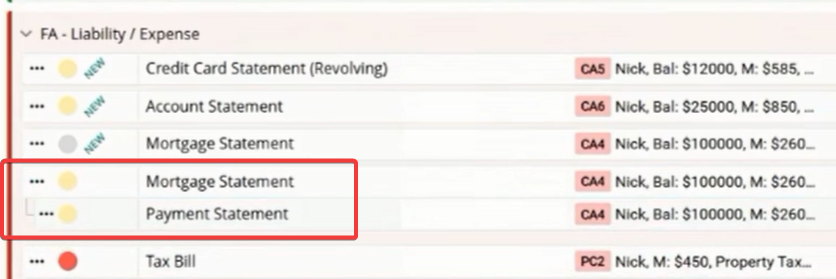
Grouping: Select "Create Docking Group" to link a secondary document (like a payment statement) to a primary one (like a mortgage statement).
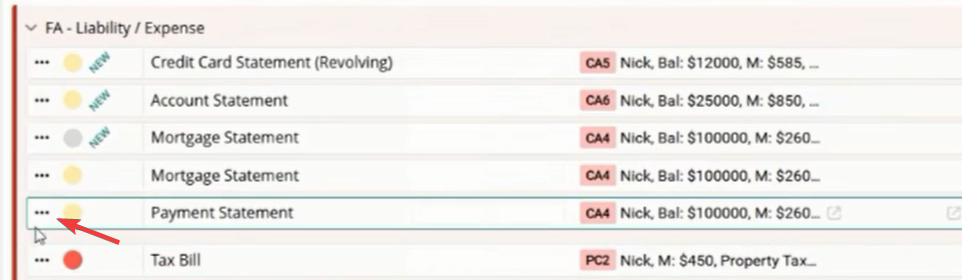
Visual Cue: A connecting line in the document list indicates the relationship, ensuring related files are always reviewed together.
Grouping: Select "Create Docking Group" to link a secondary document (like a payment statement) to a primary one (like a mortgage statement).
Visual Cue: A connecting line in the document list indicates the relationship, ensuring related files are always reviewed together.
Sharing Document Links
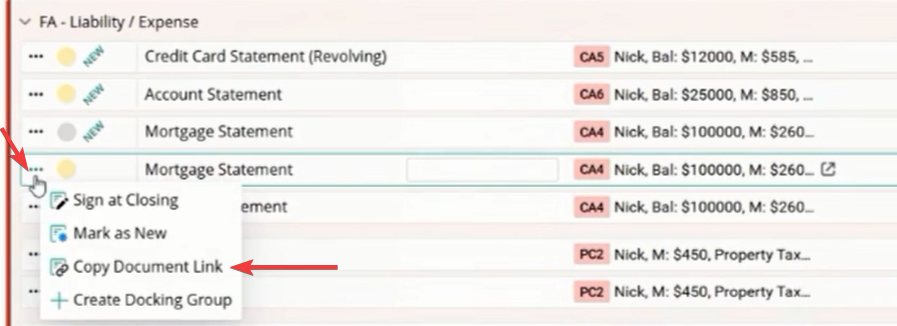
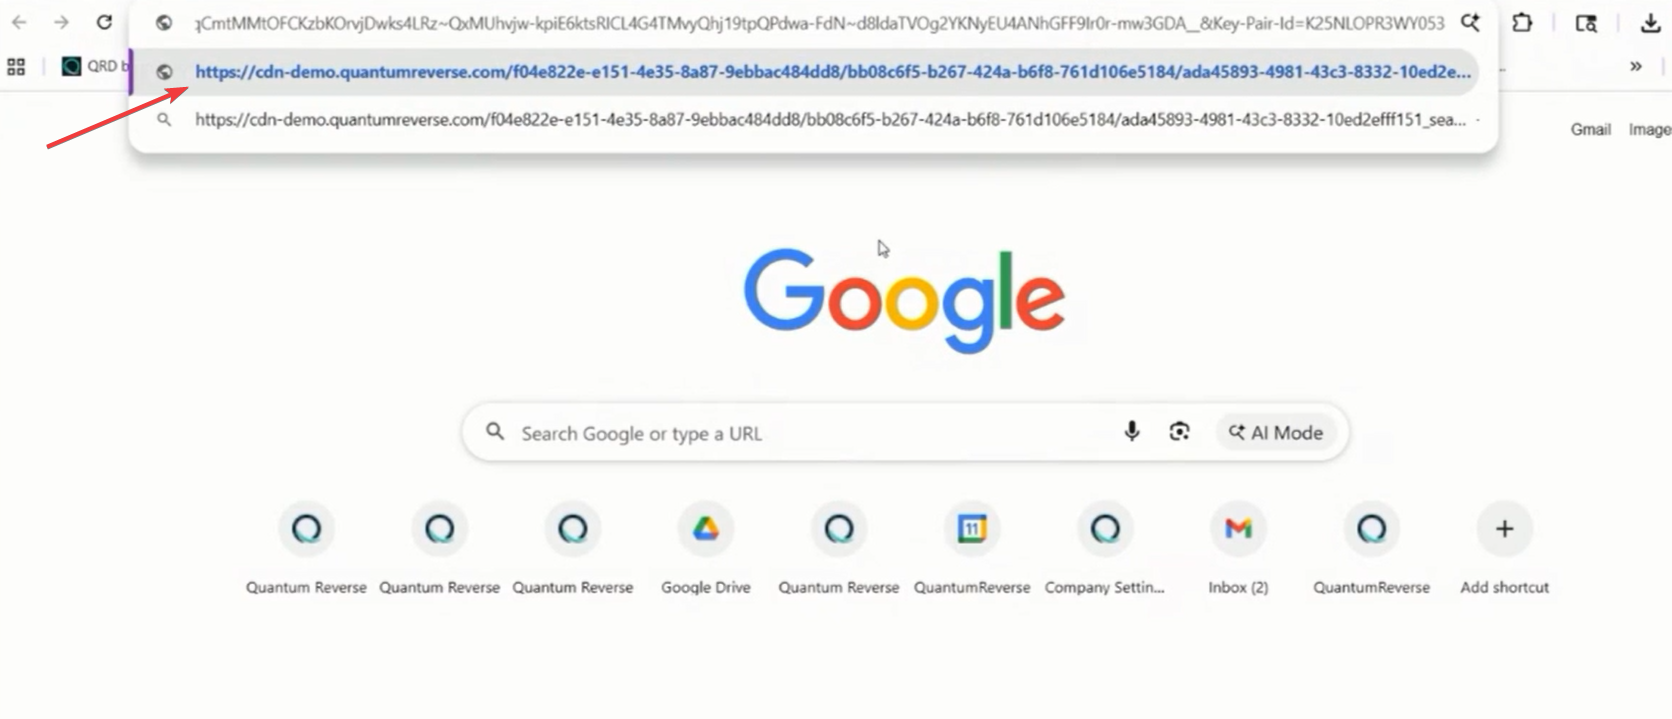
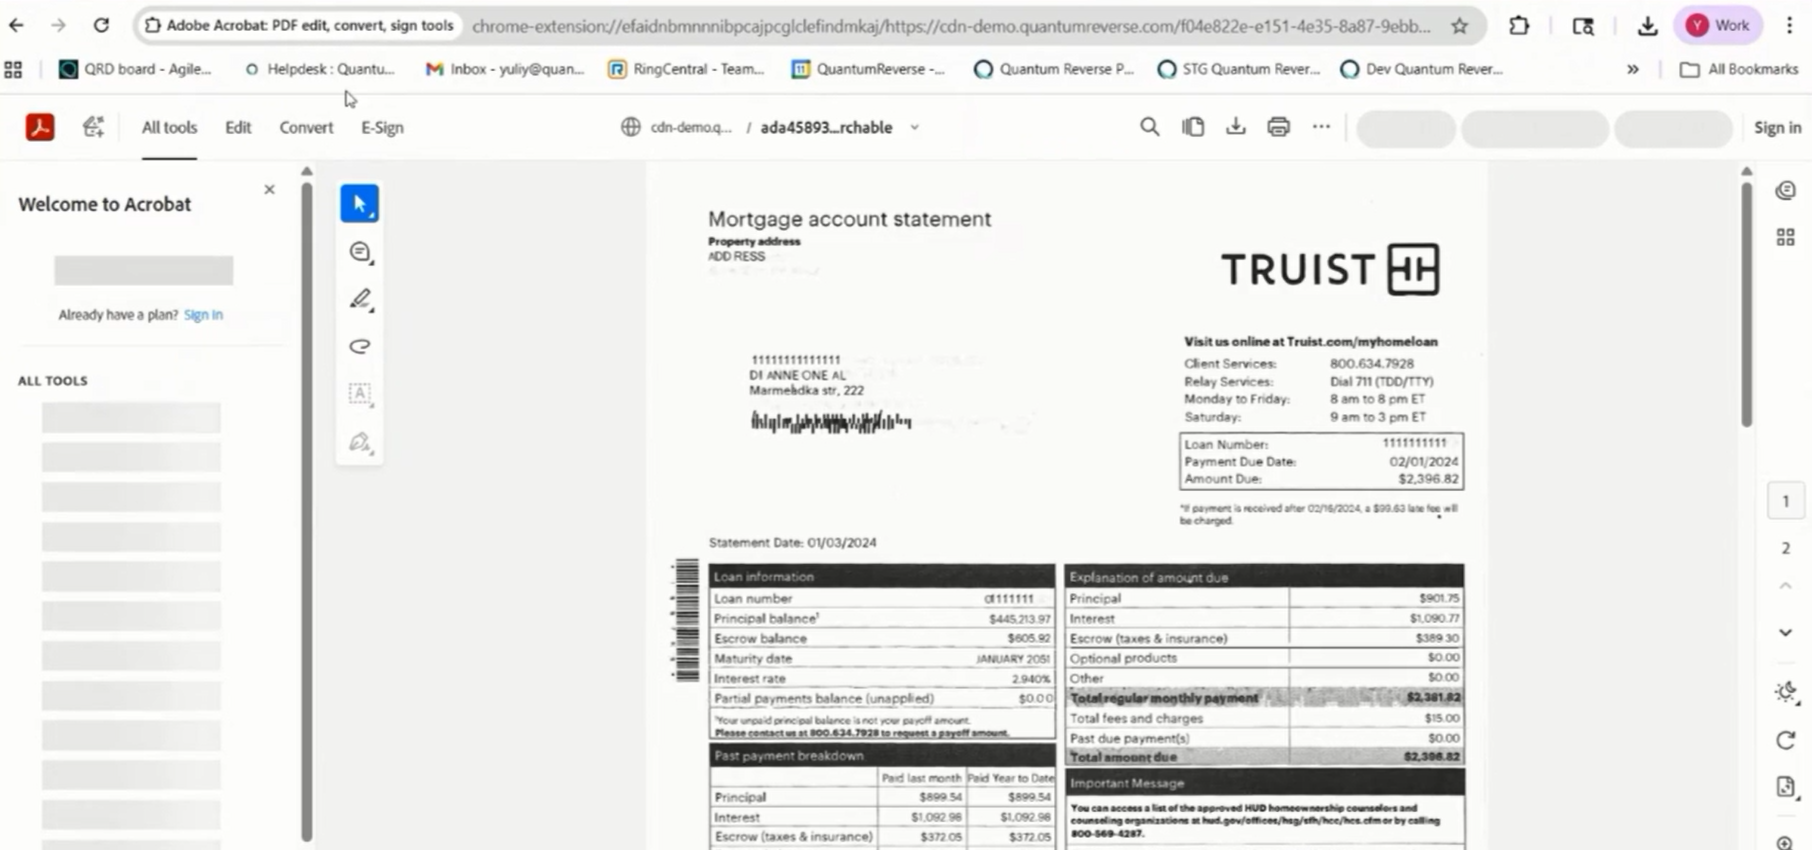
The system allows you to generate direct URLs for individual documents. Copy Document Link: Use this action to copy a secure link to your clipboard. External Access: This link can be shared with authorized parties to provide direct access to the document in a new browser tab.
Video