
Document Indexing Process
A step-by-step guide on how to index documents within the new document management system. See the training video at the bottom of this article for a more comprehensive breakdown.
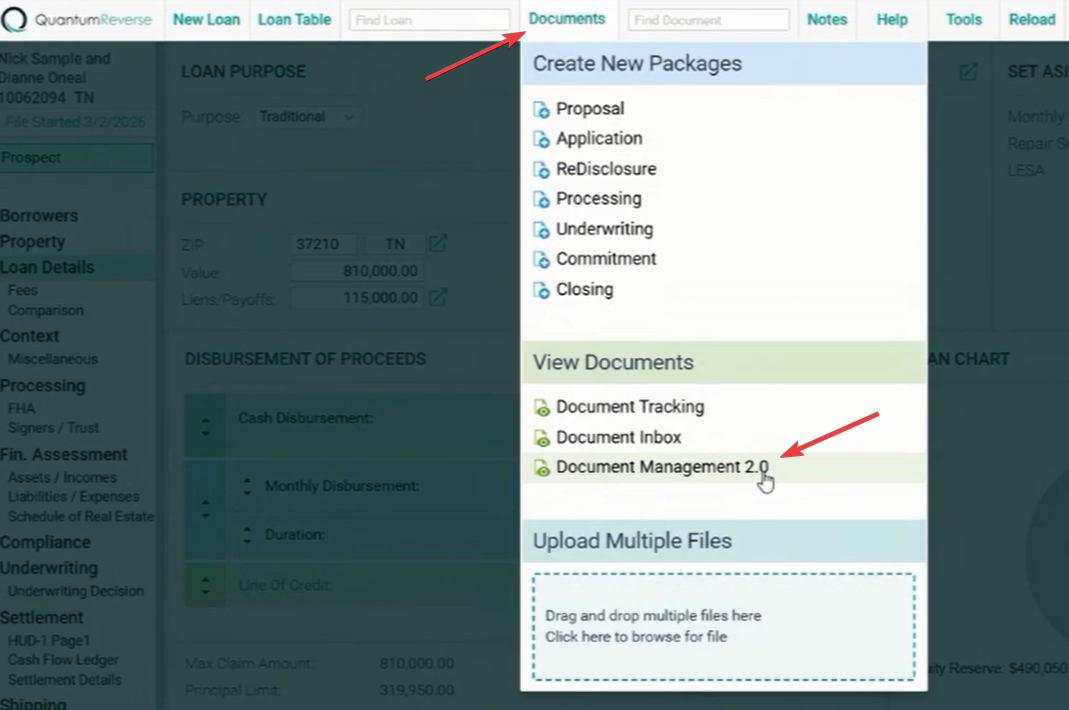
Accessing the Indexing Tab
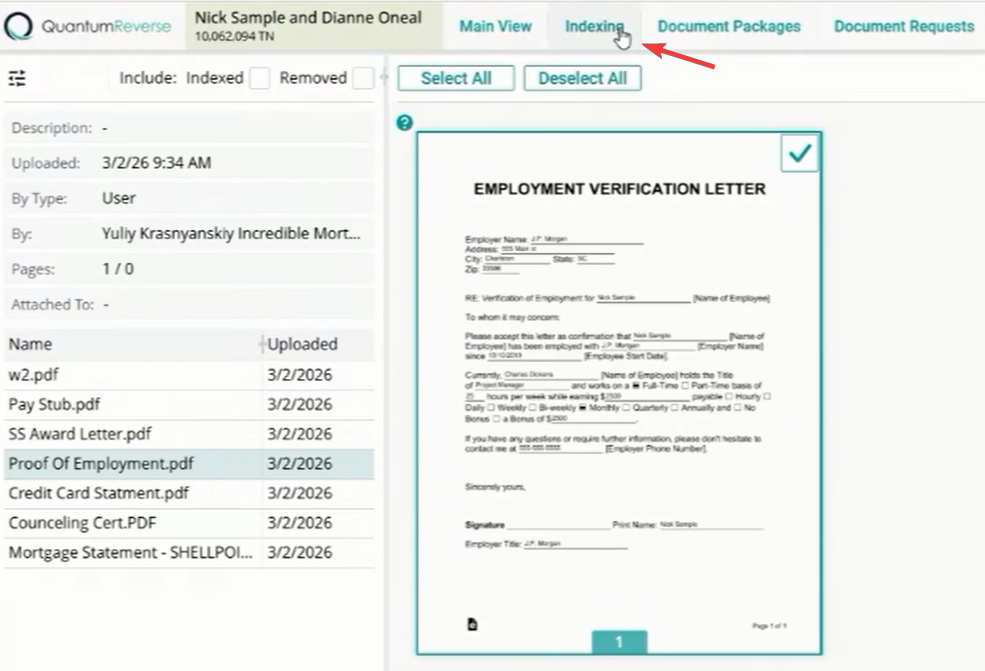
Once documents are uploaded, navigate to the Document Manager and select the Indexing tab from the top navigation menu. This is the starting point for all document classification tasks.
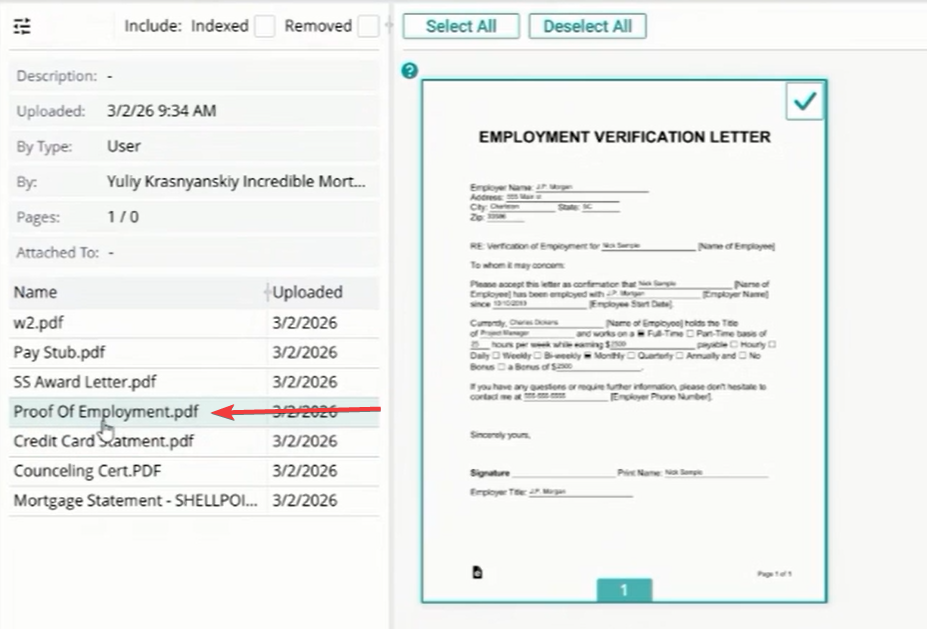
Document Selection
Select the document you wish to index from the list on the left. In this example, the user selects "Proof of Employment.pdf." The selected document will appear in the main preview area.
Location Mapping
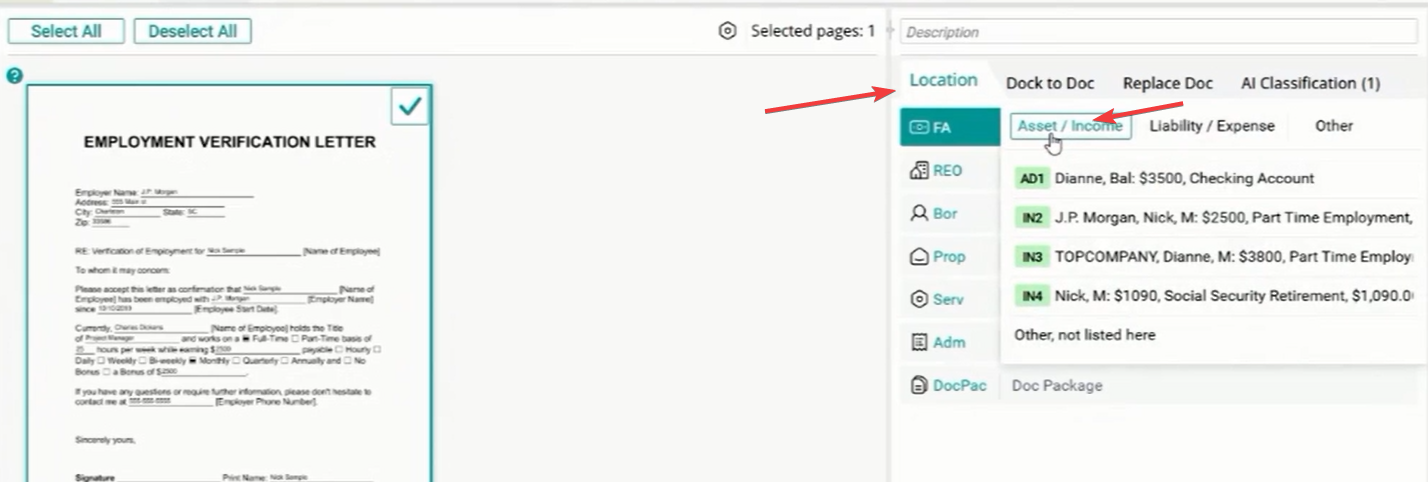
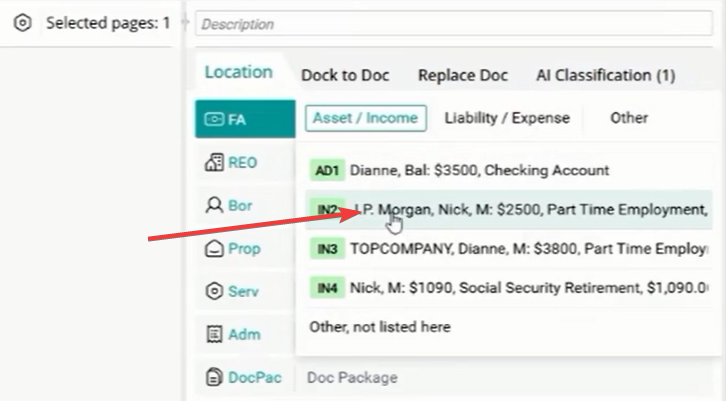
Identify the correct location for the document. For an employment verification letter, the appropriate category is FA (Financial Assessment). Within FA, select the Asset / Income tab.
Income Source Selection
After selecting the Asset/Income tab, choose the specific income source associated with the document. In this case, the user selects "J.P. Morgan" for the borrower "Nick Sample."
Document Type Specification
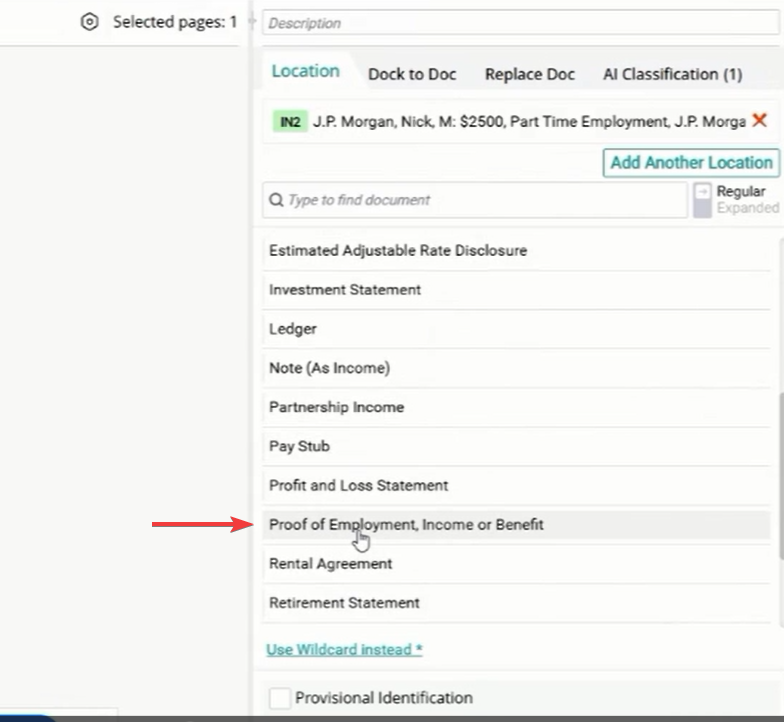
Specify the exact document type from the list. For this document, select "Proof of Employment, Income, or Benefit." This ensures the document is correctly tagged for automated workflows.
Finalizing Indexing
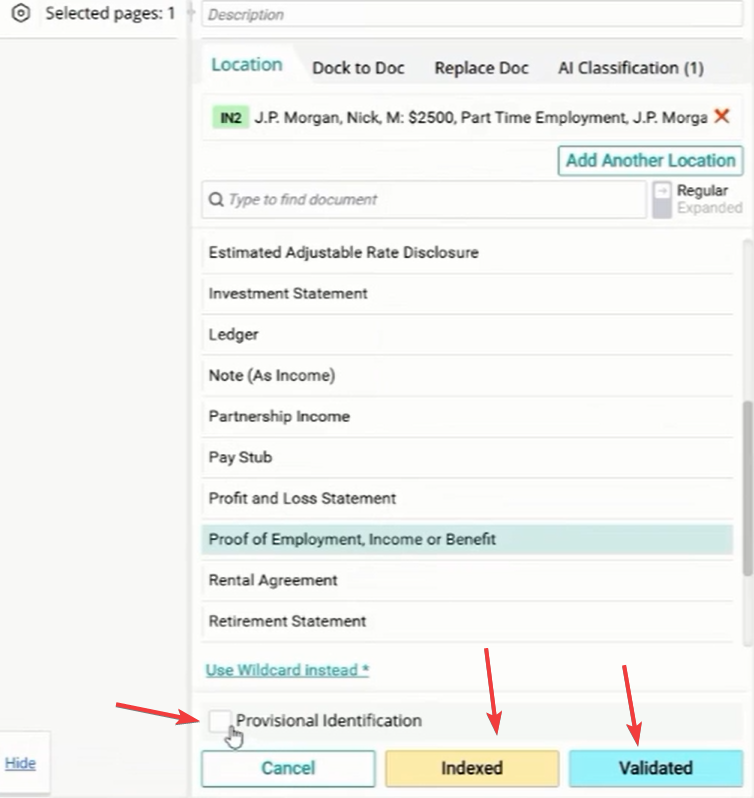
Depending on your user access levels, you will see options for Provisional Identification: for temporary tagging. Indexed: To confirm the classification. Validated: For final approval. In the video, the user clicks "Indexed" to complete the process.
Verification in Main View
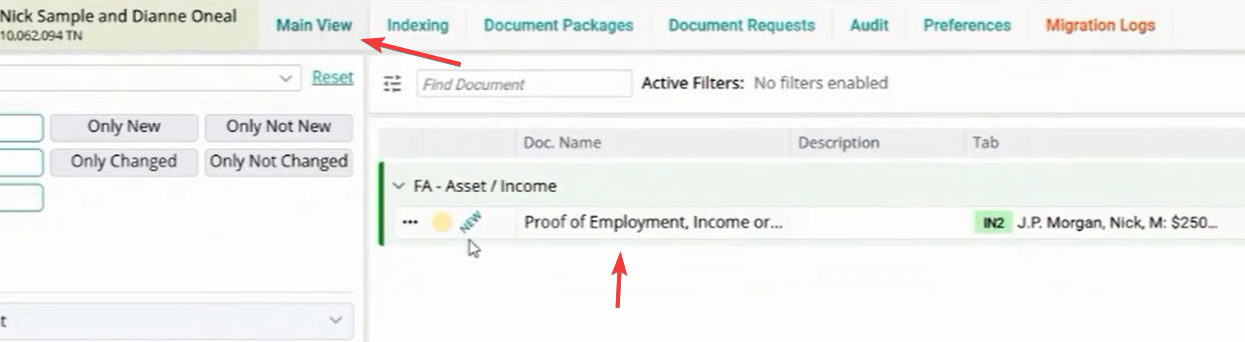
To verify the indexing was successful, navigate to the Main View. You should now see the document correctly listed under the FA - Asset / Income section with its new classification.
Full Training Video